|
|
HOWTO Make A Stencil
Following are instructions for using the stencil generator, it's quick and easy. First, you'll need a source image to make your stencil from. You can upload a picture from your computer, or download one from the net. Try to find one where the background is distinct from the foreground (subject) of the image. I recommend the creative commons image search, since you can search for images which are copylefted to allow derivative works.

One you've found an image you'd like to use, copy its URL - not the URL of the page it's on, the URL of the image - or download it to your computer. Back at the stencil generator, paste the URL into the text field and click 'go'.

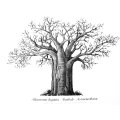
If all goes well you'll now have a set of thumbnails in front of you with differing levels of light and dark. Click one, and you'll notice the image in the middle of the page changes to a version of your picture at that white level. In this example I've used the 'Photo Negative' button at the bottom of the page to change the thumbnails from white-on-black to black-on-white. Click around until you find the whiteness level you like best.

I think that works, now to add a caption, using the text field at the bottom of the page:

All done, click 'Add to Gallery' (bottom of the page) et voila, your stencil. To save it to your computer, Right Click, 'Save As..'

Optional: Adding it to the gallery. Not forgetting to credit the original photographer Antiquité Tardive - this is basic courtesy and a condition of the Creative Commons license. It's now saved in the stencil gallery and published in the gallery's RSS feed.
Now print it on card or a transparency for screen printing, graffiti, interior decorating, cake icing, etc. The following instructables may be handy for the physical part:
Cutting out and spraying a stencil
Stencils with Islands
Created 2008-04-9 02:50:02 by strix and filed under stuff
Comments 
 |
|
Mary Clark writes...
posted: 2009-02-27 15:20:12 |
 |
|
U-PVC writes...
Hey, i am make please check its a fantastic:
http://strix.org.uk/stencil/show/1237530188-143606916016010728.ser
after this i am interested in do more research and find another topic like: How to Make Stencils for Painting
http://www.ehow.com/how_1602_make-stencils-painting.html
Thanks for sharing posted: 2009-03-20 06:29:26 |
|
|
|
uPVC Windows writes...
This is a great tutorial for making such a stencil, I have a friend who needs to do this...I will certainly recommend this webpage to her..Thanks! posted: 2009-06-19 11:02:40 |
|
|
|
m0sdef writes...
only rule to stencil making: all white parts have to touch.
this thing fails posted: 2010-03-19 01:22:31 |
|
|
|
Anonymous writes...
Только тут аренда микроавтобуса, недорого, Киев posted: 2010-11-25 13:22:00 |
|
|
|
Anonymous writes...
Хорошие тренинги на командообразование в Украине posted: 2010-11-25 01:21:11 |
|
|
|
Anonymous writes...
I had got a desire to make my own organization, but I did not have enough of money to do that. Thank heaven my close fellow advised to utilize the loan. Thence I received the bank loan and realized my desire. posted: 2010-11-14 00:19:17 |
|
|
|
Anonymous writes...
Построить деревянный дом в Украине. posted: 2010-11-29 20:35:11 |
|
|
|
Anonymous writes...
только тут прокат лимузинов по очень выгодным ценам posted: 2010-12-2 16:46:03 |
|
|
|
shj writes...
vibram five fingers
http://www.fivefingerusa.com
five finger shoes
http://www.fivefingerusa.com
vibram shoes
http://www.fivefingerusa.com
five finger
http://www.fivefingerusa.com
mbt shoes
http://www.mbtinshop.com
wholesale mbt shoes
http://www.mbtinshop.com
cheap mbt shoes
http://www.mbtinshop.com
discount mbt shoes
http://www.mbtinshop.com
mbt
http://www.mbtinshop.com
the north face
http://www.outdoorbrandshop.com
north face
http://www.outdoorbrandshop.com
north face jackets
http://www.outdoorbrandshop.com
north face clothing
http://www.outdoorbrandshop.com
north face backpacks
http://www.outdoorbrandshop.com
north face equipment
http://www.outdoorbrandshop.com
north face outlet
http://www.outdoorbrandshop.com
north face tents
http://www.outdoorbrandshop.com
nfl jerseys
http://www.shopbynfl.com
wholesale nfl jerseys
http://www.shopbynfl.com
nfl jersey
http://www.shopbynfl.com
wholesale nfl jersey
http://www.shopbynfl.com
super bowl
http://www.shopbynfl.com
super bowl jerseys
http://www.shopbynfl.com
super bowl jersey
http://www.shopbynfl.com
cheap nfl jerseys
http://www.shopbynfl.com
discounts nfl jerseys
http://www.shopbynfl.com
nfl throwback jerseys
http://www.shopbynfl.com
New Era Hat
http://www.shopbycap.com
new era hats
http://www.shopbycap.com
Cheap new era hats
http://www.shopbycap.com
whoelsae new era hats
http://www.shopbycap.com
new era cap
http://www.shopbycap.com
new era caps
http://www.shopbycap.com
wholesale era caps
http://www.shopbycap.com
DC Hat
http://www.shopbycap.com
Famous Hat
http://www.shopbycap.com
Baseball Cap
http://www.shopbycap.com
Nfl Cap
http://www.shopbycap.com
nfl jerseys
http://www.ohjerseys.com
wholesale jerseys
http://www.ohjerseys.com
nfl jersey
http://www.ohjerseys.com
wholesale jersey
http://www.ohjerseys.com
cheap nfl jerseys
http://www.ohjerseys.com
cheap nfl jersey
http://www.ohjerseys.com
super bowl jerseys
http://www.ohjerseys.com
crocs
http://www.crocsmy.com
crocs shoes
http://www.crocsmy.com
ed hardy
http://www.edhonsale.com
wholesale ed hardy
http://www.edhonsale.com
ed hardy shoes
http://www.edhonsale.com
ed hardy discount
http://www.edhonsale.com
ed hardy clothing
http://www.edhonsale.com
ed hardy bags
http://www.edhonsale.com
ed hardy caps
http://www.edhonsale.com
ed hardy sunglasses
http://www.edhonsale.com
ed hardy watches
http://www.edhonsale.com
oil painting
http://www.jiyouarts.com
china oil painting
http://www.jiyouarts.com
chinese oil painting
http://www.jiyouarts.com
art painting
http://www.jiyouarts.com
canvas painting
http://www.jiyouarts.com
photo to art oil painting
http://www.jiyouarts.com
hand made oil painting
http://www.jiyouarts.com
oil painting reproductions
http://www.jiyouarts.com
rolex watches
http://www.bigbigwatch.com
cartier watches
http://www.bigbigwatch.com
breitling watches
http://www.bigbigwatch.com
tag heuer watches
http://www.bigbigwatch.com
gucci wathces
http://www.bigbigwatch.com
omega watches
http://www.bigbigwatch.com
cartier watches
http://www.bigbigwatch.com
jimmy choo
http://www.jimmychooworld.com
jimmy choo shoes
http://www.jimmychooworld.com
jimmy choo bags
http://www.jimmychooworld.com
jimmy choo boots
http://www.jimmychooworld.com
jimmy choo handbags
http://www.jimmychooworld.com
Safety Shoes
http://www.workshoesworld.com
pu safety shoes
http://www.workshoesworld.com
vivienne westwood wedding dress
http://www.viviennewestwoodonsale.com
vivienne westwood shop
http://www.viviennewestwoodonsale.com
vivienne westwood jewellery
http://www.viviennewestwoodonsale.com
vivienne westwood shoes
http://www.viviennewestwoodonsale.com
vivienne westwood biography
http://www.viviennewestwoodonsale.com
vivienne westwood bags
http://www.viviennewestwoodonsale.com
vivienne westwood wedding
http://www.viviennewestwoodonsale.com
vivienne westwood wallet
http://www.viviennewestwoodonsale.com
vivienne westwood wedding dress
http://www.viviennewestwoodol.com
vivienne westwood shop
http://www.viviennewestwoodol.com
vivienne westwood jewellery
http://www.viviennewestwoodol.com
vivienne westwood shoes
http://www.viviennewestwoodol.com
vivienne westwood biography
http://www.viviennewestwoodol.com
vivienne westwood bags
http://www.viviennewestwoodol.com
vivienne westwood wedding
http://www.viviennewestwoodol.com
vivienne westwood wallet
http://www.viviennewestwoodol.com
爱步鞋
http://www.xietour.com
ecco鞋
http://www.xietour.com
爱步休闲鞋
http://www.xietour.com
ecco休闲鞋
http://www.xietour.com
休闲鞋
http://www.xietour.com
商务休闲鞋
http://www.xietour.com
ugg
http://www.uggchinashop.com
ugg雪地靴
http://www.uggchinashop.com
ugg官方网
http://www.uggchinashop.com
ugg boots
http://www.uggchinashop.com
ugg专柜
http://www.uggchinashop.com
ugg
http://www.uggchinese.com
ugg雪地靴
http://www.uggchinese.com
ugg官方网
http://www.uggchinese.com
ugg boots
http://www.uggchinese.com
ugg专柜
http://www.uggchinese.com
WATCH BOXES
http://www.bigbigwatch.com/WATCH-BOXES-Watches-91.html
MONT BLANC PEN
http://www.bigbigwatch.com/MONT-BLANC-PEN-Watches-120.html
ALAIN SILBERSTEIN
http://www.bigbigwatch.com/ALAIN-SILBERSTEIN-Watches-26.html
ANONIMO
http://www.bigbigwatch.com/ANONIMO-Watches-27.html
A.LANGE & SOHNE
http://www.bigbigwatch.com/A.LANGE-and-SOHNE-Watches-28.html
AUDEMARS PIGUET
http://www.bigbigwatch.com/AUDEMARS-PIGUET-Watches-29.html
BAUME & MERCIER
http://www.bigbigwatch.com/BAUME-and-MERCIER-Watches-30.html
BELL & ROSS
http://www.bigbigwatch.com/BELL-and-ROSS-Watches-31.html
BLANCPAIN
http://www.bigbigwatch.com/BLANCPAIN-Watches-32.html
BREGUET
http://www.bigbigwatch.com/BREGUET-Watches-33.html
BREITLING
http://www.bigbigwatch.com/BREITLING-Watches-34.html
B.R.M
http://www.bigbigwatch.com/B.R.M-Watches-157.html
BURBERRY
http://www.bigbigwatch.com/BURBERRY-Watches-35.html
BVLGARI
http://www.bigbigwatch.com/BVLGARI-Watches-36.html
CARTIER
http://www.bigbigwatch.com/CARTIER-Watches-37.html
CHANEL
http://www.bigbigwatch.com/CHANEL-Watches-38.html
CHAUMET
http://www.bigbigwatch.com/CHAUMET-Watches-137.html
CHOPARD
http://www.bigbigwatch.com/CHOPARD-Watches-39.html
CHRISTIAN DIOR
http://www.bigbigwatch.com/CHRISTIAN-DIOR-Watches-40.html
CHRONOSWISS
http://www.bigbigwatch.com/CHRONOSWISS-Watches-41.html
CONCORD
http://www.bigbigwatch.com/CONCORD-Watches-123.html
CORUM
http://www.bigbigwatch.com/CORUM-Watches-42.html
DEWITT
http://www.bigbigwatch.com/DEWITT-Watches-43.html
EBEL
http://www.bigbigwatch.com/EBEL-Watches-44.html
FENDI
http://www.bigbigwatch.com/FENDI-Watches-45.html
FRANCK MULLER
http://www.bigbigwatch.com/FRANCK-MULLER-Watches-46.html
GERALD GENTA
http://www.bigbigwatch.com/GERALD-GENTA-Watches-47.html
GLASHUTTE
http://www.bigbigwatch.com/GLASHUTTE-Watches-48.html
GRAHAM
http://www.bigbigwatch.com/GRAHAM-Watches-49.html
GUCCI
http://www.bigbigwatch.com/GUCCI-Watches-50.html
HARRY WINSTON
http://www.bigbigwatch.com/HARRY-WINSTON-Watches-124.html
HERMES
http://www.bigbigwatch.com/HERMES-Watches-51.html
HUBLOT
http://www.bigbigwatch.com/HUBLOT-Watches-89.html
IWC
http://www.bigbigwatch.com/IWC-Watches-52.html
JACOB & CO.
http://www.bigbigwatch.com/JACOB-and-CO.-Watches-53.html
JAEGER LE COULTRE
http://www.bigbigwatch.com/JAEGER-LE-COULTRE-Watches-54.html
LONGINES
http://www.bigbigwatch.com/LONGINES-Watches-55.html
LOUIS VUITTON
http://www.bigbigwatch.com/LOUIS-VUITTON-Watches-56.html
MAURICE & LACROIX
http://www.bigbigwatch.com/MAURICE-and-LACROIX-Watches-57.html
MONT BLANC
http://www.bigbigwatch.com/MONT-BLANC-Watches-58.html
MOVADO
http://www.bigbigwatch.com/MOVADO-Watches-59.html
OMEGA
http://www.bigbigwatch.com/OMEGA-Watches-60.html
ORIS
http://www.bigbigwatch.com/ORIS-Watches-61.html
PANERAI
http://www.bigbigwatch.com/PANERAI-Watches-62.html
PARMIGIANI FLEURIER
http://www.bigbigwatch.com/PARMIGIANI-FLEURIER-Watches-63.html
PATEK PHILIPPE
http://www.bigbigwatch.com/PATEK-PHILIPPE-Watches-64.html
PAUL PICOT
http://www.bigbigwatch.com/PAUL-PICOT-Watches-65.html
PIAGET
http://www.bigbigwatch.com/PIAGET-Watches-66.html
PORSCHE DESIGN
http://www.bigbigwatch.com/PORSCHE-DESIGN-Watches-67.html
PRADA
http://www.bigbigwatch.com/PRADA-Watches-68.html
RADO
http://www.bigbigwatch.com/RADO-Watches-69.html
RICHARD MILLE
http://www.bigbigwatch.com/RICHARD-MILLE-Watches-155.html
ROMAIN JEROME
http://www.bigbigwatch.com/ROMAIN-JEROME-Watches-127.html
ROGER DUBUIS
http://www.bigbigwatch.com/ROGER-DUBUIS-Watches-70.html
ROLEX
http://www.bigbigwatch.com/ROLEX-Watches-71.html
TAG HEUER
http://www.bigbigwatch.com/TAG-HEUER-Watches-72.html
TECHNOMARINE
http://www.bigbigwatch.com/TECHNOMARINE-Watches-73.html
TUDOR
http://www.bigbigwatch.com/TUDOR-Watches-128.html
U-BOAT
http://www.bigbigwatch.com/U-BOAT-Watches-122.html
ULYSSE NARDIN
http://www.bigbigwatch.com/ULYSSE-NARDIN-Watches-154.html
VACH. CONSTANTINE
http://www.bigbigwatch.com/VACH.-CONSTANTINE-Watches-74.html
VERSACE
http://www.bigbigwatch.com/VERSACE-Watches-75.html
ZENITH
http://www.bigbigwatch.com/ZENITH-Watches-76.html
Ed Hardy
http://www.edhardyvip.com/Ed-Hardy.html
Ed Hardy Men Apparel
http://www.edhardyvip.com/Ed-Hardy--Men--Apparel.html
Ed Hardy Women Apparel
http://www.edhardyvip.com/Ed-Hardy-Women-Apparel.html
Ed Hardy Kid Apparel
http://www.edhardyvip.com/Ed-Hardy--Kid-Apparel.html
Ed Hardy ACCESSORIES
http://www.edhardyvip.com/Ed-Hardy-ACCESSORIES.html
Christan Audigier
http://www.edhardyvip.com/Christan-Audigier.html
Christan Audigier Men APPAREL
http://www.edhardyvip.com/Christan-Audigier-Men-APPAREL.html
Christan Audigier Women APPAREL
http://www.edhardyvip.com/Christan-Audigier-Women-APPAREL.html
other APPAREL &ACCESSORIES
http://www.edhardyvip.com/other-APPAREL-&ACCESSORIES.html;
other Apparel
http://www.edhardyvip.com/other-Apparel.html
other ACCESSORIES
http://www.edhardyvip.com/other-ACCESSORIES.html
Louis Vuitton Handbags
http://www.luxurysupplierworld.com/Louis-Vuitton-Handbags.html
Chanel Handbags
http://www.luxurysupplierworld.com/Chanel-Handbags.html
Gucci Handbags
http://www.luxurysupplierworld.com/Gucci-Handbags.html
Balenciaga Handbags
http://www.luxurysupplierworld.com/Balenciaga-Handbags.html
Fendi Handbags
http://www.luxurysupplierworld.com/Fendi-Handbags.html
Yves Saint Laurent Handbags
http://www.luxurysupplierworld.com/Yves-Saint-Laurent-Handbags.html
Christian Dior Handbags
http://www.luxurysupplierworld.com/Christian-Dior-Handbags.html
Burberry Handbags
http://www.luxurysupplierworld.com/Burberry-Handbags.html
Cartier Handbags
http://www.luxurysupplierworld.com/Cartier-Handbags.html
Celine Handbags
http://www.luxurysupplierworld.com/Celine-Handbags.html
Chloe Handbags
http://www.luxurysupplierworld.com/Chloe-Handbags.html
Coach Handbags
http://www.luxurysupplierworld.com/Coach-Handbags.html
Dolce and Gabbana Handbags
http://www.luxurysupplierworld.com/Dolce-and-Gabbana-Handbags.html
BALLY Handbags
http://www.luxurysupplierworld.com/BALLY-Handbags.html
Givenchy Handbags
http://www.luxurysupplierworld.com/Givenchy-Handbags.html
Hermes Handbags
http://www.luxurysupplierworld.com/Hermes-Handbags.html
Jimmy Choo Handbags
http://www.luxurysupplierworld.com/Jimmy-Choo-Handbags.html
Juicy Couture Handbags
http://www.luxurysupplierworld.com/Juicy-Couture-Handbags.html
Lancel Handbags
http://www.luxurysupplierworld.com/Lancel-Handbags.html
Marc Jacobs Handbags
http://www.luxurysupplierworld.com/Marc-Jacobs-Handbags.html
Miu Miu Handbags
http://www.luxurysupplierworld.com/Miu-Miu-Handbags.html
Mulberry Handbags
http://www.luxurysupplierworld.com/Mulberry-Handbags.html
Prada Handbags
http://www.luxurysupplierworld.com/Prada-Handbags.html
Thomas Wylde Handbags
http://www.luxurysupplierworld.com/Thomas-Wylde-Handbags.html
Versace Handbags
http://www.luxurysupplierworld.com/Versace-Handbags.html
Bottega Veneta Handbags
http://www.luxurysupplierworld.com/Bottega-Veneta-Handbags.html
Brand Wallet
http://www.luxurysupplierworld.com/Brand-Wallet.html
Minnesota Timberwolves
http://www.jerseysaler.com/Minnesota_Timberwolves_Teams.html
New Jersey Nets
http://www.jerseysaler.com/New_Jersey_Nets_Teams.html
New Orleans Hornets
http://www.jerseysaler.com/New_Orleans_Hornets_Teams.html
New York Knicks
http://www.jerseysaler.com/New_York_Knicks_Teams.html
Orlando Magic
http://www.jerseysaler.com/Orlando_Magic_Teams.html
Philadelphia 76ers
http://www.jerseysaler.com/Philadelphia_76ers_Teams.html
Phoenix Suns
http://www.jerseysaler.com/Phoenix_Suns_Teams.html
Portland Trail Blazers
http://www.jerseysaler.com/Portland_Trail_Blazers_Teams.html
Sacramento Kings
http://www.jerseysaler.com/Sacramento_Kings_Teams.html
San Antonio Spurs
http://www.jerseysaler.com/San_Antonio_Spurs_Teams.html
Seattle SuperSonics
http://www.jerseysaler.com/Seattle_SuperSonics_Teams.html
Toronto Raptors
http://www.jerseysaler.com/Toronto_Raptors_Teams.html
Utah Jazz
http://www.jerseysaler.com/Utah_Jazz_Teams.html
Washington Wizards
http://www.jerseysaler.com/Washington_Wizards_Teams.html
NFL Teams
http://www.jerseysaler.com/NFL_Teams.html
Arizona Cardinals
http://www.jerseysaler.com/Arizona_Cardinals_Teams.html
Atlanta Falcons
http://www.jerseysaler.com/Atlanta_Falcons_Teams.html
Baltimore Ravens
http://www.jerseysaler.com/Baltimore_Ravens_Teams.html
Buffalo Bills
http://www.jerseysaler.com/Buffalo_Bills_Teams.html
Carolina Panthers
http://www.jerseysaler.com/Carolina_Panthers_Teams.html
Chicago Bears
http://www.jerseysaler.com/Chicago_Bears_Teams.html
Cincinnati Bengals
http://www.jerseysaler.com/Cincinnati_Bengals_Teams.html
Cleveland Browns
http://www.jerseysaler.com/Cleveland_Browns_Teams.html
Dallas Cowboys
http://www.jerseysaler.com/Dallas_Cowboys_Teams.html
Denver Broncos
http://www.jerseysaler.com/Denver_Broncos_Teams.html
Detroit Lions
http://www.jerseysaler.com/Detroit_Lions_Teams.html
Green Bay Packers
http://www.jerseysaler.com/Green_Bay_Packers_Teams.html
Houston Texans
http://www.jerseysaler.com/Houston_Texans_Teams.html
Indianapolis Colts
http://www.jerseysaler.com/Indianapolis_Colts_Teams.html
Kansas City Chiefs
http://www.jerseysaler.com/Kansas_City_Chiefs_Teams.html
Minnesota Vikings
http://www.jerseysaler.com/Minnesota_Vikings_Teams.html
New England Patriots
http://www.jerseysaler.com/New_England_Patriots_Teams.html
New Orleans Saints
http://www.jerseysaler.com/New_Orleans_Saints_Teams.html
New York Giants
http://www.jerseysaler.com/New_York_Giants_Teams.html
New York Jets
http://www.jerseysaler.com/New_York_Jets_Teams.html
Oakland Raiders
http://www.jerseysaler.com/Oakland_Raiders_Teams.html
Philadelphia Eagles
http://www.jerseysaler.com/Philadelphia_Eagles_Teams.html
Pittsburgh Steelers
http://www.jerseysaler.com/Pittsburgh_Steelers_Teams.html
San Diego Chargers
http://www.jerseysaler.com/San_Diego_Chargers_Teams.html
San Francisco 49ers
http://www.jerseysaler.com/San_Francisco_49ers_Teams.html
Seattle Seahawks
http://www.jerseysaler.com/Seattle_Seahawks_Teams.html
St. Louis Rams
http://www.jerseysaler.com/St._Louis_Rams_Teams.html
Super Bowl Merchandise
http://www.jerseysaler.com/Super_Bowl_Merchandise_Teams.html
Super Bowl XLII Gear
http://www.jerseysaler.com/Super_Bowl_XLII_Gear_Teams.html
Tampa Bay Buccaneers
http://www.jerseysaler.com/Tampa_Bay_Buccaneers_Teams.html
Tennessee Titans
http://www.jerseysaler.com/Tennessee_Titans_Teams.html
Washington Redskins
http://www.jerseysaler.com/Washington_Redskins_Teams.html
Miami Dolphins
http://www.jerseysaler.com/Miami_Dolphins_Teams.html
MLB Teams
http://www.jerseysaler.com/MLB_Teams.html
Arizona Diamondbacks
http://www.jerseysaler.com/Arizona_Diamondbacks_Teams.html
Atlanta Braves
http://www.jerseysaler.com/Atlanta_Braves_Teams.html
Baltimore Orioles
http://www.jerseysaler.com/Baltimore_Orioles_Teams.html
Boston Red Sox
http://www.jerseysaler.com/Boston_Red_Sox_Teams.html
Chicago Cubs
http://www.jerseysaler.com/Chicago_Cubs_Teams.html
Chicago White Sox
http://www.jerseysaler.com/Chicago_White_Sox_Teams.html
Cincinnati Reds
http://www.jerseysaler.com/Cincinnati_Reds_Teams.html
Cleveland Indians
http://www.jerseysaler.com/Cleveland_Indians_Teams.html
Colorado Rockies
http://www.jerseysaler.com/Colorado_Rockies_Teams.html
Detroit Tigers
http://www.jerseysaler.com/Detroit_Tigers_Teams.html
Florida Marlins
http://www.jerseysaler.com/Florida_Marlins_Teams.html
Houston Astros
http://www.jerseysaler.com/Houston_Astros_Teams.html
Kansas City Royals
http://www.jerseysaler.com/Kansas_City_Royals_Teams.html
Los Angeles Dodgers
http://www.jerseysaler.com/Los_Angeles_Dodgers_Teams.html
Los Angeles Angels
http://www.jerseysaler.com/Los_Angeles_Angels_Teams.html
Milwaukee Brewers
http://www.jerseysaler.com/Milwaukee_Brewers_Teams.html
Minnesota Twins
http://www.jerseysaler.com/Minnesota_Twins_Teams.html
New York Mets
http://www.jerseysaler.com/New_York_Mets_Teams.html
New York Yankees
http://www.jerseysaler.com/New_York_Yankees_Teams.html
Oakland Athletics
http://www.jerseysaler.com/Oakland_Athletics_Teams.html
Philadelphia Phillies
http://www.jerseysaler.com/Philadelphia_Phillies_Teams.html
Pittsburgh Pirates
http://www.jerseysaler.com/Pittsburgh_Pirates_Teams.html
San Diego Padres
http://www.jerseysaler.com/San_Diego_Padres_Teams.html
San Francisco Giants
http://www.jerseysaler.com/San_Francisco_Giants_Teams.html
Seattle Mariners
http://www.jerseysaler.com/Seattle_Mariners_Teams.html
St. Louis Cardinals
http://www.jerseysaler.com/St._Louis_Cardinals_Teams.html
Tampa Bay Devil Rays
http://www.jerseysaler.com/Tampa_Bay_Devil_Rays_Teams.html
Texas Rangers
http://www.jerseysaler.com/Texas_Rangers_Teams.html
Toronto Blue Jays
http://www.jerseysaler.com/Toronto_Blue_Jays_Teams.html
Washington Nationals
http://www.jerseysaler.com/Washington_Nationals_Teams.html
NHL Teams
http://www.jerseysaler.com/NHL_Teams.html
Anaheim Ducks
http://www.jerseysaler.com/Anaheim_Ducks_Teams.html
Atlanta Thrashers
http://www.jerseysaler.com/Atlanta_Thrashers_Teams.html
Boston Bruins
http://www.jerseysaler.com/Boston_Bruins_Teams.html
Buffalo Sabres
http://www.jerseysaler.com/Buffalo_Sabres_Teams.html
Calgary Flames
http://www.jerseysaler.com/Calgary_Flames_Teams.html
Carolina Hurricanes
http://www.jerseysaler.com/Carolina_Hurricanes_Teams.html
Chicago Blackhawks
http://www.jerseysaler.com/Chicago_Blackhawks_Teams.html
Colorado Avalanche
http://www.jerseysaler.com/Colorado_Avalanche_Teams.html
Columbus Blue Jackets
http://www.jerseysaler.com/Columbus_Blue_Jackets_Teams.html
Dallas Stars
http://www.jerseysaler.com/Dallas_Stars_Teams.html
Detroit Red Wings
http://www.jerseysaler.com/Detroit_Red_Wings_Teams.html
Edmonton Oilers
http://www.jerseysaler.com/Edmonton_Oilers_Teams.html
Florida Panthers
http://www.jerseysaler.com/Florida_Panthers_Teams.html
Hartford Whalers
http://www.jerseysaler.com/Hartford_Whalers_Teams.html
Los Angeles Kings
http://www.jerseysaler.com/Los_Angeles_Kings_Teams.html
Minnesota Wild
http://www.jerseysaler.com/Minnesota_Wild_Teams.html
Montreal Canadiens
http://www.jerseysaler.com/Montreal_Canadiens_Teams.html
Nashville Predators
http://www.jerseysaler.com/Nashville_Predators_Teams.html
New Jersey Devils
http://www.jerseysaler.com/New_Jersey_Devils_Teams.html
New York Islanders
http://www.jerseysaler.com/New_York_Islanders_Teams.html
New York Rangers
http://www.jerseysaler.com/New_York_Rangers_Teams.html
Ottawa Senators
http://www.jerseysaler.com/Ottawa_Senators_Teams.html
Philadelphia Flyers
http://www.jerseysaler.com/Philadelphia_Flyers_Teams.html
Phoenix Coyotes
http://www.jerseysaler.com/Phoenix_Coyotes_Teams.html
Pittsburgh Penguins
http://www.jerseysaler.com/Pittsburgh_Penguins_Teams.html
San Jose Sharks
http://www.jerseysaler.com/San_Jose_Sharks_Teams.html
St. Louis Blues
http://www.jerseysaler.com/St._Louis_Blues_Teams.html
Tampa Bay Lightning
http://www.jerseysaler.com/Tampa_Bay_Lightning_Teams.html
Toronto Maple Leafs
http://www.jerseysaler.com/Toronto_Maple_Leafs_Teams.html
Vancouver Canucks
http://www.jerseysaler.com/Vancouver_Canucks_Teams.html
Washington Capitals
http://www.jerseysaler.com/Washington_Capitals_Teams.html
World All Stars
http://www.jerseysaler.com/World_All_Stars_Teams.html
COLLEGE Teams
http://www.jerseysaler.com/COLLEGE_Teams.html
All Tmams
http://www.jerseysaler.com/Allteams.html
NBA Teams
http://www.jerseysaler.com/NBA_Teams.html
Atlanta Hawks
http://www.jerseysaler.com/Atlanta_Hawks_Teams.html
Boston Celtics
http://www.jerseysaler.com/Boston_Celtics_Teams.html
Charlotte Bobcats
http://www.jerseysaler.com/Charlotte_Bobcats_Teams.html
Chicago Bulls
http://www.jerseysaler.com/Chicago_Bulls_Teams.html
Cleveland Cavaliers
http://www.jerseysaler.com/Cleveland_Cavaliers_Teams.html
Dallas Mavericks
http://www.jerseysaler.com/Dallas_Mavericks_Teams.html
Denver Nuggets
http://www.jerseysaler.com/Denver_Nuggets_Teams.html
Detroit Pistons
http://www.jerseysaler.com/Detroit_Pistons_Teams.html
Golden State Warriors
http://www.jerseysaler.com/Golden_State_Warriors_Teams.html
Houston Rockets
http://www.jerseysaler.com/Houston_Rockets_Teams.html
Indiana Pacers
http://www.jerseysaler.com/Indiana_Pacers_Teams.html
Los Angeles Clippers
http://www.jerseysaler.com/Los_Angeles_Clippers_Teams.html
Los Angeles Lakers
http://www.jerseysaler.com/Los_Angeles_Lakers_Teams.html
Memphis Grizzlies
http://www.jerseysaler.com/Memphis_Grizzlies_Teams.html
Miami Heat
http://www.jerseysaler.com/Miami_Heat_Teams.html
Milwaukee Bucks
http://www.jerseysaler.com/Milwaukee_Bucks_Teams.html
Taylormade R9 Drivers
http://www.taylormadebrand.com/index.html
Drivers
http://www.taylormadebrand.com/Drivers.html
Irons
http://www.taylormadebrand.com/Irons.html
Putter
http://www.taylormadebrand.com/Putter.html
Wedge
http://www.taylormadebrand.com/Wedge.html
Fairway Wood
http://www.taylormadebrand.com/Fairway_Wood.html
Hybrids
http://www.taylormadebrand.com/Hybrids.html
Balls
http://www.taylormadebrand.com/Balls.html
Shoes
http://www.taylormadebrand.com/Shoes.html
Accessories
http://www.taylormadebrand.com/Accessories.html
Taylormade Wedges
http://www.taylormadebrand.com/Taylormade_Wedges.html
Titleist Wedges
http://www.taylormadebrand.com/Titleist_Wedges.html
Callaway Fairway Woods
http://www.taylormadebrand.com/Callaway_Fairway_Woods.html
Mizuno Fairway Woods
http://www.taylormadebrand.com/Mizuno_Fairway_Woods.html
Nike Fairway Woods
http://www.taylormadebrand.com/Nike_Fairway_Woods.html
Ping Fairway Woods
http://www.taylormadebrand.com/Ping_Fairway_Woods.html
Nike Shoes
http://www.taylormadebrand.com/Nike_Shoes.html
Taylormade Fairway Woods
http://www.taylormadebrand.com/Taylormade_Fairway_Woods.html
Callaway Hybrids
http://www.taylormadebrand.com/Callaway_Hybrids.html
Taylormade Hybrids
http://www.taylormadebrand.com/Taylormade_Hybrids.html
Callaway Balls
http://www.taylormadebrand.com/Callaway_Balls.html
Nike Balls
http://www.taylormadebrand.com/Nike_Balls.html
Taylormade Balls
http://www.taylormadebrand.com/Taylormade_Balls.html
Titleist Balls
http://www.taylormadebrand.com/Titleist_Balls.html
Adidas Bags
http://www.taylormadebrand.com/Adidas_Bags.html
Ping Bags
http://www.taylormadebrand.com/Ping_Bags.html
Titleist Bags
http://www.taylormadebrand.com/Titleist_Bags.html
Callaway Bags
http://www.taylormadebrand.com/Callaway_Bags.html
Taylormade Bags
http://www.taylormadebrand.com/Taylormade_Bags.html
Nike Bags
http://www.taylormadebrand.com/Nike_Bags.html
Adidas Shoes
http://www.taylormadebrand.com/Adidas_Shoes.html
Footjoy Shoes
http://www.taylormadebrand.com/Footjoy_Shoes.html
Callaway Shoes
http://www.taylormadebrand.com/Callaway_Shoes.html
Golf Glove
http://www.taylormadebrand.com/Golf_Glove.html
Headcover
http://www.taylormadebrand.com/Headcover.html
Sunglasses
http://www.taylormadebrand.com/Sunglasses.html
Outwear
http://www.taylormadebrand.com/Outwear.html
T-shirt
http://www.taylormadebrand.com/T-shirt.html
Callaway Drivers
http://www.taylormadebrand.com/Callaway_Drivers.html
Cleveland Drivers
http://www.taylormadebrand.com/Cleveland_Drivers.html
Mizuno Drivers
http://www.taylormadebrand.com/Mizuno_Drivers.html
Nike Drivers
http://www.taylormadebrand.com/Nike_Drivers.html
Ping Drivers
http://www.taylormadebrand.com/Ping_Drivers.html
Taylormade Drivers
http://www.taylormadebrand.com/Taylormade_Drivers.html
Titleist Drivers
http://www.taylormadebrand.com/Titleist_Drivers.html
Callaway Irons
http://www.taylormadebrand.com/Callaway_Irons.html
Cleveland Irons
http://www.taylormadebrand.com/Cleveland_Irons.html
Mizuno Irons
http://www.taylormadebrand.com/Mizuno_Irons.html
Nike Irons
http://www.taylormadebrand.com/Nike_Irons.html
Ping Irons
http://www.taylormadebrand.com/Ping_Irons.html
Taylormade Irons
http://www.taylormadebrand.com/Taylormade_Irons.html
Titleist Irons
http://www.taylormadebrand.com/Titleist_Irons.html
Odyssey Putters
http://www.taylormadebrand.com/Odyssey_Putters.html
Ping Putters
http://www.taylormadebrand.com/Ping_Putters.html
Taylormade Putters
http://www.taylormadebrand.com/Taylormade_Putters.html
Titleist Putters
http://www.taylormadebrand.com/Titleist_Putters.html
Yes Putters
http://www.taylormadebrand.com/Yes_Putters.html
Callaway Wedges
http://www.taylormadebrand.com/Callaway_Wedges.html
Cleveland Wedges
http://www.taylormadebrand.com/Cleveland_Wedges.html
Clevelend Fairway Wood
http://www.taylormadebrand.com/Clevelend_Fairway_Wood.html
Ping Hybrids
http://www.taylormadebrand.com/Ping_Hybrids.html
Wholesale Nike Shoes
http://www.sportsshoes24.com/index.html
Nike Shoes
http://www.sportsshoes24.com/Nike-Shoes-wholesale-1.html
Adidas Shoes
http://www.sportsshoes24.com/Adidas-Shoes-wholesale-2.html
LV Shoes
http://www.sportsshoes24.com/LV-Shoes-wholesale-13.html
D & G Shoes
http://www.sportsshoes24.com/D-and-G-Shoes-wholesale-12.html
Puma Shoes
http://www.sportsshoes24.com/Puma-Shoes-wholesale-9.html
Gucci Shoes
http://www.sportsshoes24.com/Gucci-Shoes-wholesale-10.html
Prada Shoes
http://www.sportsshoes24.com/Prada-Shoes-wholesale-11.html
Hogan Shoes
http://www.sportsshoes24.com/Hogan-Shoes-wholesale-14.html
Lacoste Shoes
http://www.sportsshoes24.com/Lacoste-Shoes-wholesale-17.html
Converse Shoes
http://www.sportsshoes24.com/Converse-Shoes-wholesale-18.html
Ed-hardy Shoes
http://www.sportsshoes24.com/Ed-hardy-Shoes-wholesale-19.html
Dsquared2 Shoes
http://www.sportsshoes24.com/Dsquared2-Shoes-wholesale-15.html
Timberland Shoes
http://www.sportsshoes24.com/Timberland-Shoes-wholesale-16.html
T-Shirt
http://www.sportsshoes24.com/T-Shirt-wholesale-113.html
Jeans
http://www.sportsshoes24.com/Jeans-wholesale-111.html
Hoodies
http://www.sportsshoes24.com/Hoodies-wholesale-112.html
Lacoste
http://www.lacostebrand.com
Lacoste shirts
http://www.lacostebrand.com
Lacoste shoes
http://www.lacostebrand.com
ugg boots
http://www.myuggshop.com
UGG
http://www.myuggshop.com
Converse
http://www.saleconverse.com
Converse shoes
http://www.saleconverse.com
Embroidery
http://www.embroiderysources.com
Embroidery Designs
http://www.embroiderysources.com
Advanced Embroidery Designs
http://www.embroiderysources.com
FREE Machine Embroidery Designs
http://www.embroiderysources.com
NBA Jerseys
http://www.jerseysaler.com
MLB Jerseys
http://www.jerseysaler.com
China Wholesale
http://www.thenextvogue.com
UGG Boots
http://www.uggboots4sale.com
Authentic Ugg Boots
http://www.uggboots4sale.com
Boots
http://www.uggboots4sale.com
ghd
http://www.ghder.com
chi
http://www.ghder.com
ghd
http://www.ghdVSCHI.com
chi
http://www.ghdVSCHI.com
ghd
http://www.goodghd.com
chi
http://www.goodghd.com
ghd
http://www.ghdmark.com
chi
http://www.ghdmark.com
Chopard Watches
http://www.chopardwatches.cn
Vacheron Constantin
http://www.vacheron-constantin-watches.cn
Bell&Ross; Watches
http://www.bellrosswatches.cn
Rolex Watches
http://www.rolexwatches24.com
Seo
http://www.ronghuaweb.com
Electromagnetic Radiation Eliminator
http://www.electromagnetic-radiation-eliminator.com
珠宝联盟网
http://www.zblmw.com
珠宝
http://www.zblmw.com
移动推拉门
http://www.yiliboli.com
全球贸易网
http://www.ecexp.com
荣华网络
http://www.ronghuaweb.com
SEO
http://www.ronghuaweb.com
搜索引擎优化
http://www.seoogle.cn
seo
http://www.seoogle.cn
莆田培训
http://www.ptbxpx.com
怀孕知识
http://www.mamabaike.com
童话
http://www.61tonghua.com
童话故事
http://www.61tonghua.com
肮脏美学
http://www.sickfox.com
肮脏美学
http://www.sickarts.com
莆田外贸
http://www.putiantrade.com
贸易通
http://www.tradetalk.cn
莆田网络公司
http://www.ronghuaweb.com
莆田
http://www.ptall.com
莆田新闻
http://www.ptall.com
莆田话
http://www.pthua.com
SEO
http://www.SEOGlobal.org
二元店
http://www.258yuan.com
两元店
http://www.258yuan.com
精品店
http://www.258yuan.com
义乌小商品
http://www.258shop.com
one dollar shop
http://www.258shop.com
taylor made r7 cgb
http://www.taylormadebrand.com
taylormade golf
http://www.taylormadebrand.com
莆田SEO
http://www.ptseo.cn
SEM
http://www.semglobal.org
儿童文学
http://www.61wenxue.com
海峡人才
http://www.haixiajob.com
怀孕知识
http://www.mamabaike.com
工艺美术城-中国.莆田
http://www.zblmw.com
工艺美术城
http://www.zblmw.com
Nike Shoes Wholesale
http://www.ohnike.com
Wholesale nike shoes
http://www.Ohnike.com
wholesale nike shoes
http://www.sportsshoes24.com
nike shoes wholesale
http://www.sportsshoes24.com
Radiation Protection Products
http://www.rppWorld.com
Radiation Protection
http://www.rppWorld.com
japan txluck
http://www.txluck.com
才子男装
http://www.caizipifa.cn
才子集团
http://www.caizipifa.cn
油画批发
http://www.youhuapifa.net
油画工作室
http://www.youhuapifa.net
油画
http://www.youhuapifa.net
莆田专业外贸网站建设
http://www.putiantrade.com
chinese tea wholesale
http://www.TeaLuck.com
tea
http://www.TeaLuck.com
SEM
http://www.semglobal.org
MoneyBookers
http://www.mymoneybookers.cn
林荣华
http://www.LinRonghua.com
石英谐振器
http://www.ptcxdz.com
32.768khz
http://www.ptcxdz.com
晶振
http://www.ptcxdz.com
振晶
http://www.ptcxdz.com
表晶
http://www.ptcxdz.com
莆田创意动画
http://www.ptflash.com.cn
莆田动画
http://www.ptflash.com.cn
保兰德
http://www.baolande.com
莆田黄页
http://www.putianyp.com
莆田企业黄页
http://www.putianyp.com
32.768Khz
http://www.ptcxdz.com
石英谐振器
http://www.ptcxdz.com
游戏外贸
http://www.GamesSEO.com
游戏关键字优化
http://www.GamesSEO.com
游戏优化
http://www.GamesSEO.com
欧美网络游戏优化
http://www.GamesSEO.com
莆田净水器
http://www.ptjsq.cn
福建净水器
http://www.ptjsq.cn
净水器
http://www.ptjsq.cn
莆田SEO
http://www.0594seo.com
TradeCMS
http://www.tradecms.com
Yellow Pages
http://www.global-yellow-pages.org
Global Yellow Pages
http://www.global-yellow-pages.org
金山毒霸
http://www.kingsoft-duba.com.cn
毒霸
http://www.kingsoft-duba.com.cn
有啊
http://www.youasky.com
有呀
http://www.youasky.com
百度有啊
http://www.youasky.com
oil painting
http://www.oilpaintingsources.com
oil painting
http://www.buyarts123.com
oil paintings
http://www.buyarts123.com
oil paintings
http://www.oilpaintingsources.com
wholesale oil painting
http://www.oilpaintingsources.com
oil painting wholesale
http://www.oilpaintingsources.com
china oil painting wholesale
http://www.oilpaintingsources.com
MAC Makeup
http://www.macmakeupshop.com
MAC Cosmetics
http://www.macmakeupshop.com
discount mac makeup
http://www.macmakeupshop.com
MAC Eye Shadow
http://www.macmakeupshop.com
ed hardy
http://www.edhardyvip.com
ed hardy clothing
http://www.edhardyvip.com
ed hardy shoes
http://www.edhardyvip.com
ghd
http://www.ghder.com
ghd hair straighteners
http://www.ghder.com
chi
http://www.ghder.com
CHI straightener
http://www.ghder.com
ghd straighteners
http://www.ghder.com
chi hair straightener
http://www.ghder.com
ghd
http://www.ghdvschi.com
ghd hair straighteners
http://www.ghdvschi.com
chi
http://www.ghdvschi.com
CHI straightener
http://www.ghdvschi.com
ghd straighteners
http://www.ghdvschi.com
chi hair straightener
http://www.ghdvschi.com
ghd
http://www.goodghd.com
ghd hair straighteners
http://www.goodghd.com
chi
http://www.goodghd.com
CHI straightener
http://www.goodghd.com
ghd straighteners
http://www.goodghd.com
chi hair straightener
http://www.goodghd.com
nfl jerseys
http://www.jerseysfans.com
nhl jerseys
http://www.jerseysfans.com
soccer jerseys
http://www.jerseysfans.com
nba jerseys
http://www.jerseysfans.com
mlb jerseys
http://www.jerseysfans.com
world cup
http://www.jerseysfans.com
nfl apparel
http://www.jerseysfans.com
nfl apparel
http://www.nfljerseysmall.com
nfl jerseys
http://www.nfljerseysmall.com
nhl jerseys
http://www.nfljerseysmall.com
soccer jerseys
http://www.nfljerseysmall.com
nba jerseys
http://www.nfljerseysmall.com
mlb jerseys
http://www.nfljerseysmall.com
world cup
http://www.nfljerseysmall.com
nike shoes
http://www.ohnike.com
wholesale nike shoes
http://www.ohnike.com
Oil paintings
http://www.buyarts123.com
Oil painting
http://www.buyarts123.com
Paintings for sale
http://www.buyarts123.com
Handmade Oil Paintings
http://www.buyarts123.com
portraits
http://www.buyarts123.com
abstract paintings
http://www.buyarts123.com
van gogh reproductions
http://www.buyarts123.com
Monet paintings
http://www.buyarts123.com
Klimt paintings
http://www.buyarts123.com
Venice painting
http://www.buyarts123.com
oil portraits
http://www.buyarts123.com
replica bags
http://www.chinabagworld.com
Replica Handbags
http://www.chinabagworld.com
Replica bags
http://www.chinabagworld.com
Designer Handbags
http://www.chinabagworld.com
Gucci bags
http://www.chinabagworld.com
Chanel bags
http://www.chinabagworld.com
シャネルの鞄
http://www.chinabagworld.com
ルイヴィトンの鞄
http://www.chinabagworld.com
Rolex Watches
http://www.bigbigwatch.com/index.html
Watch Boxes
http://www.bigbigwatch.com/WATCH-BOXES-Watches-91.html
Alain Silberstein
http://www.bigbigwatch.com/ALAIN-SILBERSTEIN-Watches-26.html
Anonimo
http://www.bigbigwatch.com/ANONIMO-Watches-27.html
A.Lange & Sohne
http://www.bigbigwatch.com/A.LANGE-and-SOHNE-Watches-28.html
Audemars Piguet
http://www.bigbigwatch.com/AUDEMARS-PIGUET-Watches-29.html
Baume & Mercier
http://www.bigbigwatch.com/BAUME-and-MERCIER-Watches-30.html
Bell & Ross
http://www.bigbigwatch.com/BELL-and-ROSS-Watches-31.html
Blancpain
http://www.bigbigwatch.com/BLANCPAIN-Watches-32.html
Breguet
http://www.bigbigwatch.com/BREGUET-Watches-33.html
Breitling
http://www.bigbigwatch.com/BREITLING-Watches-34.html
Burberry
http://www.bigbigwatch.com/BURBERRY-Watches-35.html
Bvlgari
http://www.bigbigwatch.com/BVLGARI-Watches-36.html
Cartier
http://www.bigbigwatch.com/CARTIER-Watches-37.html
Chanel
http://www.bigbigwatch.com/CHANEL-Watches-38.html
Chopard
http://www.bigbigwatch.com/CHOPARD-Watches-39.html
Christian Dior
http://www.bigbigwatch.com/CHRISTIAN-DIOR-Watches-40.html
Chrconoswiss
http://www.bigbigwatch.com/CHRONOSWISS-Watches-41.html
Corum
http://www.bigbigwatch.com/CORUM-Watches-42.html
Dewitt
http://www.bigbigwatch.com/DEWITT-Watches-43.html
Ebel
http://www.bigbigwatch.com/EBEL-Watches-44.html
Fendi
http://www.bigbigwatch.com/FENDI-Watches-45.html
Frank Muller
http://www.bigbigwatch.com/FRANK-MULLER-Watches-46.html
Gerald Genta
http://www.bigbigwatch.com/GERALD-GENTA-Watches-47.html
Glashutte
http://www.bigbigwatch.com/GLASHUTTE-Watches-48.html
Graham
http://www.bigbigwatch.com/GRAHAM-Watches-49.html
Gucci
http://www.bigbigwatch.com/GUCCI-Watches-50.html
Hermes
http://www.bigbigwatch.com/HERMES-Watches-51.html
Hublot
http://www.bigbigwatch.com/HUBLOT-Watches-89.html
Iwc
http://www.bigbigwatch.com/IWC-Watches-52.html
Jacob & Co
http://www.bigbigwatch.com/JACOB-and-CO-Watches-53.html
Jaeger Le Coultre
http://www.bigbigwatch.com/JAEGER-LE-COULTRE-Watches-54.html
Longines
http://www.bigbigwatch.com/LONGINES-Watches-55.html
Louis Vuitton
http://www.bigbigwatch.com/LOUIS-VUITTON-Watches-56.html
Maurice & Lacroix
http://www.bigbigwatch.com/MAURICE-and-LACROIX-Watches-57.html
Mont Blanc
http://www.bigbigwatch.com/MONT-BLANC-Watches-58.html
Movado
http://www.bigbigwatch.com/MOVADO-Watches-59.html
Oris
http://www.bigbigwatch.com/ORIS-Watches-61.html
Panerai
http://www.bigbigwatch.com/PANERAI-Watches-62.html
Parmigiani Fleurier
http://www.bigbigwatch.com/PARMIGIANI-FLEURIER-Watches-63.html
Patek Philippe
http://www.bigbigwatch.com/PATEK-PHILIPPE-Watches-64.html
Paul Picot
http://www.bigbigwatch.com/PAUL-PICOT-Watches-65.html
Piaget
http://www.bigbigwatch.com/PIAGET-Watches-66.html
Porsche Desing
http://www.bigbigwatch.com/PORSCHE-DESIGN-Watches-67.html
Prada
http://www.bigbigwatch.com/PRADA-Watches-68.html
Rado
http://www.bigbigwatch.com/RADO-Watches-69.html
Roger Dubuis
http://www.bigbigwatch.com/ROGER-DUBUIS-Watches-70.html
Rolex
http://www.bigbigwatch.com/ROLEX-Watches-71.html
Tag Heuer
http://www.bigbigwatch.com/TAG-HEUER-Watches-72.html
Technomarine
http://www.bigbigwatch.com/TECHNOMARINE-Watches-73.html
Vach. Constantine
http://www.bigbigwatch.com/VACH.-CONSTANTINE-Watches-74.html
Versace
http://www.bigbigwatch.com/VERSACE-Watches-75.html
Zenith
http://www.bigbigwatch.com/ZENITH-Watches-76.html
Chronomatic
http://www.bigbigwatch.com/CHRONOMATIC-Watches-109.html
Montbrilliant
http://www.bigbigwatch.com/MONTBRILLIANT-Watches-111.html
Superocean
http://www.bigbigwatch.com/SUPEROCEAN-Watches-112.html
Rolex Watches
http://www.bigbigwatch.com
Rolex
http://www.swissluxurywatches.cn
Breitling Watches
http://www.bigbigwatch.com
Computer Radiation Eliminator
http://www.radiation-eliminator.com
Replica Watches
http://www.replica-watches.com.cn
Cartier Watches
http://www.cartierwatches.org.cn
Panerai Watches
http://www.paneraiwatches.cn
Bvlgari Watches
http://www.bvlgariwatches.cn
Breitling Watches
http://www.breitlingwatches.cn
Tag Heuer Watches
http://www.tagheuerwatches.org.cn
Patek Philippe Watches
http://www.patek-philippe.org.cn
Rado Watches
http://www.radowatches.org.cn
Mont Blanc Watches
http://www.montblancwatches.cn
A.Lange & Sohne
http://www.alangesohne.org.cn
Piaget Watches
http://www.piagetwatches.org.cn
Vacheron Constantin
http://www.vacheronconstantin-watches.cn
Frank Muller Watches
http://www.frankmuller.cn
Breitling Watches
http://www.breitlingwatches.com.cn
Longine Watches
http://www.longinewatches.cn
Hublot Watches
http://www.hublotwatches.com.cn
Mont Blanc Watches
http://www.montblancwatches.com.cn
Panerai Watches
http://www.paneraiwatches.com.cn
ed hardy
http://www.edhardyglobal.com
ED HARDY
http://www.edhardyglobal.com/ED-HARDY-c9.html
ed hardy sock
http://www.edhardyglobal.com/ed-hardy-sock-c30.html
ed hardy purses
http://www.edhardyglobal.com/ed-hardy-purses-c31.html
ed hardy shoes men
http://www.edhardyglobal.com/ed-hardy-shoes-men-c32.html
ed hardy shoes women
http://www.edhardyglobal.com/ed-hardy-shoes-women-c33.html
ed hardy slipper
http://www.edhardyglobal.com/ed-hardy-slipper-c34.html
ed hardy women skirt
http://www.edhardyglobal.com/ed-hardy-women-skirt-c35.html
Short sleeve man Tee
http://www.edhardyglobal.com/Short-sleeve-man-Tee-c10.html
Short sleeve Woman Tee
http://www.edhardyglobal.com/Short-sleeve-Woman-Tee-c11.html
Long sleeve man Tee
http://www.edhardyglobal.com/Long-sleeve-man-Tee-c13.html
Long sleeve woman Tee
http://www.edhardyglobal.com/Long-sleeve-woman-Tee-c14.html
ed hardy men hoody
http://www.edhardyglobal.com/ed-hardy-men-hoody-c15.html
ed hard women hoody
http://www.edhardyglobal.com/ed-hard-women-hoody-c16.html
ed hardy boot
http://www.edhardyglobal.com/ed-hardy-boot-c17.html
ed hardy bags
http://www.edhardyglobal.com/ed-hardy-bags-c18.html
ed hardy bikini
http://www.edhardyglobal.com/ed-hardy-bikini-c19.html
ed hardy suit
http://www.edhardyglobal.com/ed-hardy-suit-c20.html
ed hardy sunglass
http://www.edhardyglobal.com/ed-hardy-sunglass-c21.html
ed hardy belt
http://www.edhardyglobal.com/ed-hardy-belt-c22.html
ed hardy underwear
http://www.edhardyglobal.com/ed-hardy-underwear-c23.html
ed hardy caps
http://www.edhardyglobal.com/ed-hardy-caps-c24.html
ed hardy watch
http://www.edhardyglobal.com/ed-hardy-watch-c25.html
ed hardy bracelet
http://www.edhardyglobal.com/ed-hardy-bracelet-c26.html
ed hardy woman shorts
http://www.edhardyglobal.com/ed-hardy-woman-shorts-c27.html
ed hardy men jeans
http://www.edhardyglobal.com/ed-hardy-men-jeans-c28.html
ed hardy women jeans
http://www.edhardyglobal.com/ed-hardy-women-jeans-c29.html
Christian Audigier
http://www.edhardyglobal.com/Christian-Audigier-c36.html
CA MEN TEE
http://www.edhardyglobal.com/CA-MEN-TEE-c37.html
CA WOMEN TEE
http://www.edhardyglobal.com/CA-WOMEN-TEE-c38.html
CA men long sleeve TEE
http://www.edhardyglobal.com/CA-men-long-sleeve-TEE-c39.html
CA women long sleeve TEE
http://www.edhardyglobal.com/CA-women-long-sleeve-TEE-c40.html
CA MEN Hoody
http://www.edhardyglobal.com/CA-MEN-Hoody-c41.html
CA women Hoody
http://www.edhardyglobal.com/CA-women-Hoody-c42.html
CA MEN Jeans
http://www.edhardyglobal.com/CA-MEN-Jeans-c43.html
CA BAGS
http://www.edhardyglobal.com/CA-BAGS-c44.html
CA bikini
http://www.edhardyglobal.com/CA-bikini-c45.html
CA Caps
http://www.edhardyglobal.com/CA-Caps-c46.html
CA women skirt
http://www.edhardyglobal.com/CA-women-skirt-c47.html
Michael Jackson
http://www.edhardyglobal.com/Michael-Jackson-c48.html
Man TEE
http://www.edhardyglobal.com/Man-TEE-c49.html
Woman TEE
http://www.edhardyglobal.com/Woman-TEE-c50.html
ghd
http://www.ghdluck.com
chi
http://www.ghdluck.com
ghd straighteners
http://www.ghdluck.com
straighteners
http://www.ghdluck.com
hair straighteners
http://www.ghdluck.com
GHD
http://www.ghd-hair-co-uk.com
GHD Straighteners
http://www.ghd-hair-co-uk.com
GHD Hair Straighteners
http://www.ghd-hair-co-uk.com
GHD PRECIOUS
http://www.ghd-hair-co-uk.com
Chi Flat Iron
http://www.ghd-hair-co-uk.com
GHD
http://www.iwantmyghd.com
GHD Straighteners
http://www.iwantmyghd.com
GHD Hair Straighteners
http://www.iwantmyghd.com
GHD PRECIOUS
http://www.iwantmyghd.com
Chi Flat Iron
http://www.iwantmyghd.com
GHD
http://www.ghd-chi-mall.com
GHD Straighteners
http://www.ghd-chi-mall.com
GHD Hair Straighteners
http://www.ghd-chi-mall.com
GHD PRECIOUS
http://www.ghd-chi-mall.com
Chi Flat Iron
http://www.ghd-chi-mall.com
GHD
http://www.ghdbrandshop.com
GHD Straighteners
http://www.ghdbrandshop.com
GHD Hair Straighteners
http://www.ghdbrandshop.com
GHD PRECIOUS
http://www.ghdbrandshop.com
Chi Flat Iron
http://www.ghdbrandshop.com
T3 Hair Dryer
http://www.ghdbrandshop.com
T3 Hair Straighteners
http://www.ghdbrandshop.com
GHD
http://www.ghd-hair-co-uk.com
GHD Straighteners
http://www.ghd-hair-co-uk.com
GHD Hair Straighteners
http://www.ghd-hair-co-uk.com
wholesale ghd straighteners
http://www.ghd-hair-co-uk.com
chi
http://www.ghd-hair-co-uk.com
Chi Flat Iron
http://www.ghd-hair-co-uk.com
cheap ghd straighteners
http://www.ghd-hair-co-uk.com
hair straighteners
http://www.ghd-hair-co-uk.com
GHD PRECIOUS
http://www.ghd-hair-co-uk.com
T3 Hair Dryer
http://www.ghd-hair-co-uk.com
T3 Hair Straighteners
http://www.ghd-hair-co-uk.com
GHD
http://www.iwantmyghd.com
GHD Straighteners
http://www.iwantmyghd.com
GHD Hair Straighteners
http://www.iwantmyghd.com
wholesale ghd straighteners
http://www.iwantmyghd.com
chi
http://www.iwantmyghd.com
Chi Flat Iron
http://www.iwantmyghd.com
cheap ghd straighteners
http://www.iwantmyghd.com
hair straighteners
http://www.iwantmyghd.com
GHD PRECIOUS
http://www.iwantmyghd.com
T3 Hair Dryer
http://www.iwantmyghd.com
T3 Hair Straighteners
http://www.iwantmyghd.com
GHD
http://www.ghd-chi-mall.com
GHD Straighteners
http://www.ghd-chi-mall.com
GHD Hair Straighteners
http://www.ghd-chi-mall.com
wholesale ghd straighteners
http://www.ghd-chi-mall.com
chi
http://www.ghd-chi-mall.com
Chi Flat Iron
http://www.ghd-chi-mall.com
cheap ghd straighteners
http://www.ghd-chi-mall.com
hair straighteners
http://www.ghd-chi-mall.com
GHD PRECIOUS
http://www.ghd-chi-mall.com
T3 Hair Dryer
http://www.ghd-chi-mall.com
T3 Hair Straighteners
http://www.ghd-chi-mall.com
GHD
http://www.ghdbrandshop.com
GHD Straighteners
http://www.ghdbrandshop.com
GHD Hair Straighteners
http://www.ghdbrandshop.com
wholesale ghd straighteners
http://www.ghdbrandshop.com
chi
http://www.ghdbrandshop.com
Chi Flat Iron
http://www.ghdbrandshop.com
cheap ghd straighteners
http://www.ghdbrandshop.com
hair straighteners
http://www.ghdbrandshop.com
GHD PRECIOUS
http://www.ghdbrandshop.com
T3 Hair Dryer
http://www.ghdbrandshop.com
T3 Hair Straighteners
http://www.ghdbrandshop.com
superbowl XLIV
http://www.super-bowl-jerseys.com
superbowl 2010
http://www.super-bowl-jerseys.com
superbowl 44
http://www.super-bowl-jerseys.com
superbowl tickets
http://www.super-bowl-jerseys.com
superbowl trivia
http://www.super-bowl-jerseys.com
nfl superbowl
http://www.super-bowl-jerseys.com
superbowl jersey
http://www.super-bowl-jerseys.com
superbowl jerseys
http://www.super-bowl-jerseys.com
wholesale superbowl jerseys
http://www.super-bowl-jerseys.com
dropshipping superbowl jersey
http://www.super-bowl-jerseys.com
cheap nfl superbowl jerseys
http://www.super-bowl-jerseys.com
superbowl XLIV
http://www.superbowljerseyshop.com
superbowl 2010
http://www.superbowljerseyshop.com
superbowl 44
http://www.superbowljerseyshop.com
superbowl tickets
http://www.superbowljerseyshop.com
superbowl trivia
http://www.superbowljerseyshop.com
nfl superbowl
http://www.superbowljerseyshop.com
superbowl jersey
http://www.superbowljerseyshop.com
superbowl jerseys
http://www.superbowljerseyshop.com
wholesale superbowl jerseys
http://www.superbowljerseyshop.com
dropshipping superbowl jersey
http://www.superbowljerseyshop.com
cheap nfl superbowl jerseys
http://www.superbowljerseyshop.com
superbowl XLIV
http://www.super-bowl-jersey.com
superbowl 2010
http://www.super-bowl-jersey.com
superbowl 44
http://www.super-bowl-jersey.com
superbowl tickets
http://www.super-bowl-jersey.com
superbowl trivia
http://www.super-bowl-jersey.com
nfl superbowl
http://www.super-bowl-jersey.com
superbowl jersey
http://www.super-bowl-jersey.com
superbowl jerseys
http://www.super-bowl-jersey.com
wholesale superbowl jerseys
http://www.super-bowl-jersey.com
dropshipping superbowl jersey
http://www.super-bowl-jersey.com
cheap nfl superbowl jerseys
http://www.super-bowl-jersey.com
ugg
http://www.uggchinashop.com
ugg雪地靴
http://www.uggchinashop.com
ugg官网
http://www.uggchinashop.com
ugg专卖店
http://www.uggchinashop.com
ugg价格
http://www.uggchinashop.com
ugg australia
http://www.uggchinashop.com
ugg
http://www.uggchinese.com
ugg雪地靴
http://www.uggchinese.com
ugg官网
http://www.uggchinese.com
ugg专卖店
http://www.uggchinese.com
ugg价格
http://www.uggchinese.com
ugg australia
http://www.uggchinese.com
金镶玉
http://www.jxyshop.com
玉配
http://www.jxyshop.com
吊坠
http://www.jxyshop.com
玉
http://www.jxyshop.com
玉网
http://www.jxyshop.com
玉镶金
http://www.jxyshop.com
nike air max
http://www.ohnike.com
nike shox
http://www.ohnike.com
nike air max
http://www.sportsshoes24.com
nike shox
http://www.sportsshoes24.com
cheap super bowl jersey
http://www.super-bowl-jersey.com
Discount super bowl jersey
http://www.super-bowl-jersey.com
makeup
http://www.macmakeupshop.com
cosmetics
http://www.macmakeupshop.com
makeup wholesale
http://www.macmakeupshop.com
cosmetics wholesale
http://www.macmakeupshop.com
wholesale cosmetics
http://www.macmakeupshop.com
wholesale makeup
http://www.macmakeupshop.com
makeup wholesale
http://www.makeupwholesaleshop.com
cosmetics wholesale
http://www.makeupwholesaleshop.com
wholesale cosmetics
http://www.makeupwholesaleshop.com
wholesale makeup
http://www.makeupwholesaleshop.com
makeup
http://www.makeupwholesaleshop.com
cosmetics
http://www.makeupwholesaleshop.com
makeup wholesale
http://www.cosmeticswholesaleshop.com
cosmetics wholesale
http://www.cosmeticswholesaleshop.com
wholesale cosmetics
http://www.cosmeticswholesaleshop.com
wholesale makeup
http://www.cosmeticswholesaleshop.com
makeup
http://www.cosmeticswholesaleshop.com
cosmetics
http://www.cosmeticswholesaleshop.com
replica handbags
http://www.luxuryhandbagworld.com
replica bags
http://www.luxuryhandbagworld.com
designer handbags
http://www.luxuryhandbagworld.com
Auto Parts
http://www.dieselpartsworld.com
Head Rotor
http://www.dieselpartsworld.com
Nozzle
http://www.dieselpartsworld.com
Element
http://www.dieselpartsworld.com
Plunger
http://www.dieselpartsworld.com
Auto Parts
http://www.autopartsproducts.com
Head Rotor
http://www.autopartsproducts.com
Nozzle
http://www.autopartsproducts.com
Element
http://www.autopartsproducts.com
Plunger
http://www.autopartsproducts.com
wholesale nfl jerseys
http://www.wholesalenfljerseys2008.com
nfl jerseys wholesale
http://www.wholesalenfljerseys2008.com
new orleans saints
http://www.wholesalenfljerseys2008.com
nfl jerseys
http://www.wholesalenfljerseys2008.com
new orleans saints jerseys
http://www.wholesalenfljerseys2008.com
jimmy choo
http://www.jimmychooworld.com
jimmy choo handbags
http://www.jimmychooworld.com
jimmy choo shoes
http://www.jimmychooworld.com
jimmy choo sunglasses
http://www.jimmychooworld.com
nfl jerseys
http://www.ecjerseys4all.com
wholesale nfl jerseys
http://www.ecjerseys4all.com
True Religion
http://www.ectr4all.com
True Religion Jeans
http://www.ectr4all.com
TR Jeans
http://www.ectr4all.com
ecco
http://www.ecco4all.com
Ecco Shoes
http://www.ecco4all.com
replica handbags
http://www.ecbag4all.com
replica bags
http://www.ecbag4all.com
handbags
http://www.ecbag4all.com
oil painting
http://www.ecoilpaintings.com
oil paintings
http://www.ecoilpaintings.com
nfl jerseys
http://www.ecjersey4all.com
mlb jerseys
http://www.ecjersey4all.com
nfl jerseys wholesale
http://www.ecjersey4all.com
nfl jersey
http://www.shopbynfl.com
nfl jerseys
http://www.shopbynfl.com
super bowl jerseys
http://www.shopbynfl.com
China Shoes Factory
http://www.oemexps.com
Shoes Trade
http://www.oemexps.com
Shoes OEM
http://www.oemexps.com
Casual Shoes
http://www.oemexps.com
Sports Shoes
http://www.oemexps.com
Hiking Shoes
http://www.oemexps.com
Skater Shoes
http://www.oemexps.com
the north face
http://www.outdoorbrandshop.com
north face
http://www.outdoorbrandshop.com
the north face discount
http://www.outdoorbrandshop.com
the north face jackets
http://www.outdoorbrandshop.com
the north face backpacks
http://www.outdoorbrandshop.com
the north face clothing
http://www.outdoorbrandshop.com
ecco
http://www.535shoes.com
ecco shoes
http://www.535shoes.com
wholesale ecco shoes
http://www.535shoes.com
Business shoes
http://www.535shoes.com
ECCO Men's Shoes
http://www.535shoes.com
ecco
http://www.eccshoes.com
ecco shoes
http://www.eccshoes.com
wholesale ecco shoes
http://www.eccshoes.com
Business shoes
http://www.eccshoes.com
ECCO Men's Shoes
http://www.eccshoes.com
work shoes
http://www.workshoesworld.com
work boots
http://www.workshoesworld.com
safety shoes
http://www.workshoesworld.com
new era caps
http://www.hat-bay.com
new era hats
http://www.hat-bay.com
new era cap
http://www.hat-bay.com
new era hat
http://www.hat-bay.com
wholesale new era caps
http://www.hat-bay.com
59Fifty Fitted Hats
http://www.hat-bay.com
nfl hats
http://www.hat-bay.com
nfl jerseys
http://www.nfljerseystks.com
nfl jersey
http://www.nfljerseystks.com
wholesale nfl jerseys
http://www.nfljerseystks.com
cheap nfl jerseys
http://www.nfljerseystks.com
nhl
http://www.nhljerseystks.com
nhl jerseys
http://www.nhljerseystks.com
nhl jersey
http://www.nhljerseystks.com
wholesale nhl jerseys
http://www.nhljerseystks.com
cheap nhl jerseys
http://www.nhljerseystks.com
mlb
http://www.mlbjerseystks.com
mlb jerseys
http://www.mlbjerseystks.com
mlb jersey
http://www.mlbjerseystks.com
cheap mlb jerseys
http://www.mlbjerseystks.com
wholesale mlb jerseys
http://www.mlbjerseystks.com
vivienne westwood
http://www.viviennewestwoodonsale.com
vivienne westwood bag
http://www.viviennewestwoodonsale.com
vivienne westwood handbag
http://www.viviennewestwoodonsale.com
wholesale vivienne westwood
http://www.viviennewestwoodonsale.com
vivienne westwood jewellery
http://www.viviennewestwoodonsale.com
vivienne westwood jewellery
http://www.viviennewestwoodol.com
vivienne westwood
http://www.viviennewestwoodol.com
vivienne westwood bag
http://www.viviennewestwoodol.com
vivienne westwood handbag
http://www.viviennewestwoodol.com
wholesale vivienne westwood
http://www.viviennewestwoodol.com
莆田逢源印刷
http://www.ptfyys.com
莆田印刷公司
http://www.ptfyys.com
逢源印刷
http://www.ptfyys.com
google
http://www.google.com
rolex watches
http://www.b2cwatch.com
mbt shoes
http://www.mbtinshop.com
china factory
http://www.shoes-oem.com
crocs shoes
http://www.crocsmy.com
59fifty fitted lids
http://www.shopbycap.com
バッグ
http://www.chinabagworld.com
財布
http://www.chinabagworld.com
腕時計
http://www.chinabagworld.com
nfl throwback jerseys
http://www.shopbynfl.com
UGG雪地靴
http://www.uggchinamall.com
UGG批发
http://www.uggchinamall.com
UGG专卖店
http://www.uggchinamall.com
UGG正品
http://www.uggchinamall.com
oil painting
http://www.jiyouarts.com
爱步
http://www.xietour.com
爱步鞋
http://www.xietour.com
ECCO鞋
http://www.xietour.com
爱步休闲鞋
http://www.xietour.com
其乐
http://www.xietour.com
其乐鞋
http://www.xietour.com
其乐皮鞋
http://www.xietour.com
健乐士
http://www.xietour.com
nike shoes
http://www.ebuyfashions.com
china wholesale
http://www.ebuyfashions.com
nike air jordan
http://www.ebuyfashions.com
handbags
http://www.ebuyfashions.com/Handbags-c228
jewelry
http://www.ebuyfashions.com/Jewelry-c238
sunglasses
http://www.ebuyfashions.com/Sunglasses-c593
hair straightener
http://www.ebuyfashions.com/Hair--Straightener-c242 posted: 2010-12-7 09:11:57 |
|
|
|
straightener writes...
Ceramic straighteners are used ceramic heating elements and more effective due to their constant heat, with less than 10 seconds heat-up time. Instant makeover is come true. CHI flat iron, Babyliss straightener and GHD straightener will be your good choice. Approved retail online store—ghdhairlovely.com supplying discounted ghd straighteners, cheap chi flat iron, cheap chi hair dryer and discounted babyliss straightener. Attractive? Grab them now! posted: 2010-12-20 05:47:11 |
 |
|
straightener writes...
Ceramic straighteners are used ceramic heating elements and more effective due to their constant heat, with less than 10 seconds heat-up time. Instant makeover is come true. CHI flat iron, Babyliss straightener and GHD straightener will be your good choice. Approved retail online store—ghdhairlovely.com supplying discounted ghd straighteners, cheap chi flat iron, cheap chi hair dryer and discounted babyliss straightener. Attractive? Grab them now! posted: 2010-12-20 05:46:00 |
|
|
|
Anonymous writes...
Specialists state that personal loans help a lot of people to live their own way, because they can feel free to buy needed stuff. Moreover, some banks offer credit loan for young and old people. posted: 2010-12-11 13:58:52 |
|
|
|
Anonymous writes...
Buildings are not very cheap and not everyone is able to buy it. Nevertheless, home loans was invented to aid different people in such situations. posted: 2010-12-14 08:09:04 |
|
|
|
Anonymous writes...
If you are willing to buy a house, you will have to get the credit loans. Furthermore, my sister commonly utilizes a small business loan, which seems to be the most reliable. posted: 2010-12-16 21:46:21 |
|
|
|
cc writes...
[url=http://www.fivefingerusa.com]vibram five fingers[/url]
[url=http://www.fivefingerusa.com]five finger shoes[/url]
[url=http://www.fivefingerusa.com]vibram shoes[/url]
[url=http://www.fivefingerusa.com]five finger[/url]
[url=http://www.mbtinshop.com]mbt shoes[/url]
[url=http://www.mbtinshop.com]wholesale mbt shoes[/url]
[url=http://www.mbtinshop.com]cheap mbt shoes[/url]
[url=http://www.mbtinshop.com]discount mbt shoes[/url]
[url=http://www.mbtinshop.com]mbt[/url]
[url=http://www.mbtinshop.com]buy mbt kaya[/url]
[url=http://www.outdoorbrandshop.com]the north face[/url]
[url=http://www.outdoorbrandshop.com]north face[/url]
[url=http://www.outdoorbrandshop.com]north face jackets[/url]
[url=http://www.outdoorbrandshop.com]north face clothing[/url]
[url=http://www.outdoorbrandshop.com]north face backpacks[/url]
[url=http://www.outdoorbrandshop.com]north face equipment[/url]
[url=http://www.outdoorbrandshop.com]north face outlet[/url]
[url=http://www.outdoorbrandshop.com]north face tents[/url]
[url=http://www.shopbynfl.com]nfl jerseys[/url]
[url=http://www.shopbynfl.com]wholesale nfl jerseys[/url]
[url=http://www.shopbynfl.com]nfl jersey[/url]
[url=http://www.shopbynfl.com]wholesale nfl jersey[/url]
[url=http://www.shopbynfl.com]super bowl[/url]
[url=http://www.shopbynfl.com]super bowl jerseys[/url]
[url=http://www.shopbynfl.com]super bowl jersey[/url]
[url=http://www.shopbynfl.com]cheap nfl jerseys[/url]
[url=http://www.shopbynfl.com]discounts nfl jerseys[/url]
[url=http://www.shopbynfl.com]nfl throwback jerseys[/url]
[url=http://www.shopbynfl.com]super bowl 2011 Jerseys[/url]
[url=http://www.shopbynfl.com]2011 super bowl Jerseys[/url]
[url=http://www.shopbynfl.com]super bowl XLV Jerseys[/url]
[url=http://www.shopbynfl.com]XLV super bowl Jerseys[/url]
[url=http://www.shopbycap.com]New Era Hat[/url]
[url=http://www.shopbycap.com]new era hats[/url]
[url=http://www.shopbycap.com]Cheap new era hats[/url]
[url=http://www.shopbycap.com]whoelsae new era hats[/url]
[url=http://www.shopbycap.com]new era cap[/url]
[url=http://www.shopbycap.com]new era caps[/url]
[url=http://www.shopbycap.com]wholesale era caps[/url]
[url=http://www.shopbycap.com]DC Hat[/url]
[url=http://www.shopbycap.com]Famous Hat[/url]
[url=http://www.shopbycap.com]Baseball Cap[/url]
[url=http://www.shopbycap.com]Nfl Cap[/url]
[url=http://www.ohjerseys.com]nfl jerseys[/url]
[url=http://www.ohjerseys.com]wholesale jerseys[/url]
[url=http://www.ohjerseys.com]nfl jersey[/url]
[url=http://www.ohjerseys.com]wholesale jersey[/url]
[url=http://www.ohjerseys.com]cheap nfl jerseys[/url]
[url=http://www.ohjerseys.com]cheap nfl jersey[/url]
[url=http://www.ohjerseys.com]super bowl jerseys[/url]
[url=http://www.crocsmy.com]crocs[/url]
[url=http://www.crocsmy.com]crocs shoes[/url]
[url=http://www.edhonsale.com]ed hardy[/url]
[url=http://www.edhonsale.com]wholesale ed hardy[/url]
[url=http://www.edhonsale.com]ed hardy shoes[/url]
[url=http://www.edhonsale.com]ed hardy discount[/url]
[url=http://www.edhonsale.com]ed hardy clothing[/url]
[url=http://www.edhonsale.com]ed hardy bags[/url]
[url=http://www.edhonsale.com]ed hardy caps[/url]
[url=http://www.edhonsale.com]ed hardy sunglasses[/url]
[url=http://www.edhonsale.com]ed hardy watches[/url]
[url=http://www.jiyouarts.com]oil painting[/url]
[url=http://www.jiyouarts.com]china oil painting[/url]
[url=http://www.jiyouarts.com]chinese oil painting[/url]
[url=http://www.jiyouarts.com]art painting[/url]
[url=http://www.jiyouarts.com]canvas painting[/url]
[url=http://www.jiyouarts.com]photo to art oil painting[/url]
[url=http://www.jiyouarts.com]hand made oil painting[/url]
[url=http://www.jiyouarts.com]oil painting reproductions[/url]
[url=http://www.bigbigwatch.com]rolex watches[/url]
[url=http://www.bigbigwatch.com]cartier watches[/url]
[url=http://www.bigbigwatch.com]breitling watches[/url]
[url=http://www.bigbigwatch.com]tag heuer watches[/url]
[url=http://www.bigbigwatch.com]gucci wathces[/url]
[url=http://www.bigbigwatch.com]omega watches[/url]
[url=http://www.bigbigwatch.com]cartier watches[/url]
[url=http://www.jimmychooworld.com]jimmy choo[/url]
[url=http://www.jimmychooworld.com]jimmy choo shoes[/url]
[url=http://www.jimmychooworld.com]jimmy choo bags[/url]
[url=http://www.jimmychooworld.com]jimmy choo boots[/url]
[url=http://www.jimmychooworld.com]jimmy choo handbags[/url]
[url=http://www.workshoesworld.com]Safety Shoes[/url]
[url=http://www.workshoesworld.com]pu safety shoes[/url]
[url=http://www.viviennewestwoodonsale.com]vivienne westwood wedding dress[/url]
[url=http://www.viviennewestwoodonsale.com]vivienne westwood shop[/url]
[url=http://www.viviennewestwoodonsale.com]vivienne westwood jewellery[/url]
[url=http://www.viviennewestwoodonsale.com]vivienne westwood shoes[/url]
[url=http://www.viviennewestwoodonsale.com]vivienne westwood biography[/url]
[url=http://www.viviennewestwoodonsale.com]vivienne westwood bags[/url]
[url=http://www.viviennewestwoodonsale.com]vivienne westwood wedding[/url]
[url=http://www.viviennewestwoodonsale.com]vivienne westwood wallet[/url]
[url=http://www.viviennewestwoodol.com]vivienne westwood wedding dress[/url]
[url=http://www.viviennewestwoodol.com]vivienne westwood shop[/url]
[url=http://www.viviennewestwoodol.com]vivienne westwood jewellery[/url]
[url=http://www.viviennewestwoodol.com]vivienne westwood shoes[/url]
[url=http://www.viviennewestwoodol.com]vivienne westwood biography[/url]
[url=http://www.viviennewestwoodol.com]vivienne westwood bags[/url]
[url=http://www.viviennewestwoodol.com]vivienne westwood wedding[/url]
[url=http://www.viviennewestwoodol.com]vivienne westwood wallet[/url]
[url=http://www.xietour.com]爱步鞋[/url]
[url=http://www.xietour.com]ecco鞋[/url]
[url=http://www.xietour.com]爱步休闲鞋[/url]
[url=http://www.xietour.com]ecco休闲鞋[/url]
[url=http://www.xietour.com]休闲鞋[/url]
[url=http://www.xietour.com]商务休闲鞋[/url]
[url=http://www.uggchinashop.com]ugg[/url]
[url=http://www.uggchinashop.com]ugg雪地靴[/url]
[url=http://www.uggchinashop.com]ugg官方网[/url]
[url=http://www.uggchinashop.com]ugg boots[/url]
[url=http://www.uggchinashop.com]ugg专柜[/url]
[url=http://www.uggchinese.com]ugg[/url]
[url=http://www.uggchinese.com]ugg雪地靴[/url]
[url=http://www.uggchinese.com]ugg官方网[/url]
[url=http://www.uggchinese.com]ugg boots[/url]
[url=http://www.uggchinese.com]ugg专柜[/url]
[url=http://www.ebuyfashions.com]nike shoes[/url]
[url=http://www.ebuyfashions.com]china wholesale[/url]
[url=http://www.ebuyfashions.com]nike air jordan[/url]
[url=http://www.ebuyfashions.com/Handbags-c228]handbags[/url]
[url=http://www.ebuyfashions.com/Jewelry-c238]jewelry[/url]
[url=http://www.ebuyfashions.com/Sunglasses-c593]sunglasses[/url]
[url=http://www.ebuyfashions.com/Hair--Straightener-c242]hair straightener[/url]
[url=http://www.viviennewestwoodjapan.com]ヴィヴィアン[/url]
[url=http://www.viviennewestwoodjapan.com]ビビアンウエストウッド[/url]
[url=http://www.viviennewestwoodjapan.com]ヴィヴィアンウエストウッド[/url]
[url=http://www.viviennewestwoodjapan.com]vivienne[/url]
[url=http://www.viviennewestwoodjapan.com]ビビアンウエスト[/url]
[url=http://www.viviennewestwoodjapan.com]vivienne westwood[/url]
[url=http://www.bigbigwatch.com/WATCH-BOXES-Watches-91.html]WATCH BOXES[/url]
[url=http://www.bigbigwatch.com/MONT-BLANC-PEN-Watches-120.html]MONT BLANC PEN Watches[/url]
[url=http://www.bigbigwatch.com/ALAIN-SILBERSTEIN-Watches-26.html]ALAIN SILBERSTEIN Watches[/url]
[url=http://www.bigbigwatch.com/ANONIMO-Watches-27.html]ANONIMO Watches[/url]
[url=http://www.bigbigwatch.com/A.LANGE-and-SOHNE-Watches-28.html]A.LANGE & SOHNE Watches[/url]
[url=http://www.bigbigwatch.com/AUDEMARS-PIGUET-Watches-29.html]AUDEMARS PIGUET Watches[/url]
[url=http://www.bigbigwatch.com/BAUME-and-MERCIER-Watches-30.html]BAUME & MERCIER Watches[/url]
[url=http://www.bigbigwatch.com/BELL-and-ROSS-Watches-31.html]BELL & ROSS Watches[/url]
[url=http://www.bigbigwatch.com/BLANCPAIN-Watches-32.html]BLANCPAIN Watches[/url]
[url=http://www.bigbigwatch.com/BREGUET-Watches-33.html]BREGUET Watches[/url]
[url=http://www.bigbigwatch.com/BREITLING-Watches-34.html]BREITLING Watches[/url]
[url=http://www.bigbigwatch.com/B.R.M-Watches-157.html]B.R.M Watches[/url]
[url=http://www.bigbigwatch.com/BURBERRY-Watches-35.html]BURBERRY Watches[/url]
[url=http://www.bigbigwatch.com/BVLGARI-Watches-36.html]BVLGARI Watches[/url]
[url=http://www.bigbigwatch.com/CARTIER-Watches-37.html]CARTIER Watches[/url]
[url=http://www.bigbigwatch.com/CHANEL-Watches-38.html]CHANEL Watches[/url]
[url=http://www.bigbigwatch.com/CHAUMET-Watches-137.html]CHAUMET Watches[/url]
[url=http://www.bigbigwatch.com/CHOPARD-Watches-39.html]CHOPARD Watches[/url]
[url=http://www.bigbigwatch.com/CHRISTIAN-DIOR-Watches-40.html]CHRISTIAN DIOR Watches[/url]
[url=http://www.bigbigwatch.com/CHRONOSWISS-Watches-41.html]CHRONOSWISS Watches[/url]
[url=http://www.bigbigwatch.com/CONCORD-Watches-123.html]CONCORD Watches[/url]
[url=http://www.bigbigwatch.com/CORUM-Watches-42.html]CORUM Watches[/url]
[url=http://www.bigbigwatch.com/DEWITT-Watches-43.html]DEWITT Watches[/url]
[url=http://www.bigbigwatch.com/EBEL-Watches-44.html]EBEL Watches[/url]
[url=http://www.bigbigwatch.com/FENDI-Watches-45.html]FENDI Watches[/url]
[url=http://www.bigbigwatch.com/FRANCK-MULLER-Watches-46.html]FRANCK MULLER Watches[/url]
[url=http://www.bigbigwatch.com/GERALD-GENTA-Watches-47.html]GERALD GENTA Watches[/url]
[url=http://www.bigbigwatch.com/GLASHUTTE-Watches-48.html]GLASHUTTE Watches[/url]
[url=http://www.bigbigwatch.com/GRAHAM-Watches-49.html]GRAHAM Watches[/url]
[url=http://www.bigbigwatch.com/GUCCI-Watches-50.html]GUCCI Watches[/url]
[url=http://www.bigbigwatch.com/HARRY-WINSTON-Watches-124.html]HARRY WINSTON Watches[/url]
[url=http://www.bigbigwatch.com/HERMES-Watches-51.html]HERMES Watches[/url]
[url=http://www.bigbigwatch.com/HUBLOT-Watches-89.html]HUBLOT Watches[/url]
[url=http://www.bigbigwatch.com/IWC-Watches-52.html]IWC Watches[/url]
[url=http://www.bigbigwatch.com/JACOB-and-CO.-Watches-53.html]JACOB & CO. Watches[/url]
[url=http://www.bigbigwatch.com/JAEGER-LE-COULTRE-Watches-54.html]JAEGER LE COULTRE Watches[/url]
[url=http://www.bigbigwatch.com/LONGINES-Watches-55.html]LONGINES Watches[/url]
[url=http://www.bigbigwatch.com/LOUIS-VUITTON-Watches-56.html]LOUIS VUITTON Watches[/url]
[url=http://www.bigbigwatch.com/MAURICE-and-LACROIX-Watches-57.html]MAURICE & LACROIX Watches[/url]
[url=http://www.bigbigwatch.com/MONT-BLANC-Watches-58.html]MONT BLANC Watches[/url]
[url=http://www.bigbigwatch.com/MOVADO-Watches-59.html]MOVADO Watches[/url]
[url=http://www.bigbigwatch.com/OMEGA-Watches-60.html]OMEGA Watches[/url]
[url=http://www.bigbigwatch.com/ORIS-Watches-61.html]ORIS Watches[/url]
[url=http://www.bigbigwatch.com/PANERAI-Watches-62.html]PANERAI Watches[/url]
[url=http://www.bigbigwatch.com/PARMIGIANI-FLEURIER-Watches-63.html]PARMIGIANI FLEURIER Watches[/url]
[url=http://www.bigbigwatch.com/PATEK-PHILIPPE-Watches-64.html]PATEK PHILIPPE Watches[/url]
[url=http://www.bigbigwatch.com/PAUL-PICOT-Watches-65.html]PAUL PICOT Watches[/url]
[url=http://www.bigbigwatch.com/PIAGET-Watches-66.html]PIAGET Watches[/url]
[url=http://www.bigbigwatch.com/PORSCHE-DESIGN-Watches-67.html]PORSCHE DESIGN Watches[/url]
[url=http://www.bigbigwatch.com/PRADA-Watches-68.html]PRADA Watches[/url]
[url=http://www.bigbigwatch.com/RADO-Watches-69.html]RADO Watches[/url]
[url=http://www.bigbigwatch.com/RICHARD-MILLE-Watches-155.html]RICHARD MILLE Watches[/url]
[url=http://www.bigbigwatch.com/ROMAIN-JEROME-Watches-127.html]ROMAIN JEROME Watches[/url]
[url=http://www.bigbigwatch.com/ROGER-DUBUIS-Watches-70.html]ROGER DUBUIS Watches[/url]
[url=http://www.bigbigwatch.com/ROLEX-Watches-71.html]ROLEX Watches[/url]
[url=http://www.bigbigwatch.com/TAG-HEUER-Watches-72.html]TAG HEUER Watches[/url]
[url=http://www.bigbigwatch.com/TECHNOMARINE-Watches-73.html]TECHNOMARINE Watches[/url]
[url=http://www.bigbigwatch.com/TUDOR-Watches-128.html]TUDOR Watches[/url]
[url=http://www.bigbigwatch.com/U-BOAT-Watches-122.html]U-BOAT Watches[/url]
[url=http://www.bigbigwatch.com/ULYSSE-NARDIN-Watches-154.html]ULYSSE NARDIN Watches[/url]
[url=http://www.bigbigwatch.com/VACH.-CONSTANTINE-Watches-74.html]VACH. CONSTANTINE Watches[/url]
[url=http://www.bigbigwatch.com/VERSACE-Watches-75.html]VERSACE Watches[/url]
[url=http://www.bigbigwatch.com/ZENITH-Watches-76.html]ZENITH Watches[/url]
[url=http://www.edhardyvip.com/Ed-Hardy.html]Ed Hardy[/url]
[url=http://www.edhardyvip.com/Ed-Hardy--Men--Apparel.html]Ed Hardy Men Apparel[/url]
[url=http://www.edhardyvip.com/Ed-Hardy-Women-Apparel.html]Ed Hardy Women Apparel[/url]
[url=http://www.edhardyvip.com/Ed-Hardy--Kid-Apparel.html]Ed Hardy Kid Apparel[/url]
[url=http://www.edhardyvip.com/Ed-Hardy-ACCESSORIES.html]Ed Hardy ACCESSORIES[/url]
[url=http://www.edhardyvip.com/Christan-Audigier.html]Christan Audigier[/url]
[url=http://www.edhardyvip.com/Christan-Audigier-Men-APPAREL.html]Christan Audigier Men APPAREL[/url]
[url=http://www.edhardyvip.com/Christan-Audigier-Women-APPAREL.html]Christan Audigier Women APPAREL[/url]
[url=http://www.edhardyvip.com/other-APPAREL-&ACCESSORIES.html;]other APPAREL &ACCESSORIES[/url]
[url=http://www.edhardyvip.com/other-Apparel.html]other Apparel[/url]
[url=http://www.edhardyvip.com/other-ACCESSORIES.html]other ACCESSORIES[/url]
[url=http://www.luxurysupplierworld.com/Louis-Vuitton-Handbags.html]Louis Vuitton Handbags[/url]
[url=http://www.luxurysupplierworld.com/Chanel-Handbags.html]Chanel Handbags[/url]
[url=http://www.luxurysupplierworld.com/Gucci-Handbags.html]Gucci Handbags[/url]
[url=http://www.luxurysupplierworld.com/Balenciaga-Handbags.html]Balenciaga Handbags[/url]
[url=http://www.luxurysupplierworld.com/Fendi-Handbags.html]Fendi Handbags[/url]
[url=http://www.luxurysupplierworld.com/Yves-Saint-Laurent-Handbags.html]Yves Saint Laurent Handbags[/url]
[url=http://www.luxurysupplierworld.com/Christian-Dior-Handbags.html]Christian Dior Handbags[/url]
[url=http://www.luxurysupplierworld.com/Burberry-Handbags.html]Burberry Handbags[/url]
[url=http://www.luxurysupplierworld.com/Cartier-Handbags.html]Cartier Handbags[/url]
[url=http://www.luxurysupplierworld.com/Celine-Handbags.html]Celine Handbags[/url]
[url=http://www.luxurysupplierworld.com/Chloe-Handbags.html]Chloe Handbags[/url]
[url=http://www.luxurysupplierworld.com/Coach-Handbags.html]Coach Handbags[/url]
[url=http://www.luxurysupplierworld.com/Dolce-and-Gabbana-Handbags.html]Dolce and Gabbana Handbags[/url]
[url=http://www.luxurysupplierworld.com/BALLY-Handbags.html]BALLY Handbags[/url]
[url=http://www.luxurysupplierworld.com/Givenchy-Handbags.html]Givenchy Handbags[/url]
[url=http://www.luxurysupplierworld.com/Hermes-Handbags.html]Hermes Handbags[/url]
[url=http://www.luxurysupplierworld.com/Jimmy-Choo-Handbags.html]Jimmy Choo Handbags[/url]
[url=http://www.luxurysupplierworld.com/Juicy-Couture-Handbags.html]Juicy Couture Handbags[/url]
[url=http://www.luxurysupplierworld.com/Lancel-Handbags.html]Lancel Handbags[/url]
[url=http://www.luxurysupplierworld.com/Marc-Jacobs-Handbags.html]Marc Jacobs Handbags[/url]
[url=http://www.luxurysupplierworld.com/Miu-Miu-Handbags.html]Miu Miu Handbags[/url]
[url=http://www.luxurysupplierworld.com/Mulberry-Handbags.html]Mulberry Handbags[/url]
[url=http://www.luxurysupplierworld.com/Prada-Handbags.html]Prada Handbags[/url]
[url=http://www.luxurysupplierworld.com/Thomas-Wylde-Handbags.html]Thomas Wylde Handbags[/url]
[url=http://www.luxurysupplierworld.com/Versace-Handbags.html]Versace Handbags[/url]
[url=http://www.luxurysupplierworld.com/Bottega-Veneta-Handbags.html]Bottega Veneta Handbags[/url]
[url=http://www.luxurysupplierworld.com/Brand-Wallet.html]Brand Wallet[/url]
[url=http://www.jerseysaler.com/NFL_Teams.html]NFL Teams[/url]
[url=http://www.jerseysaler.com/Arizona_Cardinals_Teams.html]Arizona Cardinals[/url]
[url=http://www.jerseysaler.com/Atlanta_Falcons_Teams.html]Atlanta Falcons[/url]
[url=http://www.jerseysaler.com/Baltimore_Ravens_Teams.html]Baltimore Ravens[/url]
[url=http://www.jerseysaler.com/Buffalo_Bills_Teams.html]Buffalo Bills[/url]
[url=http://www.jerseysaler.com/Carolina_Panthers_Teams.html]Carolina Panthers[/url]
[url=http://www.jerseysaler.com/Chicago_Bears_Teams.html]Chicago Bears[/url]
[url=http://www.jerseysaler.com/Cincinnati_Bengals_Teams.html]Cincinnati Bengals[/url]
[url=http://www.jerseysaler.com/Cleveland_Browns_Teams.html]Cleveland Browns[/url]
[url=http://www.jerseysaler.com/Dallas_Cowboys_Teams.html]Dallas Cowboys[/url]
[url=http://www.jerseysaler.com/Denver_Broncos_Teams.html]Denver Broncos[/url]
[url=http://www.jerseysaler.com/Detroit_Lions_Teams.html]Detroit Lions[/url]
[url=http://www.jerseysaler.com/Green_Bay_Packers_Teams.html]Green Bay Packers[/url]
[url=http://www.jerseysaler.com/Houston_Texans_Teams.html]Houston Texans[/url]
[url=http://www.jerseysaler.com/Indianapolis_Colts_Teams.html]Indianapolis Colts[/url]
[url=http://www.jerseysaler.com/Kansas_City_Chiefs_Teams.html]Kansas City Chiefs[/url]
[url=http://www.jerseysaler.com/Minnesota_Vikings_Teams.html]Minnesota Vikings[/url]
[url=http://www.jerseysaler.com/New_England_Patriots_Teams.html]New England Patriots[/url]
[url=http://www.jerseysaler.com/New_Orleans_Saints_Teams.html]New Orleans Saints[/url]
[url=http://www.jerseysaler.com/New_York_Giants_Teams.html]New York Giants[/url]
[url=http://www.jerseysaler.com/New_York_Jets_Teams.html]New York Jets[/url]
[url=http://www.jerseysaler.com/Oakland_Raiders_Teams.html]Oakland Raiders[/url]
[url=http://www.jerseysaler.com/Philadelphia_Eagles_Teams.html]Philadelphia Eagles[/url]
[url=http://www.jerseysaler.com/Pittsburgh_Steelers_Teams.html]Pittsburgh Steelers[/url]
[url=http://www.jerseysaler.com/San_Diego_Chargers_Teams.html]San Diego Chargers[/url]
[url=http://www.jerseysaler.com/San_Francisco_49ers_Teams.html]San Francisco 49ers[/url]
[url=http://www.jerseysaler.com/Seattle_Seahawks_Teams.html]Seattle Seahawks[/url]
[url=http://www.jerseysaler.com/St._Louis_Rams_Teams.html]St. Louis Rams[/url]
[url=http://www.jerseysaler.com/Super_Bowl_Merchandise_Teams.html]Super Bowl Merchandise[/url]
[url=http://www.jerseysaler.com/Super_Bowl_XLII_Gear_Teams.html]Super Bowl XLII Gear[/url]
[url=http://www.jerseysaler.com/Tampa_Bay_Buccaneers_Teams.html]Tampa Bay Buccaneers[/url]
[url=http://www.jerseysaler.com/Tennessee_Titans_Teams.html]Tennessee Titans[/url]
[url=http://www.jerseysaler.com/Washington_Redskins_Teams.html]Washington Redskins[/url]
[url=http://www.jerseysaler.com/Miami_Dolphins_Teams.html]Miami Dolphins[/url]
[url=http://www.jerseysaler.com/MLB_Teams.html]MLB Teams[/url]
[url=http://www.jerseysaler.com/Arizona_Diamondbacks_Teams.html]Arizona Diamondbacks[/url]
[url=http://www.jerseysaler.com/Atlanta_Braves_Teams.html]Atlanta Braves[/url]
[url=http://www.jerseysaler.com/Baltimore_Orioles_Teams.html]Baltimore Orioles[/url]
[url=http://www.jerseysaler.com/Boston_Red_Sox_Teams.html]Boston Red Sox[/url]
[url=http://www.jerseysaler.com/Chicago_Cubs_Teams.html]Chicago Cubs[/url]
[url=http://www.jerseysaler.com/Chicago_White_Sox_Teams.html]Chicago White Sox[/url]
[url=http://www.jerseysaler.com/Cincinnati_Reds_Teams.html]Cincinnati Reds[/url]
[url=http://www.jerseysaler.com/Cleveland_Indians_Teams.html]Cleveland Indians[/url]
[url=http://www.jerseysaler.com/Colorado_Rockies_Teams.html]Colorado Rockies[/url]
[url=http://www.jerseysaler.com/Detroit_Tigers_Teams.html]Detroit Tigers[/url]
[url=http://www.jerseysaler.com/Florida_Marlins_Teams.html]Florida Marlins[/url]
[url=http://www.jerseysaler.com/Houston_Astros_Teams.html]Houston Astros[/url]
[url=http://www.jerseysaler.com/Kansas_City_Royals_Teams.html]Kansas City Royals[/url]
[url=http://www.jerseysaler.com/Los_Angeles_Dodgers_Teams.html]Los Angeles Dodgers[/url]
[url=http://www.jerseysaler.com/Los_Angeles_Angels_Teams.html]Los Angeles Angels[/url]
[url=http://www.jerseysaler.com/Milwaukee_Brewers_Teams.html]Milwaukee Brewers[/url]
[url=http://www.jerseysaler.com/Minnesota_Twins_Teams.html]Minnesota Twins[/url]
[url=http://www.jerseysaler.com/New_York_Mets_Teams.html]New York Mets[/url]
[url=http://www.jerseysaler.com/New_York_Yankees_Teams.html]New York Yankees[/url]
[url=http://www.jerseysaler.com/Oakland_Athletics_Teams.html]Oakland Athletics[/url]
[url=http://www.jerseysaler.com/Philadelphia_Phillies_Teams.html]Philadelphia Phillies[/url]
[url=http://www.jerseysaler.com/Pittsburgh_Pirates_Teams.html]Pittsburgh Pirates[/url]
[url=http://www.jerseysaler.com/San_Diego_Padres_Teams.html]San Diego Padres[/url]
[url=http://www.jerseysaler.com/San_Francisco_Giants_Teams.html]San Francisco Giants[/url]
[url=http://www.jerseysaler.com/Seattle_Mariners_Teams.html]Seattle Mariners[/url]
[url=http://www.jerseysaler.com/St._Louis_Cardinals_Teams.html]St. Louis Cardinals[/url]
[url=http://www.jerseysaler.com/Tampa_Bay_Devil_Rays_Teams.html]Tampa Bay Devil Rays[/url]
[url=http://www.jerseysaler.com/Texas_Rangers_Teams.html]Texas Rangers[/url]
[url=http://www.jerseysaler.com/Toronto_Blue_Jays_Teams.html]Toronto Blue Jays[/url]
[url=http://www.jerseysaler.com/Washington_Nationals_Teams.html]Washington Nationals[/url]
[url=http://www.jerseysaler.com/NHL_Teams.html]NHL Teams[/url]
[url=http://www.jerseysaler.com/Anaheim_Ducks_Teams.html]Anaheim Ducks[/url]
[url=http://www.jerseysaler.com/Atlanta_Thrashers_Teams.html]Atlanta Thrashers[/url]
[url=http://www.jerseysaler.com/Boston_Bruins_Teams.html]Boston Bruins[/url]
[url=http://www.jerseysaler.com/Buffalo_Sabres_Teams.html]Buffalo Sabres[/url]
[url=http://www.jerseysaler.com/Calgary_Flames_Teams.html]Calgary Flames[/url]
[url=http://www.jerseysaler.com/Carolina_Hurricanes_Teams.html]Carolina Hurricanes[/url]
[url=http://www.jerseysaler.com/Chicago_Blackhawks_Teams.html]Chicago Blackhawks[/url]
[url=http://www.jerseysaler.com/Colorado_Avalanche_Teams.html]Colorado Avalanche[/url]
[url=http://www.jerseysaler.com/Columbus_Blue_Jackets_Teams.html]Columbus Blue Jackets[/url]
[url=http://www.jerseysaler.com/Dallas_Stars_Teams.html]Dallas Stars[/url]
[url=http://www.jerseysaler.com/Detroit_Red_Wings_Teams.html]Detroit Red Wings[/url]
[url=http://www.jerseysaler.com/Edmonton_Oilers_Teams.html]Edmonton Oilers[/url]
[url=http://www.jerseysaler.com/Florida_Panthers_Teams.html]Florida Panthers[/url]
[url=http://www.jerseysaler.com/Hartford_Whalers_Teams.html]Hartford Whalers[/url]
[url=http://www.jerseysaler.com/Los_Angeles_Kings_Teams.html]Los Angeles Kings[/url]
[url=http://www.jerseysaler.com/Minnesota_Wild_Teams.html]Minnesota Wild[/url]
[url=http://www.jerseysaler.com/Montreal_Canadiens_Teams.html]Montreal Canadiens[/url]
[url=http://www.jerseysaler.com/Nashville_Predators_Teams.html]Nashville Predators[/url]
[url=http://www.jerseysaler.com/New_Jersey_Devils_Teams.html]New Jersey Devils[/url]
[url=http://www.jerseysaler.com/New_York_Islanders_Teams.html]New York Islanders[/url]
[url=http://www.jerseysaler.com/New_York_Rangers_Teams.html]New York Rangers[/url]
[url=http://www.jerseysaler.com/Ottawa_Senators_Teams.html]Ottawa Senators[/url]
[url=http://www.jerseysaler.com/Philadelphia_Flyers_Teams.html]Philadelphia Flyers[/url]
[url=http://www.jerseysaler.com/Phoenix_Coyotes_Teams.html]Phoenix Coyotes[/url]
[url=http://www.jerseysaler.com/Pittsburgh_Penguins_Teams.html]Pittsburgh Penguins[/url]
[url=http://www.jerseysaler.com/San_Jose_Sharks_Teams.html]San Jose Sharks[/url]
[url=http://www.jerseysaler.com/St._Louis_Blues_Teams.html]St. Louis Blues[/url]
[url=http://www.jerseysaler.com/Tampa_Bay_Lightning_Teams.html]Tampa Bay Lightning[/url]
[url=http://www.jerseysaler.com/Toronto_Maple_Leafs_Teams.html]Toronto Maple Leafs[/url]
[url=http://www.jerseysaler.com/Vancouver_Canucks_Teams.html]Vancouver Canucks[/url]
[url=http://www.jerseysaler.com/Washington_Capitals_Teams.html]Washington Capitals[/url]
[url=http://www.jerseysaler.com/World_All_Stars_Teams.html]World All Stars[/url]
[url=http://www.jerseysaler.com/COLLEGE_Teams.html]COLLEGE Teams[/url]
[url=http://www.jerseysaler.com/Allteams.html]All Tmams[/url]
[url=http://www.bigbigwatch.com/ROLEX-Watches-71.html]Rolex Watches[/url]
[url=http://www.bigbigwatch.com/TAG-HEUER-Watches-72.html]Tag Heuer Watches[/url]
[url=http://www.bigbigwatch.com/TECHNOMARINE-Watches-73.html]Technomarine Watches[/url]
[url=http://www.bigbigwatch.com/VACH.-CONSTANTINE-Watches-74.html]Vach. Constantine Watches[/url]
[url=http://www.bigbigwatch.com/VERSACE-Watches-75.html]Versace Watches[/url]
[url=http://www.bigbigwatch.com/ZENITH-Watches-76.html]Zenith Watches[/url]
[url=http://www.bigbigwatch.com/CHRONOMATIC-Watches-109.html]Chronomatic Watches[/url]
[url=http://www.bigbigwatch.com/MONTBRILLIANT-Watches-111.html]Montbrilliant Watches[/url]
[url=http://www.bigbigwatch.com/SUPEROCEAN-Watches-112.html]Superocean Watches[/url]
[url=http://www.taylormadebrand.com/index.html]Taylormade R9 Drivers[/url]
[url=http://www.taylormadebrand.com/Drivers.html]Drivers[/url]
[url=http://www.taylormadebrand.com/Irons.html]Irons[/url]
[url=http://www.taylormadebrand.com/Putter.html]Putter[/url]
[url=http://www.taylormadebrand.com/Wedge.html]Wedge[/url]
[url=http://www.taylormadebrand.com/Fairway_Wood.html]Fairway Wood[/url]
[url=http://www.taylormadebrand.com/Hybrids.html]Hybrids[/url]
[url=http://www.taylormadebrand.com/Balls.html]Balls[/url]
[url=http://www.taylormadebrand.com/Shoes.html]Shoes[/url]
[url=http://www.taylormadebrand.com/Accessories.html]Accessories[/url]
[url=http://www.taylormadebrand.com/Taylormade_Wedges.html]Taylormade Wedges[/url]
[url=http://www.taylormadebrand.com/Titleist_Wedges.html]Titleist Wedges[/url]
[url=http://www.taylormadebrand.com/Callaway_Fairway_Woods.html]Callaway Fairway Woods[/url]
[url=http://www.taylormadebrand.com/Mizuno_Fairway_Woods.html]Mizuno Fairway Woods[/url]
[url=http://www.taylormadebrand.com/Nike_Fairway_Woods.html]Nike Fairway Woods[/url]
[url=http://www.taylormadebrand.com/Ping_Fairway_Woods.html]Ping Fairway Woods[/url]
[url=http://www.taylormadebrand.com/Nike_Shoes.html]Nike Shoes[/url]
[url=http://www.taylormadebrand.com/Taylormade_Fairway_Woods.html]Taylormade Fairway Woods[/url]
[url=http://www.taylormadebrand.com/Callaway_Hybrids.html]Callaway Hybrids[/url]
[url=http://www.taylormadebrand.com/Taylormade_Hybrids.html]Taylormade Hybrids[/url]
[url=http://www.taylormadebrand.com/Callaway_Balls.html]Callaway Balls[/url]
[url=http://www.taylormadebrand.com/Nike_Balls.html]Nike Balls[/url]
[url=http://www.taylormadebrand.com/Taylormade_Balls.html]Taylormade Balls[/url]
[url=http://www.taylormadebrand.com/Titleist_Balls.html]Titleist Balls[/url]
[url=http://www.taylormadebrand.com/Adidas_Bags.html]Adidas Bags[/url]
[url=http://www.taylormadebrand.com/Ping_Bags.html]Ping Bags[/url]
[url=http://www.taylormadebrand.com/Titleist_Bags.html]Titleist Bags[/url]
[url=http://www.taylormadebrand.com/Callaway_Bags.html]Callaway Bags[/url]
[url=http://www.taylormadebrand.com/Taylormade_Bags.html]Taylormade Bags[/url]
[url=http://www.taylormadebrand.com/Nike_Bags.html]Nike Bags[/url]
[url=http://www.taylormadebrand.com/Adidas_Shoes.html]Adidas Shoes[/url]
[url=http://www.taylormadebrand.com/Footjoy_Shoes.html]Footjoy Shoes[/url]
[url=http://www.taylormadebrand.com/Callaway_Shoes.html]Callaway Shoes[/url]
[url=http://www.taylormadebrand.com/Golf_Glove.html]Golf Glove[/url]
[url=http://www.taylormadebrand.com/Headcover.html]Headcover[/url]
[url=http://www.taylormadebrand.com/Sunglasses.html]Sunglasses[/url]
[url=http://www.taylormadebrand.com/Outwear.html]Outwear[/url]
[url=http://www.taylormadebrand.com/T-shirt.html]T-shirt[/url]
[url=http://www.taylormadebrand.com/Callaway_Drivers.html]Callaway Drivers[/url]
[url=http://www.taylormadebrand.com/Cleveland_Drivers.html]Cleveland Drivers[/url]
[url=http://www.taylormadebrand.com/Mizuno_Drivers.html]Mizuno Drivers[/url]
[url=http://www.taylormadebrand.com/Nike_Drivers.html]Nike Drivers[/url]
[url=http://www.taylormadebrand.com/Ping_Drivers.html]Ping Drivers[/url]
[url=http://www.taylormadebrand.com/Taylormade_Drivers.html]Taylormade Drivers[/url]
[url=http://www.taylormadebrand.com/Titleist_Drivers.html]Titleist Drivers[/url]
[url=http://www.taylormadebrand.com/Callaway_Irons.html]Callaway Irons[/url]
[url=http://www.taylormadebrand.com/Cleveland_Irons.html]Cleveland Irons[/url]
[url=http://www.taylormadebrand.com/Mizuno_Irons.html]Mizuno Irons[/url]
[url=http://www.taylormadebrand.com/Nike_Irons.html]Nike Irons[/url]
[url=http://www.taylormadebrand.com/Ping_Irons.html]Ping Irons[/url]
[url=http://www.taylormadebrand.com/Taylormade_Irons.html]Taylormade Irons[/url]
[url=http://www.taylormadebrand.com/Titleist_Irons.html]Titleist Irons[/url]
[url=http://www.taylormadebrand.com/Odyssey_Putters.html]Odyssey Putters[/url]
[url=http://www.taylormadebrand.com/Ping_Putters.html]Ping Putters[/url]
[url=http://www.taylormadebrand.com/Taylormade_Putters.html]Taylormade Putters[/url]
[url=http://www.taylormadebrand.com/Titleist_Putters.html]Titleist Putters[/url]
[url=http://www.taylormadebrand.com/Yes_Putters.html]Yes Putters[/url]
[url=http://www.taylormadebrand.com/Callaway_Wedges.html]Callaway Wedges[/url]
[url=http://www.taylormadebrand.com/Cleveland_Wedges.html]Cleveland Wedges[/url]
[url=http://www.taylormadebrand.com/Clevelend_Fairway_Wood.html]Clevelend Fairway Wood[/url]
[url=http://www.taylormadebrand.com/Ping_Hybrids.html]Ping Hybrids[/url]
[url=http://www.sportsshoes24.net/index.html]Wholesale Nike Shoes[/url]
[url=http://www.sportsshoes24.net/Nike-Shoes-wholesale-1.html]Nike Shoes[/url]
[url=http://www.sportsshoes24.net/Adidas-Shoes-wholesale-2.html]Adidas Shoes[/url]
[url=http://www.sportsshoes24.net/LV-Shoes-wholesale-13.html]LV Shoes[/url]
[url=http://www.sportsshoes24.net/D-and-G-Shoes-wholesale-12.html]D & G Shoes[/url]
[url=http://www.sportsshoes24.net/Puma-Shoes-wholesale-9.html]Puma Shoes[/url]
[url=http://www.sportsshoes24.net/Gucci-Shoes-wholesale-10.html]Gucci Shoes[/url]
[url=http://www.sportsshoes24.net/Prada-Shoes-wholesale-11.html]Prada Shoes[/url]
[url=http://www.sportsshoes24.net/Hogan-Shoes-wholesale-14.html]Hogan Shoes[/url]
[url=http://www.sportsshoes24.net/Lacoste-Shoes-wholesale-17.html]Lacoste Shoes[/url]
[url=http://www.sportsshoes24.net/Converse-Shoes-wholesale-18.html]Converse Shoes[/url]
[url=http://www.sportsshoes24.net/Ed-hardy-Shoes-wholesale-19.html]Ed-hardy Shoes[/url]
[url=http://www.sportsshoes24.net/Dsquared2-Shoes-wholesale-15.html]Dsquared2 Shoes[/url]
[url=http://www.sportsshoes24.net/Timberland-Shoes-wholesale-16.html]Timberland Shoes[/url]
[url=http://www.sportsshoes24.net/T-Shirt-wholesale-113.html]T-Shirt[/url]
[url=http://www.sportsshoes24.net/Jeans-wholesale-111.html]Jeans[/url]
[url=http://www.sportsshoes24.net/Hoodies-wholesale-112.html]Hoodies[/url]
[url=http://www.tradecms.com]TradeCMS[/url]
[url=http://www.global-yellow-pages.org]Yellow Pages[/url]
[url=http://www.global-yellow-pages.org]Global Yellow Pages[/url]
[url=http://www.kingsoft-duba.com.cn]金山毒霸[/url]
[url=http://www.kingsoft-duba.com.cn]毒霸[/url]
[url=http://www.youasky.com]有啊[/url]
[url=http://www.youasky.com]有呀[/url]
[url=http://www.youasky.com]百度有啊[/url]
[url=http://www.oilpaintingsources.com]oil painting[/url]
[url=http://www.buyarts123.com]oil painting[/url]
[url=http://www.buyarts123.com]oil paintings[/url]
[url=http://www.oilpaintingsources.com]oil paintings[/url]
[url=http://www.oilpaintingsources.com]wholesale oil painting[/url]
[url=http://www.oilpaintingsources.com]oil painting wholesale[/url]
[url=http://www.oilpaintingsources.com]china oil painting wholesale[/url]
[url=http://www.lacostebrand.com]Lacoste[/url]
[url=http://www.lacostebrand.com]Lacoste shirts[/url]
[url=http://www.lacostebrand.com]Lacoste shoes[/url]
[url=http://www.myuggshop.com]ugg boots[/url]
[url=http://www.myuggshop.com]UGG[/url]
[url=http://www.saleconverse.com]Converse[/url]
[url=http://www.saleconverse.com]Converse shoes[/url]
[url=http://www.embroiderysources.com]Embroidery[/url]
[url=http://www.embroiderysources.com]Embroidery Designs[/url]
[url=http://www.embroiderysources.com]Advanced Embroidery Designs[/url]
[url=http://www.embroiderysources.com]FREE Machine Embroidery Designs[/url]
[url=http://www.jerseysaler.com]NBA Jerseys[/url]
[url=http://www.jerseysaler.com]MLB Jerseys[/url]
[url=http://www.thenextvogue.com]China Wholesale[/url]
[url=http://www.uggboots4sale.com]UGG Boots[/url]
[url=http://www.uggboots4sale.com]Authentic Ugg Boots[/url]
[url=http://www.uggboots4sale.com]Boots[/url]
[url=http://www.jerseysaler.com/NBA_Teams.html]NBA Teams[/url]
[url=http://www.jerseysaler.com/Atlanta_Hawks_Teams.html]Atlanta Hawks[/url]
[url=http://www.jerseysaler.com/Boston_Celtics_Teams.html]Boston Celtics[/url]
[url=http://www.jerseysaler.com/Charlotte_Bobcats_Teams.html]Charlotte Bobcats[/url]
[url=http://www.jerseysaler.com/Chicago_Bulls_Teams.html]Chicago Bulls[/url]
[url=http://www.jerseysaler.com/Cleveland_Cavaliers_Teams.html]Cleveland Cavaliers[/url]
[url=http://www.jerseysaler.com/Dallas_Mavericks_Teams.html]Dallas Mavericks[/url]
[url=http://www.jerseysaler.com/Denver_Nuggets_Teams.html]Denver Nuggets[/url]
[url=http://www.jerseysaler.com/Detroit_Pistons_Teams.html]Detroit Pistons[/url]
[url=http://www.jerseysaler.com/Golden_State_Warriors_Teams.html]Golden State Warriors[/url]
[url=http://www.jerseysaler.com/Houston_Rockets_Teams.html]Houston Rockets[/url]
[url=http://www.jerseysaler.com/Indiana_Pacers_Teams.html]Indiana Pacers[/url]
[url=http://www.jerseysaler.com/Los_Angeles_Clippers_Teams.html]Los Angeles Clippers[/url]
[url=http://www.jerseysaler.com/Los_Angeles_Lakers_Teams.html]Los Angeles Lakers[/url]
[url=http://www.jerseysaler.com/Memphis_Grizzlies_Teams.html]Memphis Grizzlies[/url]
[url=http://www.jerseysaler.com/Miami_Heat_Teams.html]Miami Heat[/url]
[url=http://www.jerseysaler.com/Milwaukee_Bucks_Teams.html]Milwaukee Bucks[/url]
[url=http://www.jerseysaler.com/Minnesota_Timberwolves_Teams.html]Minnesota Timberwolves[/url]
[url=http://www.jerseysaler.com/New_Jersey_Nets_Teams.html]New Jersey Nets[/url]
[url=http://www.jerseysaler.com/New_Orleans_Hornets_Teams.html]New Orleans Hornets[/url]
[url=http://www.jerseysaler.com/New_York_Knicks_Teams.html]New York Knicks[/url]
[url=http://www.jerseysaler.com/Orlando_Magic_Teams.html]Orlando Magic[/url]
[url=http://www.jerseysaler.com/Philadelphia_76ers_Teams.html]Philadelphia 76ers[/url]
[url=http://www.jerseysaler.com/Phoenix_Suns_Teams.html]Phoenix Suns[/url]
[url=http://www.jerseysaler.com/Portland_Trail_Blazers_Teams.html]Portland Trail Blazers[/url]
[url=http://www.jerseysaler.com/Sacramento_Kings_Teams.html]Sacramento Kings[/url]
[url=http://www.jerseysaler.com/San_Antonio_Spurs_Teams.html]San Antonio Spurs[/url]
[url=http://www.jerseysaler.com/Seattle_SuperSonics_Teams.html]Seattle SuperSonics[/url]
[url=http://www.jerseysaler.com/Toronto_Raptors_Teams.html]Toronto Raptors[/url]
[url=http://www.jerseysaler.com/Utah_Jazz_Teams.html]Utah Jazz[/url]
[url=http://www.jerseysaler.com/Washington_Wizards_Teams.html]Washington Wizards[/url]
[url=http://www.bigbigwatch.com/HERMES-Watches-51.html]Hermes Watches[/url]
[url=http://www.bigbigwatch.com/HUBLOT-Watches-89.html]Hublot Watches[/url]
[url=http://www.bigbigwatch.com/IWC-Watches-52.html]Iwc Watches[/url]
[url=http://www.bigbigwatch.com/JACOB-and-CO-Watches-53.html]Jacob & Co Watches[/url]
[url=http://www.bigbigwatch.com/JAEGER-LE-COULTRE-Watches-54.html]Jaeger Le Coultre Watches[/url]
[url=http://www.bigbigwatch.com/LONGINES-Watches-55.html]Longines Watches[/url]
[url=http://www.bigbigwatch.com/LOUIS-VUITTON-Watches-56.html]Louis Vuitton Watches[/url]
[url=http://www.bigbigwatch.com/MAURICE-and-LACROIX-Watches-57.html]Maurice & Lacroix Watches[/url]
[url=http://www.bigbigwatch.com/MONT-BLANC-Watches-58.html]Mont Blanc Watches[/url]
[url=http://www.bigbigwatch.com/MOVADO-Watches-59.html]Movado Watches[/url]
[url=http://www.bigbigwatch.com/ORIS-Watches-61.html]Oris Watches[/url]
[url=http://www.bigbigwatch.com/PANERAI-Watches-62.html]Panerai Watches[/url]
[url=http://www.bigbigwatch.com/PARMIGIANI-FLEURIER-Watches-63.html]Parmigiani Fleurier Watches[/url]
[url=http://www.bigbigwatch.com/PATEK-PHILIPPE-Watches-64.html]Patek Philippe Watches[/url]
[url=http://www.bigbigwatch.com/PAUL-PICOT-Watches-65.html]Paul Picot Watches[/url]
[url=http://www.bigbigwatch.com/PIAGET-Watches-66.html]Piaget Watches[/url]
[url=http://www.bigbigwatch.com/PORSCHE-DESIGN-Watches-67.html]Porsche Desing Watches[/url]
[url=http://www.bigbigwatch.com/PRADA-Watches-68.html]Prada Watches[/url]
[url=http://www.bigbigwatch.com/RADO-Watches-69.html]Rado Watches[/url]
[url=http://www.bigbigwatch.com/ROGER-DUBUIS-Watches-70.html]Roger Dubuis Watches[/url]
[url=http://www.ghder.com]ghd[/url]
[url=http://www.ghder.com]chi[/url]
[url=http://www.ghdVSCHI.com]ghd[/url]
[url=http://www.ghdVSCHI.com]chi[/url]
[url=http://www.goodghd.com]ghd[/url]
[url=http://www.goodghd.com]chi[/url]
[url=http://www.ghdmark.com]ghd[/url]
[url=http://www.ghdmark.com]chi[/url]
[url=http://www.macmakeupshop.com]MAC Makeup[/url]
[url=http://www.macmakeupshop.com]MAC Cosmetics[/url]
[url=http://www.macmakeupshop.com]discount mac makeup[/url]
[url=http://www.macmakeupshop.com]MAC Eye Shadow[/url]
[url=http://www.edhardyvip.com]ed hardy[/url]
[url=http://www.edhardyvip.com]ed hardy clothing[/url]
[url=http://www.edhardyvip.com]ed hardy shoes[/url]
[url=http://www.ghder.com]ghd[/url]
[url=http://www.ghder.com]ghd hair straighteners[/url]
[url=http://www.ghder.com]chi[/url]
[url=http://www.ghder.com]CHI straightener[/url]
[url=http://www.ghder.com]ghd straighteners[/url]
[url=http://www.ghder.com]chi hair straightener[/url]
[url=http://www.ghdvschi.com]ghd[/url]
[url=http://www.ghdvschi.com]ghd hair straighteners[/url]
[url=http://www.ghdvschi.com]chi[/url]
[url=http://www.ghdvschi.com]CHI straightener[/url]
[url=http://www.ghdvschi.com]ghd straighteners[/url]
[url=http://www.ghdvschi.com]chi hair straightener[/url]
[url=http://www.goodghd.com]ghd[/url]
[url=http://www.goodghd.com]ghd hair straighteners[/url]
[url=http://www.goodghd.com]chi[/url]
[url=http://www.goodghd.com]CHI straightener[/url]
[url=http://www.goodghd.com]ghd straighteners[/url]
[url=http://www.goodghd.com]chi hair straightener[/url]
[url=http://www.jerseysfans.com]nfl jerseys[/url]
[url=http://www.jerseysfans.com]nhl jerseys[/url]
[url=http://www.jerseysfans.com]soccer jerseys[/url]
[url=http://www.jerseysfans.com]nba jerseys[/url]
[url=http://www.jerseysfans.com]mlb jerseys[/url]
[url=http://www.jerseysfans.com]world cup[/url]
[url=http://www.jerseysfans.com]nfl apparel[/url]
[url=http://www.nfljerseysmall.com]nfl apparel[/url]
[url=http://www.nfljerseysmall.com]nfl jerseys[/url]
[url=http://www.nfljerseysmall.com]nhl jerseys[/url]
[url=http://www.nfljerseysmall.com]soccer jerseys[/url]
[url=http://www.nfljerseysmall.com]nba jerseys[/url]
[url=http://www.nfljerseysmall.com]mlb jerseys[/url]
[url=http://www.nfljerseysmall.com]world cup[/url]
[url=http://www.ohnike.com]nike shoes[/url]
[url=http://www.ohnike.com]wholesale nike shoes[/url]
[url=http://www.buyarts123.com]Oil paintings[/url]
[url=http://www.buyarts123.com]Oil painting[/url]
[url=http://www.buyarts123.com]Paintings for sale[/url]
[url=http://www.buyarts123.com]Handmade Oil Paintings[/url]
[url=http://www.buyarts123.com]portraits[/url]
[url=http://www.buyarts123.com]abstract paintings[/url]
[url=http://www.buyarts123.com]van gogh reproductions[/url]
[url=http://www.buyarts123.com]Monet paintings[/url]
[url=http://www.buyarts123.com]Klimt paintings[/url]
[url=http://www.buyarts123.com]Venice painting[/url]
[url=http://www.buyarts123.com]oil portraits[/url]
[url=http://www.chinabagworld.com]replica bags[/url]
[url=http://www.chinabagworld.com]Replica Handbags[/url]
[url=http://www.chinabagworld.com]Replica bags[/url]
[url=http://www.chinabagworld.com]Designer Handbags[/url]
[url=http://www.chinabagworld.com]Gucci bags[/url]
[url=http://www.chinabagworld.com]Chanel bags[/url]
[url=http://www.chinabagworld.com]シャネルの鞄[/url]
[url=http://www.chinabagworld.com]ルイヴィトンの鞄[/url]
[url=http://www.bigbigwatch.com]Rolex Watches[/url]
[url=http://www.swissluxurywatches.cn]Rolex Watches[/url]
[url=http://www.bigbigwatch.com]Breitling Watches[/url]
[url=http://www.radiation-eliminator.com]Computer Radiation Eliminator[/url]
[url=http://www.replica-watches.com.cn]Replica Watches[/url]
[url=http://www.cartierwatches.org.cn]Cartier Watches[/url]
[url=http://www.paneraiwatches.cn]Panerai Watches[/url]
[url=http://www.bvlgariwatches.cn]Bvlgari Watches[/url]
[url=http://www.breitlingwatches.cn]Breitling Watches[/url]
[url=http://www.tagheuerwatches.org.cn]Tag Heuer Watches[/url]
[url=http://www.patek-philippe.org.cn]Patek Philippe Watches[/url]
[url=http://www.radowatches.org.cn]Rado Watches[/url]
[url=http://www.montblancwatches.cn]Mont Blanc Watches[/url]
[url=http://www.alangesohne.org.cn]A.Lange & Sohne[/url]
[url=http://www.piagetwatches.org.cn]Piaget Watches[/url]
[url=http://www.vacheronconstantin-watches.cn]Vacheron Constantin Watches[/url]
[url=http://www.frankmuller.cn]Frank Muller Watches[/url]
[url=http://www.breitlingwatches.com.cn]Breitling Watches[/url]
[url=http://www.longinewatches.cn]Longine Watches[/url]
[url=http://www.hublotwatches.com.cn]Hublot Watches[/url]
[url=http://www.montblancwatches.com.cn]Mont Blanc Watches[/url]
[url=http://www.paneraiwatches.com.cn]Panerai Watches[/url]
[url=http://www.chopardwatches.cn]Chopard Watches[/url]
[url=http://www.vacheron-constantin-watches.cn]Vacheron Constantin Watches[/url]
[url=http://www.bellrosswatches.cn]Bell&Ross; Watches[/url]
[url=http://www.rolexwatches24.com]Rolex Watches[/url]
[url=http://www.ronghuaweb.com]Seo[/url]
[url=http://www.electromagnetic-radiation-eliminator.com]Electromagnetic Radiation Eliminator[/url]
[url=http://www.zblmw.com]珠宝联盟网[/url]
[url=http://www.zblmw.com]珠宝[/url]
[url=http://www.yiliboli.com]移动推拉门[/url]
[url=http://www.ecexp.com]全球贸易网[/url]
[url=http://www.ronghuaweb.com]荣华网络[/url]
[url=http://www.ronghuaweb.com]SEO[/url]
[url=http://www.seoogle.cn]搜索引擎优化[/url]
[url=http://www.seoogle.cn]seo[/url]
[url=http://www.ptbxpx.com]莆田培训[/url]
[url=http://www.mamabaike.com]怀孕知识[/url]
[url=http://www.61tonghua.com]童话[/url]
[url=http://www.61tonghua.com]童话故事[/url]
[url=http://www.sickfox.com]肮脏美学[/url]
[url=http://www.sickarts.com]肮脏美学[/url]
[url=http://www.putiantrade.com]莆田外贸[/url]
[url=http://www.tradetalk.cn]贸易通[/url]
[url=http://www.ronghuaweb.com]莆田网络公司[/url]
[url=http://www.ptall.com]莆田[/url]
[url=http://www.ptall.com]莆田新闻[/url]
[url=http://www.pthua.com]莆田话[/url]
[url=http://www.SEOGlobal.org]SEO[/url]
[url=http://www.258yuan.com]二元店[/url]
[url=http://www.258yuan.com]两元店[/url]
[url=http://www.258yuan.com]精品店[/url]
[url=http://www.258shop.com]义乌小商品[/url]
[url=http://www.258shop.com]one dollar shop[/url]
[url=http://www.taylormadebrand.com]taylor made r7 cgb[/url]
[url=http://www.taylormadebrand.com]taylormade golf[/url]
[url=http://www.ptseo.cn]莆田SEO[/url]
[url=http://www.semglobal.org]SEM[/url]
[url=http://www.61wenxue.com]儿童文学[/url]
[url=http://www.haixiajob.com]海峡人才[/url]
[url=http://www.mamabaike.com]怀孕知识[/url]
[url=http://www.zblmw.com]工艺美术城-中国.莆田[/url]
[url=http://www.zblmw.com]工艺美术城[/url]
[url=http://www.ohnike.com]Nike Shoes Wholesale[/url]
[url=http://www.Ohnike.com]Wholesale nike shoes[/url]
[url=http://www.sportsshoes24.net]wholesale nike shoes[/url]
[url=http://www.sportsshoes24.net]nike shoes wholesale[/url]
[url=http://www.rppWorld.com]Radiation Protection Products[/url]
[url=http://www.rppWorld.com]Radiation Protection[/url]
[url=http://www.txluck.com]japan txluck[/url]
[url=http://www.caizipifa.cn]才子男装[/url]
[url=http://www.caizipifa.cn]才子集团[/url]
[url=http://www.youhuapifa.net]油画批发[/url]
[url=http://www.youhuapifa.net]油画工作室[/url]
[url=http://www.youhuapifa.net]油画[/url]
[url=http://www.putiantrade.com]莆田专业外贸网站建设[/url]
[url=http://www.TeaLuck.com]chinese tea wholesale[/url]
[url=http://www.TeaLuck.com]tea[/url]
[url=http://www.semglobal.org]SEM[/url]
[url=http://www.mymoneybookers.cn]MoneyBookers[/url]
[url=http://www.LinRonghua.com]林荣华[/url]
[url=http://www.ptcxdz.com]石英谐振器[/url]
[url=http://www.ptcxdz.com]32.768khz[/url]
[url=http://www.ptcxdz.com]晶振[/url]
[url=http://www.ptcxdz.com]振晶[/url]
[url=http://www.ptcxdz.com]表晶[/url]
[url=http://www.ptflash.com.cn]莆田创意动画[/url]
[url=http://www.ptflash.com.cn]莆田动画[/url]
[url=http://www.baolande.com]保兰德[/url]
[url=http://www.putianyp.com]莆田黄页[/url]
[url=http://www.putianyp.com]莆田企业黄页[/url]
[url=http://www.ptcxdz.com]32.768Khz[/url]
[url=http://www.ptcxdz.com]石英谐振器[/url]
[url=http://www.GamesSEO.com]游戏外贸[/url]
[url=http://www.GamesSEO.com]游戏关键字优化[/url]
[url=http://www.GamesSEO.com]游戏优化[/url]
[url=http://www.GamesSEO.com]欧美网络游戏优化[/url]
[url=http://www.ptjsq.cn]莆田净水器[/url]
[url=http://www.ptjsq.cn]福建净水器[/url]
[url=http://www.ptjsq.cn]净水器[/url]
[url=http://www.0594seo.com]莆田SEO[/url]
[url=http://www.bigbigwatch.com/index.html]Rolex Watches[/url]
[url=http://www.bigbigwatch.com/WATCH-BOXES-Watches-91.html]Watch Boxes[/url]
[url=http://www.bigbigwatch.com/ALAIN-SILBERSTEIN-Watches-26.html]Alain Silberstein Watches[/url]
[url=http://www.bigbigwatch.com/ANONIMO-Watches-27.html]Anonimo Watches[/url]
[url=http://www.bigbigwatch.com/A.LANGE-and-SOHNE-Watches-28.html]A.Lange & Sohne Watches[/url]
[url=http://www.bigbigwatch.com/AUDEMARS-PIGUET-Watches-29.html]Audemars Piguet Watches[/url]
[url=http://www.bigbigwatch.com/BAUME-and-MERCIER-Watches-30.html]Baume & Mercier Watches[/url]
[url=http://www.bigbigwatch.com/BELL-and-ROSS-Watches-31.html]Bell & Ross Watches[/url]
[url=http://www.bigbigwatch.com/BLANCPAIN-Watches-32.html]Blancpain Watches[/url]
[url=http://www.bigbigwatch.com/BREGUET-Watches-33.html]Breguet Watches[/url]
[url=http://www.bigbigwatch.com/BREITLING-Watches-34.html]Breitling Watches[/url]
[url=http://www.bigbigwatch.com/BURBERRY-Watches-35.html]Burberry Watches[/url]
[url=http://www.bigbigwatch.com/BVLGARI-Watches-36.html]Bvlgari Watches[/url]
[url=http://www.bigbigwatch.com/CARTIER-Watches-37.html]Cartier Watches[/url]
[url=http://www.bigbigwatch.com/CHANEL-Watches-38.html]Chanel Watches[/url]
[url=http://www.bigbigwatch.com/CHOPARD-Watches-39.html]Chopard Watches[/url]
[url=http://www.bigbigwatch.com/CHRISTIAN-DIOR-Watches-40.html]Christian Dior Watches[/url]
[url=http://www.bigbigwatch.com/CHRONOSWISS-Watches-41.html]Chrconoswiss Watches[/url]
[url=http://www.bigbigwatch.com/CORUM-Watches-42.html]Corum Watches[/url]
[url=http://www.bigbigwatch.com/DEWITT-Watches-43.html]Dewitt Watches[/url]
[url=http://www.bigbigwatch.com/EBEL-Watches-44.html]Ebel Watches[/url]
[url=http://www.bigbigwatch.com/FENDI-Watches-45.html]Fendi Watches[/url]
[url=http://www.bigbigwatch.com/FRANK-MULLER-Watches-46.html]Frank Muller Watches[/url]
[url=http://www.bigbigwatch.com/GERALD-GENTA-Watches-47.html]Gerald Genta Watches[/url]
[url=http://www.bigbigwatch.com/GLASHUTTE-Watches-48.html]Glashutte Watches[/url]
[url=http://www.bigbigwatch.com/GRAHAM-Watches-49.html]Graham Watches[/url]
[url=http://www.bigbigwatch.com/GUCCI-Watches-50.html]Gucci Watches[/url]
[url=http://www.edhardyglobal.com]ed hardy[/url]
[url=http://www.edhardyglobal.com/ED-HARDY-c9.html]ED HARDY[/url]
[url=http://www.edhardyglobal.com/ed-hardy-sock-c30.html]ed hardy sock[/url]
[url=http://www.edhardyglobal.com/ed-hardy-purses-c31.html]ed hardy purses[/url]
[url=http://www.edhardyglobal.com/ed-hardy-shoes-men-c32.html]ed hardy shoes men[/url]
[url=http://www.edhardyglobal.com/ed-hardy-shoes-women-c33.html]ed hardy shoes women[/url]
[url=http://www.edhardyglobal.com/ed-hardy-slipper-c34.html]ed hardy slipper[/url]
[url=http://www.edhardyglobal.com/ed-hardy-women-skirt-c35.html]ed hardy women skirt[/url]
[url=http://www.edhardyglobal.com/Short-sleeve-man-Tee-c10.html]Short sleeve man Tee[/url]
[url=http://www.edhardyglobal.com/Short-sleeve-Woman-Tee-c11.html]Short sleeve Woman Tee[/url]
[url=http://www.edhardyglobal.com/Long-sleeve-man-Tee-c13.html]Long sleeve man Tee[/url]
[url=http://www.edhardyglobal.com/Long-sleeve-woman-Tee-c14.html]Long sleeve woman Tee[/url]
[url=http://www.edhardyglobal.com/ed-hardy-men-hoody-c15.html]ed hardy men hoody[/url]
[url=http://www.edhardyglobal.com/ed-hard-women-hoody-c16.html]ed hard women hoody[/url]
[url=http://www.edhardyglobal.com/ed-hardy-boot-c17.html]ed hardy boot[/url]
[url=http://www.edhardyglobal.com/ed-hardy-bags-c18.html]ed hardy bags[/url]
[url=http://www.edhardyglobal.com/ed-hardy-bikini-c19.html]ed hardy bikini[/url]
[url=http://www.edhardyglobal.com/ed-hardy-suit-c20.html]ed hardy suit[/url]
[url=http://www.edhardyglobal.com/ed-hardy-sunglass-c21.html]ed hardy sunglass[/url]
[url=http://www.edhardyglobal.com/ed-hardy-belt-c22.html]ed hardy belt[/url]
[url=http://www.edhardyglobal.com/ed-hardy-underwear-c23.html]ed hardy underwear[/url]
[url=http://www.edhardyglobal.com/ed-hardy-caps-c24.html]ed hardy caps[/url]
[url=http://www.edhardyglobal.com/ed-hardy-watch-c25.html]ed hardy watch[/url]
[url=http://www.edhardyglobal.com/ed-hardy-bracelet-c26.html]ed hardy bracelet[/url]
[url=http://www.edhardyglobal.com/ed-hardy-woman-shorts-c27.html]ed hardy woman shorts[/url]
[url=http://www.edhardyglobal.com/ed-hardy-men-jeans-c28.html]ed hardy men jeans[/url]
[url=http://www.edhardyglobal.com/ed-hardy-women-jeans-c29.html]ed hardy women jeans[/url]
[url=http://www.edhardyglobal.com/Christian-Audigier-c36.html]Christian Audigier[/url]
[url=http://www.edhardyglobal.com/CA-MEN-TEE-c37.html]CA MEN TEE[/url]
[url=http://www.edhardyglobal.com/CA-WOMEN-TEE-c38.html]CA WOMEN TEE[/url]
[url=http://www.edhardyglobal.com/CA-men-long-sleeve-TEE-c39.html]CA men long sleeve TEE[/url]
[url=http://www.edhardyglobal.com/CA-women-long-sleeve-TEE-c40.html]CA women long sleeve TEE[/url]
[url=http://www.edhardyglobal.com/CA-MEN-Hoody-c41.html]CA MEN Hoody[/url]
[url=http://www.edhardyglobal.com/CA-women-Hoody-c42.html]CA women Hoody[/url]
[url=http://www.edhardyglobal.com/CA-MEN-Jeans-c43.html]CA MEN Jeans[/url]
[url=http://www.edhardyglobal.com/CA-BAGS-c44.html]CA BAGS[/url]
[url=http://www.edhardyglobal.com/CA-bikini-c45.html]CA bikini[/url]
[url=http://www.edhardyglobal.com/CA-Caps-c46.html]CA Caps[/url]
[url=http://www.edhardyglobal.com/CA-women-skirt-c47.html]CA women skirt[/url]
[url=http://www.edhardyglobal.com/Michael-Jackson-c48.html]Michael Jackson[/url]
[url=http://www.edhardyglobal.com/Man-TEE-c49.html]Man TEE[/url]
[url=http://www.edhardyglobal.com/Woman-TEE-c50.html]Woman TEE[/url]
[url=http://www.ghdluck.com]ghd[/url]
[url=http://www.ghdluck.com]chi[/url]
[url=http://www.ghdluck.com]ghd straighteners[/url]
[url=http://www.ghdluck.com]straighteners[/url]
[url=http://www.ghdluck.com]hair straighteners[/url]
[url=http://www.ghd-hair-co-uk.com]GHD[/url]
[url=http://www.ghd-hair-co-uk.com]GHD Straighteners[/url]
[url=http://www.ghd-hair-co-uk.com]GHD Hair Straighteners[/url]
[url=http://www.ghd-hair-co-uk.com]wholesale ghd straighteners[/url]
[url=http://www.ghd-hair-co-uk.com]chi[/url]
[url=http://www.ghd-hair-co-uk.com]Chi Flat Iron[/url]
[url=http://www.ghd-hair-co-uk.com]cheap ghd straighteners[/url]
[url=http://www.ghd-hair-co-uk.com]hair straighteners[/url]
[url=http://www.ghd-hair-co-uk.com]GHD PRECIOUS[/url]
[url=http://www.ghd-hair-co-uk.com]T3 Hair Dryer[/url]
[url=http://www.ghd-hair-co-uk.com]T3 Hair Straighteners[/url]
[url=http://www.iwantmyghd.com]GHD[/url]
[url=http://www.iwantmyghd.com]GHD Straighteners[/url]
[url=http://www.iwantmyghd.com]GHD Hair Straighteners[/url]
[url=http://www.iwantmyghd.com]wholesale ghd straighteners[/url]
[url=http://www.iwantmyghd.com]chi[/url]
[url=http://www.iwantmyghd.com]Chi Flat Iron[/url]
[url=http://www.iwantmyghd.com]cheap ghd straighteners[/url]
[url=http://www.iwantmyghd.com]hair straighteners[/url]
[url=http://www.iwantmyghd.com]GHD PRECIOUS[/url]
[url=http://www.iwantmyghd.com]T3 Hair Dryer[/url]
[url=http://www.iwantmyghd.com]T3 Hair Straighteners[/url]
[url=http://www.ghd-chi-mall.com]GHD[/url]
[url=http://www.ghd-chi-mall.com]GHD Straighteners[/url]
[url=http://www.ghd-chi-mall.com]GHD Hair Straighteners[/url]
[url=http://www.ghd-chi-mall.com]wholesale ghd straighteners[/url]
[url=http://www.ghd-chi-mall.com]chi[/url]
[url=http://www.ghd-chi-mall.com]Chi Flat Iron[/url]
[url=http://www.ghd-chi-mall.com]cheap ghd straighteners[/url]
[url=http://www.ghd-chi-mall.com]hair straighteners[/url]
[url=http://www.ghd-chi-mall.com]GHD PRECIOUS[/url]
[url=http://www.ghd-chi-mall.com]T3 Hair Dryer[/url]
[url=http://www.ghd-chi-mall.com]T3 Hair Straighteners[/url]
[url=http://www.ghdbrandshop.com]GHD[/url]
[url=http://www.ghdbrandshop.com]GHD Straighteners[/url]
[url=http://www.ghdbrandshop.com]GHD Hair Straighteners[/url]
[url=http://www.ghdbrandshop.com]wholesale ghd straighteners[/url]
[url=http://www.ghdbrandshop.com]chi[/url]
[url=http://www.ghdbrandshop.com]Chi Flat Iron[/url]
[url=http://www.ghdbrandshop.com]cheap ghd straighteners[/url]
[url=http://www.ghdbrandshop.com]hair straighteners[/url]
[url=http://www.ghdbrandshop.com]GHD PRECIOUS[/url]
[url=http://www.ghdbrandshop.com]T3 Hair Dryer[/url]
[url=http://www.ghdbrandshop.com]T3 Hair Straighteners[/url]
[url=http://www.super-bowl-jerseys.com]superbowl XLIV[/url]
[url=http://www.super-bowl-jerseys.com]superbowl 2010[/url]
[url=http://www.super-bowl-jerseys.com]superbowl 44[/url]
[url=http://www.super-bowl-jerseys.com]superbowl tickets[/url]
[url=http://www.super-bowl-jerseys.com]superbowl trivia[/url]
[url=http://www.super-bowl-jerseys.com]nfl superbowl[/url]
[url=http://www.super-bowl-jerseys.com]superbowl jersey[/url]
[url=http://www.super-bowl-jerseys.com]superbowl jerseys[/url]
[url=http://www.super-bowl-jerseys.com]wholesale superbowl jerseys[/url]
[url=http://www.super-bowl-jerseys.com]dropshipping superbowl jersey[/url]
[url=http://www.super-bowl-jerseys.com]cheap nfl superbowl jerseys[/url]
[url=http://www.superbowljerseyshop.com]superbowl XLIV[/url]
[url=http://www.superbowljerseyshop.com]superbowl 2010[/url]
[url=http://www.superbowljerseyshop.com]superbowl 44[/url]
[url=http://www.superbowljerseyshop.com]superbowl tickets[/url]
[url=http://www.superbowljerseyshop.com]superbowl trivia[/url]
[url=http://www.superbowljerseyshop.com]nfl superbowl[/url]
[url=http://www.superbowljerseyshop.com]superbowl jersey[/url]
[url=http://www.superbowljerseyshop.com]superbowl jerseys[/url]
[url=http://www.superbowljerseyshop.com]wholesale superbowl jerseys[/url]
[url=http://www.superbowljerseyshop.com]dropshipping superbowl jersey[/url]
[url=http://www.superbowljerseyshop.com]cheap nfl superbowl jerseys[/url]
[url=http://www.super-bowl-jersey.com]superbowl XLIV[/url]
[url=http://www.super-bowl-jersey.com]superbowl 2010[/url]
[url=http://www.super-bowl-jersey.com]superbowl 44[/url]
[url=http://www.super-bowl-jersey.com]superbowl tickets[/url]
[url=http://www.super-bowl-jersey.com]superbowl trivia[/url]
[url=http://www.super-bowl-jersey.com]nfl superbowl[/url]
[url=http://www.super-bowl-jersey.com]superbowl jersey[/url]
[url=http://www.super-bowl-jersey.com]superbowl jerseys[/url]
[url=http://www.super-bowl-jersey.com]wholesale superbowl jerseys[/url]
[url=http://www.super-bowl-jersey.com]dropshipping superbowl jersey[/url]
[url=http://www.super-bowl-jersey.com]cheap nfl superbowl jerseys[/url]
[url=http://www.uggchinashop.com]ugg[/url]
[url=http://www.uggchinashop.com]ugg雪地靴[/url]
[url=http://www.uggchinashop.com]ugg官网[/url]
[url=http://www.uggchinashop.com]ugg专卖店[/url]
[url=http://www.uggchinashop.com]ugg价格[/url]
[url=http://www.uggchinashop.com]ugg australia[/url]
[url=http://www.uggchinese.com]ugg[/url]
[url=http://www.uggchinese.com]ugg雪地靴[/url]
[url=http://www.uggchinese.com]ugg官网[/url]
[url=http://www.uggchinese.com]ugg专卖店[/url]
[url=http://www.uggchinese.com]ugg价格[/url]
[url=http://www.uggchinese.com]ugg australia[/url]
[url=http://www.jxyshop.com]金镶玉[/url]
[url=http://www.jxyshop.com]玉配[/url]
[url=http://www.jxyshop.com]吊坠[/url]
[url=http://www.jxyshop.com]玉[/url]
[url=http://www.jxyshop.com]玉网[/url]
[url=http://www.jxyshop.com]玉镶金[/url]
[url=http://www.ohnike.com]nike air max[/url]
[url=http://www.ohnike.com]nike shox[/url]
[url=http://www.sportsshoes24.net]nike air max[/url]
[url=http://www.sportsshoes24.net]nike shox[/url]
[url=http://www.super-bowl-jersey.com]cheap super bowl jersey[/url]
[url=http://www.super-bowl-jersey.com]Discount super bowl jersey[/url]
[url=http://www.macmakeupshop.com]makeup[/url]
[url=http://www.macmakeupshop.com]cosmetics[/url]
[url=http://www.macmakeupshop.com]makeup wholesale[/url]
[url=http://www.macmakeupshop.com]cosmetics wholesale[/url]
[url=http://www.macmakeupshop.com]wholesale cosmetics[/url]
[url=http://www.macmakeupshop.com]wholesale makeup[/url]
[url=http://www.makeupwholesaleshop.com]makeup[/url]
[url=http://www.makeupwholesaleshop.com]cosmetics[/url]
[url=http://www.makeupwholesaleshop.com]makeup wholesale[/url]
[url=http://www.makeupwholesaleshop.com]cosmetics wholesale[/url]
[url=http://www.makeupwholesaleshop.com]wholesale cosmetics[/url]
[url=http://www.makeupwholesaleshop.com]wholesale makeup[/url]
[url=http://www.cosmeticswholesaleshop.com]makeup[/url]
[url=http://www.cosmeticswholesaleshop.com]cosmetics[/url]
[url=http://www.cosmeticswholesaleshop.com]makeup wholesale[/url]
[url=http://www.cosmeticswholesaleshop.com]cosmetics wholesale[/url]
[url=http://www.cosmeticswholesaleshop.com]wholesale cosmetics[/url]
[url=http://www.cosmeticswholesaleshop.com]wholesale makeup[/url]
[url=http://www.luxuryhandbagworld.com]replica handbags[/url]
[url=http://www.luxuryhandbagworld.com]replica bags[/url]
[url=http://www.luxuryhandbagworld.com]designer handbags[/url]
[url=http://www.dieselpartsworld.com]Auto Parts[/url]
[url=http://www.dieselpartsworld.com]Head Rotor[/url]
[url=http://www.dieselpartsworld.com]Nozzle[/url]
[url=http://www.dieselpartsworld.com]Element[/url]
[url=http://www.dieselpartsworld.com]Plunger[/url]
[url=http://www.autopartsproducts.com]Auto Parts[/url]
[url=http://www.autopartsproducts.com]Head Rotor[/url]
[url=http://www.autopartsproducts.com]Nozzle[/url]
[url=http://www.autopartsproducts.com]Element[/url]
[url=http://www.autopartsproducts.com]Plunger[/url]
[url=http://www.wholesalenfljerseys2008.com]wholesale nfl jerseys[/url]
[url=http://www.wholesalenfljerseys2008.com]nfl jerseys wholesale[/url]
[url=http://www.wholesalenfljerseys2008.com]new orleans saints[/url]
[url=http://www.wholesalenfljerseys2008.com]nfl jerseys[/url]
[url=http://www.wholesalenfljerseys2008.com]new orleans saints jerseys[/url]
[url=http://www.jimmychooworld.com]jimmy choo[/url]
[url=http://www.jimmychooworld.com]jimmy choo handbags[/url]
[url=http://www.jimmychooworld.com]jimmy choo shoes[/url]
[url=http://www.jimmychooworld.com]jimmy choo sunglasses[/url]
[url=http://www.ecjerseys4all.com]nfl jerseys[/url]
[url=http://www.ecjerseys4all.com]wholesale nfl jerseys[/url]
[url=http://www.ectr4all.com]True Religion[/url]
[url=http://www.ectr4all.com]True Religion Jeans[/url]
[url=http://www.ectr4all.com]TR Jeans[/url]
[url=http://www.ecco4all.com]ecco[/url]
[url=http://www.ecco4all.com]Ecco Shoes[/url]
[url=http://www.ecbag4all.com]replica handbags[/url]
[url=http://www.ecbag4all.com]replica bags[/url]
[url=http://www.ecbag4all.com]handbags[/url]
[url=http://www.ecoilpaintings.com]oil painting[/url]
[url=http://www.ecoilpaintings.com]oil paintings[/url]
[url=http://www.ecjersey4all.com]nfl jerseys[/url]
[url=http://www.ecjersey4all.com]mlb jerseys[/url]
[url=http://www.ecjersey4all.com]nfl jerseys wholesale[/url]
[url=http://www.shopbynfl.com]nfl jersey[/url]
[url=http://www.shopbynfl.com]nfl jerseys[/url]
[url=http://www.shopbynfl.com]super bowl jerseys[/url]
[url=http://www.oemexps.com]China Shoes Factory[/url]
[url=http://www.oemexps.com]Shoes Trade[/url]
[url=http://www.oemexps.com]Shoes OEM[/url]
[url=http://www.oemexps.com]Casual Shoes[/url]
[url=http://www.oemexps.com]Sports Shoes[/url]
[url=http://www.oemexps.com]Hiking Shoes[/url]
[url=http://www.oemexps.com]Skater Shoes[/url]
[url=http://www.outdoorbrandshop.com]the north face[/url]
[url=http://www.outdoorbrandshop.com]north face[/url]
[url=http://www.outdoorbrandshop.com]the north face discount[/url]
[url=http://www.outdoorbrandshop.com]the north face jackets[/url]
[url=http://www.outdoorbrandshop.com]the north face backpacks[/url]
[url=http://www.outdoorbrandshop.com]the north face clothing[/url]
[url=http://www.535shoes.com]ecco[/url]
[url=http://www.535shoes.com]ecco shoes[/url]
[url=http://www.535shoes.com]wholesale ecco shoes[/url]
[url=http://www.535shoes.com]Business shoes[/url]
[url=http://www.535shoes.com]ECCO Men's Shoes[/url]
[url=http://www.eccshoes.com]ecco[/url]
[url=http://www.eccshoes.com]ecco shoes[/url]
[url=http://www.eccshoes.com]wholesale ecco shoes[/url]
[url=http://www.eccshoes.com]Business shoes[/url]
[url=http://www.eccshoes.com]ECCO Men's Shoes[/url]
[url=http://www.workshoesworld.com]work shoes[/url]
[url=http://www.workshoesworld.com]work boots[/url]
[url=http://www.workshoesworld.com]safety shoes[/url]
[url=http://www.hat-bay.com]new era caps[/url]
[url=http://www.hat-bay.com]new era hats[/url]
[url=http://www.hat-bay.com]new era cap[/url]
[url=http://www.hat-bay.com]new era hat[/url]
[url=http://www.hat-bay.com]wholesale new era caps[/url]
[url=http://www.hat-bay.com]59Fifty Fitted Hats[/url]
[url=http://www.hat-bay.com]nfl hats[/url]
[url=http://www.nfljerseystks.com]nfl jerseys[/url]
[url=http://www.nfljerseystks.com]nfl jersey[/url]
[url=http://www.nfljerseystks.com]wholesale nfl jerseys[/url]
[url=http://www.nfljerseystks.com]cheap nfl jerseys[/url]
[url=http://www.nhljerseystks.com]nhl[/url]
[url=http://www.nhljerseystks.com]nhl jerseys[/url]
[url=http://www.nhljerseystks.com]nhl jersey[/url]
[url=http://www.nhljerseystks.com]wholesale nhl jerseys[/url]
[url=http://www.nhljerseystks.com]cheap nhl jerseys[/url]
[url=http://www.mlbjerseystks.com]mlb[/url]
[url=http://www.mlbjerseystks.com]mlb jerseys[/url]
[url=http://www.mlbjerseystks.com]mlb jersey[/url]
[url=http://www.mlbjerseystks.com]cheap mlb jerseys[/url]
[url=http://www.mlbjerseystks.com]wholesale mlb jerseys[/url]
[url=http://www.viviennewestwoodonsale.com]vivienne westwood[/url]
[url=http://www.viviennewestwoodonsale.com]vivienne westwood bag[/url]
[url=http://www.viviennewestwoodonsale.com]vivienne westwood handbag[/url]
[url=http://www.viviennewestwoodonsale.com]wholesale vivienne westwood[/url]
[url=http://www.viviennewestwoodonsale.com]vivienne westwood jewellery[/url]
[url=http://www.viviennewestwoodol.com]vivienne westwood jewellery[/url]
[url=http://www.viviennewestwoodol.com]vivienne westwood[/url]
[url=http://www.viviennewestwoodol.com]vivienne westwood bag[/url]
[url=http://www.viviennewestwoodol.com]vivienne westwood handbag[/url]
[url=http://www.viviennewestwoodol.com]wholesale vivienne westwood[/url]
[url=http://www.ptfyys.com]莆田逢源印刷[/url]
[url=http://www.ptfyys.com]莆田印刷公司[/url]
[url=http://www.ptfyys.com]逢源印刷[/url]
[url=http://www.google.com/]google[/url]
[url=http://www.b2cwatch.com/]rolex watches[/url]
[url=http://www.mbtinshop.com/]mbt shoes[/url]
[url=http://www.mbtinshop.com/]buy mbt kaya[/url]
[url=http://www.shoes-oem.com/]china factory[/url]
[url=http://www.crocsmy.com/]crocs shoes[/url]
[url=http://www.shopbycap.com/]59fifty fitted lids[/url]
[url=http://www.chinabagworld.com]バッグ[/url]
[url=http://www.chinabagworld.com]財布[/url]
[url=http://www.chinabagworld.com]腕時計[/url]
[url=http://www.shopbynfl.com]nfl throwback jerseys[/url]
[url=http://www.uggchinamall.com]UGG雪地靴[/url]
[url=http://www.uggchinamall.com]UGG批发[/url]
[url=http://www.uggchinamall.com]UGG专卖店[/url]
[url=http://www.uggchinamall.com]UGG正品[/url]
[url=http://www.jiyouarts.com]oil painting[/url]
[url=http://www.xietour.com]爱步[/url] posted: 2010-12-30 02:36:04 |
|
|
|
TimurKOMAROV writes...
Только тут пассажирские перевозки по минимальному тарифу posted: 2010-12-27 20:14:23 |
|
|
|
KulaginVLADIMIR35 writes...
Надежный прокат машин в Киеве posted: 2011-01-15 17:34:19 |
|
|
|
cc writes...
super bowl Jersey
super bowl Jerseys
super bowl 2011 Jerseys
2011 super bowl Jerseys
super bowl XLV Jerseys
XLV super bowl Jerseys
Baltimore Ravens
Baltimore Ravens Jersey
Baltimore Ravens Jerseys
Buffalo Bills
Buffalo Bills Jersey
Buffalo Bills Jerseys
Cincinnati Bengals
Cincinnati Bengals Jersey
Cincinnati Bengals Jerseys
Cleveland Browns
Cleveland Browns Jersey
Cleveland Browns Jerseys
Denver Broncos
Denver Broncos Jersey
Denver Broncos Jerseys
Houston Texans
Houston Texans Jersey
Houston Texans Jerseys
Indianapolis Colts
Indianapolis Colts Jersey
Indianapolis Colts Jerseys
Jacksonville Jaguars
Jacksonville Jaguars Jersey
Jacksonville Jaguars Jerseys
Kansas City Chiefs
Kansas City Chiefs Jersey
Kansas City Chiefs Jerseys
Miami Dolphins
Miami Dolphins Jersey
Miami Dolphins Jerseys
New England Patriots
New England Patriots Jersey
New England Patriots Jerseys
New York Jets
New York Jets Jersey
New York Jets Jerseys
Oakland Raiders
Oakland Raiders Jersey
Oakland Raiders Jerseys
Pittsburgh Steelers
Pittsburgh Steelers Jersey
Pittsburgh Steelers Jerseys
San Diego Chargers
San Diego Chargers Jersey
San Diego Chargers Jerseys
Tennessee Titans
Tennessee Titans Jersey
Tennessee Titans Jerseys
Arizona Cardinals
Arizona Cardinals Jersey
Arizona Cardinals Jerseys
Atlanta Falcons
Atlanta Falcons Jersey
Atlanta Falcons Jerseys
Carolina Panthers
Carolina Panthers Jersey
Carolina Panthers Jerseys
Chicago Bears
Chicago Bears Jersey
Chicago Bears Jerseys
Dallas Cowboys
Dallas Cowboys Jersey
Dallas Cowboys Jerseys
Detroit Lions
Detroit Lions Jersey
Detroit Lions Jerseys
Green Bay Packers
Green Bay Packers Jersey
Green Bay Packers Jerseys
Minnesota Vikings
Minnesota Vikings Jersey
Minnesota Vikings Jerseys
New Orleans Saints
New Orleans Saints Jersey
New Orleans Saints Jerseys
New York Giants
New York Giants Jersey
New York Giants Jerseys
Philadelphia Eagles
Philadelphia Eagles Jersey
Philadelphia Eagles Jerseys
San Francisco 49ers
San Francisco 49ers Jersey
San Francisco 49ers Jerseys
Seattle Seahawks
Seattle Seahawks Jersey
Seattle Seahawks Jerseys
St.Louis Rams
St.Louis Rams Jersey
St.Louis Rams Jerseys
Tampa Bay Buccaneers
Tampa Bay Buccaneers Jersey
Tampa Bay Buccaneers Jerseys
Washington Redskins
Washington Redskins Jersey
Washington Redskins Jerseys
vibram five fingers
five finger shoes
vibram shoes
five finger
mbt shoes
wholesale mbt shoes
cheap mbt shoes
discount mbt shoes
mbt
buy mbt kaya
the north face
north face
north face jackets
north face clothing
north face backpacks
north face equipment
north face outlet
north face tents
nfl jerseys
wholesale nfl jerseys
nfl jersey
wholesale nfl jersey
super bowl
super bowl jerseys
super bowl jersey
cheap nfl jerseys
discounts nfl jerseys
nfl throwback jerseys
乐斯菲斯
The North Face
North Face
北面
户外用户
户外装备tnf
north face官网
north face 羽绒服
the north face 中国官网
the north face 冲锋衣
the north face 专卖店
the north face 羽绒服
super bowl 2011 Jerseys
2011 super bowl Jerseys
super bowl XLV Jerseys
XLV super bowl Jerseys
New Era Hat
new era hats
Cheap new era hats
whoelsae new era hats
new era cap
new era caps
wholesale era caps
DC Hat
Famous Hat
Baseball Cap
Nfl Cap
nfl jerseys
wholesale jerseys
nfl jersey
wholesale jersey
cheap nfl jerseys
cheap nfl jersey
super bowl jerseys
crocs
crocs shoes
ed hardy
wholesale ed hardy
ed hardy shoes
ed hardy discount
ed hardy clothing
ed hardy bags
ed hardy caps
ed hardy sunglasses
ed hardy watches
oil painting
china oil painting
chinese oil painting
art painting
canvas painting
photo to art oil painting
hand made oil painting
oil painting reproductions
rolex watches
cartier watches
breitling watches
tag heuer watches
gucci wathces
omega watches
cartier watches
jimmy choo
jimmy choo shoes
jimmy choo bags
jimmy choo boots
jimmy choo handbags
Safety Shoes
pu safety shoes
vivienne westwood wedding dress
vivienne westwood shop
vivienne westwood jewellery
vivienne westwood shoes
vivienne westwood biography
vivienne westwood bags
vivienne westwood wedding
vivienne westwood wallet
vivienne westwood wedding dress
vivienne westwood shop
vivienne westwood jewellery
vivienne westwood shoes
vivienne westwood biography
vivienne westwood bags
vivienne westwood wedding
vivienne westwood wallet
爱步鞋
ecco鞋
爱步休闲鞋
ecco休闲鞋
休闲鞋
商务休闲鞋
Clarks
ugg
ugg雪地靴
ugg官方网
ugg boots
ugg专柜
ugg
ugg雪地靴
ugg官方网
ugg boots
ugg专柜
nike shoes
china wholesale
nike air jordan
Nike Air Jordan
Nike Air Jordan Fusion
Nike Air Force 1
Nike Lebron James
Nike Kobe Bryant
Nike KEN GRIFF Shoes
Nike Air Max
Nike Shox
Nike Air Yeezy
Nike Sneaker King
Puma Shoes
Nike Dunk
Bape Shoes
Handbags
Jewelry
Sunglasses
Hair Straightener
Belt
Jerseys
Wallet
ヴィヴィアン
ビビアンウエストウッド
ヴィヴィアンウエストウッド
vivienne
ビビアンウエスト
vivienne westwood
Vach. Constantine Watches
Versace Watches
Zenith Watches
Chronomatic Watches
Montbrilliant Watches
Superocean Watches
BREITLING Watches
B.R.M Watches
BURBERRY Watches
BVLGARI Watches
CARTIER Watches
CHANEL Watches
CHAUMET Watches
CHOPARD Watches
CHRISTIAN DIOR Watches
CHRONOSWISS Watches
CONCORD Watches
CORUM Watches
DEWITT Watches
EBEL Watches
FENDI Watches
FRANCK MULLER Watches
GERALD GENTA Watches
GLASHUTTE Watches
GRAHAM Watches
GUCCI Watches
HARRY WINSTON Watches
HERMES Watches
HUBLOT Watches
IWC Watches
JACOB & CO. Watches
JAEGER LE COULTRE Watches
LONGINES Watches
LOUIS VUITTON Watches
MAURICE & LACROIX Watches
MONT BLANC Watches
MOVADO Watches
OMEGA Watches
ORIS Watches
PANERAI Watches
PARMIGIANI FLEURIER Watches
PATEK PHILIPPE Watches
PAUL PICOT Watches
PIAGET Watches
PORSCHE DESIGN Watches
PRADA Watches
RADO Watches
RICHARD MILLE Watches
ROMAIN JEROME Watches
ROGER DUBUIS Watches
ROLEX Watches
TAG HEUER Watches
TECHNOMARINE Watches
TUDOR Watches
U-BOAT Watches
ULYSSE NARDIN Watches
VACH. CONSTANTINE Watches
VERSACE Watches
ZENITH Watches
Ed Hardy
Ed Hardy Men Apparel
Ed Hardy Women Apparel
Ed Hardy Kid Apparel
Ed Hardy ACCESSORIES
Christan Audigier
Christan Audigier Men APPAREL
Christan Audigier Women APPAREL
other APPAREL &ACCESSORIES
other Apparel
other ACCESSORIES
Louis Vuitton Handbags
Chanel Handbags
Gucci Handbags
Balenciaga Handbags
Fendi Handbags
Yves Saint Laurent Handbags
Christian Dior Handbags
Burberry Handbags
Cartier Handbags
Celine Handbags
Chloe Handbags
Coach Handbags
Dolce and Gabbana Handbags
BALLY Handbags
Givenchy Handbags
Hermes Handbags
Jimmy Choo Handbags
Juicy Couture Handbags
Lancel Handbags
Marc Jacobs Handbags
Miu Miu Handbags
Mulberry Handbags
Prada Handbags
Thomas Wylde Handbags
Versace Handbags
Bottega Veneta Handbags
Brand Wallet
NFL Teams
Arizona Cardinals
Atlanta Falcons
Baltimore Ravens
Buffalo Bills
Carolina Panthers
Chicago Bears
Cincinnati Bengals
Cleveland Browns
Dallas Cowboys
Denver Broncos
Detroit Lions
Green Bay Packers
Houston Texans
Indianapolis Colts
Kansas City Chiefs
Minnesota Vikings
New England Patriots
New Orleans Saints
New York Giants
New York Jets
Oakland Raiders
Philadelphia Eagles
Pittsburgh Steelers
San Diego Chargers
San Francisco 49ers
Seattle Seahawks
St. Louis Rams
Super Bowl Merchandise
Super Bowl XLII Gear
Tampa Bay Buccaneers
Tennessee Titans
Washington Redskins
Miami Dolphins
MLB Teams
Arizona Diamondbacks
Atlanta Braves
Baltimore Orioles
Boston Red Sox
Chicago Cubs
Chicago White Sox
Cincinnati Reds
Cleveland Indians
Colorado Rockies
Detroit Tigers
Florida Marlins
Houston Astros
Kansas City Royals
Los Angeles Dodgers
Los Angeles Angels
Milwaukee Brewers
Minnesota Twins
New York Mets
New York Yankees
Oakland Athletics
Philadelphia Phillies
Pittsburgh Pirates
San Diego Padres
San Francisco Giants
Seattle Mariners
St. Louis Cardinals
Tampa Bay Devil Rays
Texas Rangers
Toronto Blue Jays
Washington Nationals
NHL Teams
Anaheim Ducks
Atlanta Thrashers
Boston Bruins
Buffalo Sabres
Calgary Flames
Carolina Hurricanes
Chicago Blackhawks
Colorado Avalanche
Columbus Blue Jackets
Dallas Stars
Detroit Red Wings
Edmonton Oilers
Florida Panthers
Hartford Whalers
Los Angeles Kings
Minnesota Wild
Montreal Canadiens
Nashville Predators
New Jersey Devils
New York Islanders
New York Rangers
Ottawa Senators
Philadelphia Flyers
Phoenix Coyotes
Pittsburgh Penguins
San Jose Sharks
St. Louis Blues
Tampa Bay Lightning
Toronto Maple Leafs
Vancouver Canucks
Washington Capitals
World All Stars
COLLEGE Teams
All Tmams
Rolex Watches
Watch Boxes
Alain Silberstein Watches
Anonimo Watches
A.Lange & Sohne Watches
Audemars Piguet Watches
Baume & Mercier Watches
Bell & Ross Watches
Blancpain Watches
Breguet Watches
Breitling Watches
Burberry Watches
Bvlgari Watches
Cartier Watches
Chanel Watches
Chopard Watches
Christian Dior Watches
Chrconoswiss Watches
Corum Watches
Dewitt Watches
Ebel Watches
Fendi Watches
Frank Muller Watches
Gerald Genta Watches
Glashutte Watches
Graham Watches
Gucci Watches
Hermes Watches
Hublot Watches
Iwc Watches
Jacob & Co Watches
Jaeger Le Coultre Watches
Longines Watches
Louis Vuitton Watches
Maurice & Lacroix Watches
Mont Blanc Watches
Movado Watches
Oris Watches
Panerai Watches
Parmigiani Fleurier Watches
Patek Philippe Watches
Paul Picot Watches
Piaget Watches
Porsche Desing Watches
Prada Watches
Rado Watches
Roger Dubuis Watches
Rolex Watches
Tag Heuer Watches
Technomarine Watches
Taylormade R9 Drivers
Drivers
Irons
Putter
Wedge
Fairway Wood
Hybrids
Balls
Shoes
Accessories
Taylormade Wedges
Titleist Wedges
Callaway Fairway Woods
Mizuno Fairway Woods
Nike Fairway Woods
Ping Fairway Woods
Nike Shoes
Taylormade Fairway Woods
Callaway Hybrids
Taylormade Hybrids
Callaway Balls
Nike Balls
Taylormade Balls
Titleist Balls
Adidas Bags
Ping Bags
Titleist Bags
Callaway Bags
Taylormade Bags
Nike Bags
Adidas Shoes
Footjoy Shoes
Callaway Shoes
Golf Glove
Headcover
Sunglasses
Outwear
T-shirt
Callaway Drivers
Cleveland Drivers
Mizuno Drivers
Nike Drivers
Ping Drivers
Taylormade Drivers
Titleist Drivers
Callaway Irons
Cleveland Irons
Mizuno Irons
Nike Irons
Ping Irons
Taylormade Irons
Titleist Irons
Odyssey Putters
Ping Putters
Taylormade Putters
Titleist Putters
Yes Putters
Callaway Wedges
Cleveland Wedges
Clevelend Fairway Wood
Ping Hybrids
Lacoste
Lacoste shirts
Lacoste shoes
ugg boots
UGG
WATCH BOXES
MONT BLANC PEN Watches
ALAIN SILBERSTEIN Watches
ANONIMO Watches
A.LANGE & SOHNE Watches
AUDEMARS PIGUET Watches
BAUME & MERCIER Watches
BELL & ROSS Watches
BLANCPAIN Watches
BREGUET Watches
NBA Teams
Atlanta Hawks
Boston Celtics
Charlotte Bobcats
Chicago Bulls
Cleveland Cavaliers
Dallas Mavericks
Denver Nuggets
Detroit Pistons
Golden State Warriors
Houston Rockets
Indiana Pacers
Los Angeles Clippers
Los Angeles Lakers
Memphis Grizzlies
Miami Heat
Milwaukee Bucks
Minnesota Timberwolves
New Jersey Nets
New Orleans Hornets
New York Knicks
Orlando Magic
Philadelphia 76ers
Phoenix Suns
Portland Trail Blazers
Sacramento Kings
San Antonio Spurs
Seattle SuperSonics
Toronto Raptors
Utah Jazz
Washington Wizards
Converse
Converse shoes
Embroidery
Embroidery Designs
Advanced Embroidery Designs
FREE Machine Embroidery Designs
NBA Jerseys
MLB Jerseys
ghd
chi
ghd
chi
ghd
chi
ghd
chi
MAC Makeup
MAC Cosmetics
discount mac makeup
MAC Eye Shadow
ed hardy
ed hardy clothing
ed hardy shoes
ghd
ghd hair straighteners
chi
posted: 2011-01-24 06:12:32 |
|
|
|
cc writes...
cheap nfl superbowl jerseys
ugg
ugg雪地靴
ugg官网
ugg专卖店
ugg价格
ugg australia
ugg
ugg雪地靴
ugg官网
ugg专卖店
ugg价格
ugg australia
金镶玉
玉配
吊坠
玉
玉网
玉镶金
nike air max
nike shox
nike air max
nike shox
cheap super bowl jersey
Discount super bowl jersey
makeup
cosmetics
makeup wholesale
cosmetics wholesale
wholesale cosmetics
wholesale makeup
makeup
cosmetics
makeup wholesale
cosmetics wholesale
wholesale cosmetics
wholesale makeup
makeup
cosmetics
makeup wholesale
cosmetics wholesale
wholesale cosmetics
wholesale makeup
replica handbags
replica bags
designer handbags
Auto Parts
Head Rotor
Nozzle
Element
Plunger
Auto Parts
Head Rotor
Nozzle
Element
Plunger
wholesale nfl jerseys
nfl jerseys wholesale
new orleans saints
nfl jerseys
new orleans saints jerseys
jimmy choo
jimmy choo handbags
jimmy choo shoes
jimmy choo sunglasses
nfl jerseys
wholesale nfl jerseys
True Religion
True Religion Jeans
TR Jeans
ecco
Ecco Shoes
replica handbags
replica bags
handbags
oil painting
oil paintings
nfl jerseys
mlb jerseys
nfl jerseys wholesale
nfl jersey
nfl jerseys
super bowl jerseys
China Shoes Factory
Shoes Trade
Shoes OEM
Casual Shoes
Sports Shoes
Hiking Shoes
Skater Shoes
the north face
north face
the north face discount
the north face jackets
the north face backpacks
the north face clothing
ecco
ecco shoes
wholesale ecco shoes
Business shoes
ECCO Men's Shoes
ecco
ecco shoes
wholesale ecco shoes
Business shoes
ECCO Men's Shoes
work shoes
work boots
safety shoes
new era caps
new era hats
new era cap
new era hat
wholesale new era caps
59Fifty Fitted Hats
nfl hats
nfl jerseys
nfl jersey
wholesale nfl jerseys
cheap nfl jerseys
nhl
nhl jerseys
nhl jersey
wholesale nhl jerseys
cheap nhl jerseys
mlb
mlb jerseys
mlb jersey
cheap mlb jerseys
wholesale mlb jerseys
vivienne westwood
vivienne westwood bag
vivienne westwood handbag
wholesale vivienne westwood
vivienne westwood jewellery
vivienne westwood jewellery
vivienne westwood
vivienne westwood bag
vivienne westwood handbag
wholesale vivienne westwood
莆田逢源印刷
莆田印刷公司
逢源印刷
google
rolex watches
mbt shoes
buy mbt kaya
china factory
crocs shoes
59fifty fitted lids
バッグ
財布
腕時計
nfl throwback jerseys
UGG雪地靴
UGG批发
UGG专卖店
UGG正品
oil painting
爱步
爱步鞋
ECCO鞋
爱步休闲鞋
其乐
其乐鞋
其乐皮鞋
健乐士
ECCO
ECCO靴
ECCO シューズ
ECCO ゴルフ
ecco 店舗
ecco 通販 posted: 2011-01-27 03:01:40 |
|
|
|
SelenaFuller writes...
Every one acknowledges that life seems to be not very cheap, however some people require money for different issues and not every person gets big sums cash. So to receive some personal loans or just sba loan would be a right solution. posted: 2011-02-22 15:45:21 |
|
|
|
TonyaROY writes...
Do you acknowledge that it's the best time to get the loan, which can make your dreams come true. posted: 2011-02-23 08:20:58 |
|
|
|
cc writes...
super bowl Jersey
super bowl Jerseys
super bowl 2011 Jerseys
2011 super bowl Jerseys
super bowl XLV Jerseys
XLV super bowl Jerseys
Baltimore Ravens
Baltimore Ravens Jersey
Baltimore Ravens Jerseys
Buffalo Bills
Buffalo Bills Jersey
Buffalo Bills Jerseys
Cincinnati Bengals
Cincinnati Bengals Jersey
Cincinnati Bengals Jerseys
Cleveland Browns
Cleveland Browns Jersey
Cleveland Browns Jerseys
Denver Broncos
Denver Broncos Jersey
Denver Broncos Jerseys
Houston Texans
Houston Texans Jersey
Houston Texans Jerseys
Indianapolis Colts
Indianapolis Colts Jersey
Indianapolis Colts Jerseys
Jacksonville Jaguars
Jacksonville Jaguars Jersey
Jacksonville Jaguars Jerseys
Kansas City Chiefs
Kansas City Chiefs Jersey
Kansas City Chiefs Jerseys
Miami Dolphins
Miami Dolphins Jersey
Miami Dolphins Jerseys
New England Patriots
New England Patriots Jersey
New England Patriots Jerseys
New York Jets
New York Jets Jersey
New York Jets Jerseys
Oakland Raiders
Oakland Raiders Jersey
Oakland Raiders Jerseys
Pittsburgh Steelers
Pittsburgh Steelers Jersey
Pittsburgh Steelers Jerseys
San Diego Chargers
San Diego Chargers Jersey
San Diego Chargers Jerseys
Tennessee Titans
Tennessee Titans Jersey
Tennessee Titans Jerseys
Arizona Cardinals
Arizona Cardinals Jersey
Arizona Cardinals Jerseys
Atlanta Falcons
Atlanta Falcons Jersey
Atlanta Falcons Jerseys
Carolina Panthers
Carolina Panthers Jersey
Carolina Panthers Jerseys
Chicago Bears
Chicago Bears Jersey
Chicago Bears Jerseys
Dallas Cowboys
Dallas Cowboys Jersey
Dallas Cowboys Jerseys
Detroit Lions
Detroit Lions Jersey
Detroit Lions Jerseys
Green Bay Packers
Green Bay Packers Jersey
Green Bay Packers Jerseys
Minnesota Vikings
Minnesota Vikings Jersey
Minnesota Vikings Jerseys
New Orleans Saints
New Orleans Saints Jersey
New Orleans Saints Jerseys
New York Giants
New York Giants Jersey
New York Giants Jerseys
Philadelphia Eagles
Philadelphia Eagles Jersey
Philadelphia Eagles Jerseys
San Francisco 49ers
San Francisco 49ers Jersey
San Francisco 49ers Jerseys
Seattle Seahawks
Seattle Seahawks Jersey
Seattle Seahawks Jerseys
St.Louis Rams
St.Louis Rams Jersey
St.Louis Rams Jerseys
Tampa Bay Buccaneers
Tampa Bay Buccaneers Jersey
Tampa Bay Buccaneers Jerseys
Washington Redskins
Washington Redskins Jersey
Washington Redskins Jerseys
vibram five fingers
five finger shoes
vibram shoes
five finger
mbt shoes
wholesale mbt shoes
cheap mbt shoes
discount mbt shoes
mbt
buy mbt kaya
the north face
north face
north face jackets
north face clothing
north face backpacks
north face equipment
north face outlet
north face tents
nfl jerseys
wholesale nfl jerseys
nfl jersey
wholesale nfl jersey
super bowl
super bowl jerseys
super bowl jersey
cheap nfl jerseys
discounts nfl jerseys
nfl throwback jerseys
乐斯菲斯
The North Face
North Face
北面
户外用户
户外装备tnf
north face官网
north face 羽绒服
the north face 中国官网
the north face 冲锋衣
the north face 专卖店
the north face 羽绒服
super bowl 2011 Jerseys
2011 super bowl Jerseys
super bowl XLV Jerseys
XLV super bowl Jerseys
New Era Hat
new era hats
Cheap new era hats
whoelsae new era hats
new era cap
new era caps
wholesale era caps
DC Hat
Famous Hat
Baseball Cap
Nfl Cap
nfl jerseys
wholesale jerseys
nfl jersey
wholesale jersey
cheap nfl jerseys
cheap nfl jersey
super bowl jerseys
crocs
crocs shoes
ed hardy
wholesale ed hardy
ed hardy shoes
ed hardy discount
ed hardy clothing
ed hardy bags
ed hardy caps
ed hardy sunglasses
ed hardy watches
oil painting
china oil painting
chinese oil painting
art painting
canvas painting
photo to art oil painting
hand made oil painting
oil painting reproductions
rolex watches
cartier watches
breitling watches
tag heuer watches
gucci wathces
omega watches
cartier watches
jimmy choo
jimmy choo shoes
jimmy choo bags
jimmy choo boots
jimmy choo handbags
Safety Shoes
pu safety shoes
vivienne westwood wedding dress
vivienne westwood shop
vivienne westwood jewellery
vivienne westwood shoes
vivienne westwood biography
vivienne westwood bags
vivienne westwood wedding
vivienne westwood wallet
vivienne westwood wedding dress
vivienne westwood shop
vivienne westwood jewellery
vivienne westwood shoes
vivienne westwood biography
vivienne westwood bags
vivienne westwood wedding
vivienne westwood wallet
爱步鞋
ecco鞋
爱步休闲鞋
ecco休闲鞋
休闲鞋
商务休闲鞋
Clarks
ugg
ugg雪地靴
ugg官方网
ugg boots
ugg专柜
ugg
ugg雪地靴
ugg官方网
ugg boots
ugg专柜
nike shoes
china wholesale
nike air jordan
Nike Air Jordan
Nike Air Jordan Fusion
Nike Air Force 1
Nike Lebron James
Nike Kobe Bryant
Nike KEN GRIFF Shoes
Nike Air Max
Nike Shox
Nike Air Yeezy
Nike Sneaker King
Puma Shoes
Nike Dunk
Bape Shoes
Handbags
Jewelry
Sunglasses
Hair Straightener
Belt
Jerseys
Wallet
ヴィヴィアン
ビビアンウエストウッド
ヴィヴィアンウエストウッド
vivienne
ビビアンウエスト
vivienne westwood
Vach. Constantine Watches
Versace Watches
Zenith Watches
Chronomatic Watches
Montbrilliant Watches
Superocean Watches
BREITLING Watches
B.R.M Watches
BURBERRY Watches
BVLGARI Watches
CARTIER Watches
CHANEL Watches
CHAUMET Watches
CHOPARD Watches
CHRISTIAN DIOR Watches
CHRONOSWISS Watches
CONCORD Watches
CORUM Watches
DEWITT Watches
EBEL Watches
FENDI Watches
FRANCK MULLER Watches
GERALD GENTA Watches
GLASHUTTE Watches
GRAHAM Watches
GUCCI Watches
HARRY WINSTON Watches
HERMES Watches
HUBLOT Watches
IWC Watches
JACOB & CO. Watches
JAEGER LE COULTRE Watches
LONGINES Watches
LOUIS VUITTON Watches
MAURICE & LACROIX Watches
MONT BLANC Watches
MOVADO Watches
OMEGA Watches
ORIS Watches
PANERAI Watches
PARMIGIANI FLEURIER Watches
PATEK PHILIPPE Watches
PAUL PICOT Watches
PIAGET Watches
PORSCHE DESIGN Watches
PRADA Watches
RADO Watches
RICHARD MILLE Watches
ROMAIN JEROME Watches
ROGER DUBUIS Watches
ROLEX Watches
TAG HEUER Watches
TECHNOMARINE Watches
TUDOR Watches
U-BOAT Watches
ULYSSE NARDIN Watches
VACH. CONSTANTINE Watches
VERSACE Watches
ZENITH Watches
Ed Hardy
Ed Hardy Men Apparel
Ed Hardy Women Apparel
Ed Hardy Kid Apparel
Ed Hardy ACCESSORIES
Christan Audigier
Christan Audigier Men APPAREL
Christan Audigier Women APPAREL
other APPAREL &ACCESSORIES
other Apparel
other ACCESSORIES
Louis Vuitton Handbags
Chanel Handbags
Gucci Handbags
Balenciaga Handbags
Fendi Handbags
Yves Saint Laurent Handbags
Christian Dior Handbags
Burberry Handbags
Cartier Handbags
Celine Handbags
Chloe Handbags
Coach Handbags
Dolce and Gabbana Handbags
BALLY Handbags
Givenchy Handbags
Hermes Handbags
Jimmy Choo Handbags
Juicy Couture Handbags
Lancel Handbags
Marc Jacobs Handbags
Miu Miu Handbags
Mulberry Handbags
Prada Handbags
Thomas Wylde Handbags
Versace Handbags
Bottega Veneta Handbags
Brand Wallet
NFL Teams
Arizona Cardinals
Atlanta Falcons
Baltimore Ravens
Buffalo Bills
Carolina Panthers
Chicago Bears
Cincinnati Bengals
Cleveland Browns
Dallas Cowboys
Denver Broncos
Detroit Lions
Green Bay Packers
Houston Texans
Indianapolis Colts
Kansas City Chiefs
Minnesota Vikings
New England Patriots
New Orleans Saints
New York Giants
New York Jets
Oakland Raiders
Philadelphia Eagles
Pittsburgh Steelers
San Diego Chargers
San Francisco 49ers
Seattle Seahawks
St. Louis Rams
Super Bowl Merchandise
Super Bowl XLII Gear
Tampa Bay Buccaneers
Tennessee Titans
Washington Redskins
Miami Dolphins
MLB Teams
Arizona Diamondbacks
Atlanta Braves
Baltimore Orioles
Boston Red Sox
Chicago Cubs
Chicago White Sox
Cincinnati Reds
Cleveland Indians
Colorado Rockies
Detroit Tigers
Florida Marlins
Houston Astros
Kansas City Royals
Los Angeles Dodgers
Los Angeles Angels
Milwaukee Brewers
Minnesota Twins
New York Mets
New York Yankees
Oakland Athletics
Philadelphia Phillies
Pittsburgh Pirates
San Diego Padres
San Francisco Giants
Seattle Mariners
St. Louis Cardinals
Tampa Bay Devil Rays
Texas Rangers
Toronto Blue Jays
Washington Nationals
NHL Teams
Anaheim Ducks
Atlanta Thrashers
Boston Bruins
Buffalo Sabres
Calgary Flames
Carolina Hurricanes
Chicago Blackhawks
Colorado Avalanche
Columbus Blue Jackets
Dallas Stars
Detroit Red Wings
Edmonton Oilers
Florida Panthers
Hartford Whalers
Los Angeles Kings
Minnesota Wild
Montreal Canadiens
Nashville Predators
New Jersey Devils
New York Islanders
New York Rangers
Ottawa Senators
Philadelphia Flyers
Phoenix Coyotes
Pittsburgh Penguins
San Jose Sharks
St. Louis Blues
Tampa Bay Lightning
Toronto Maple Leafs
Vancouver Canucks
Washington Capitals
World All Stars
COLLEGE Teams
All Tmams
Rolex Watches
Watch Boxes
Alain Silberstein Watches
Anonimo Watches
A.Lange & Sohne Watches
Audemars Piguet Watches
Baume & Mercier Watches
Bell & Ross Watches
Blancpain Watches
Breguet Watches
Breitling Watches
Burberry Watches
Bvlgari Watches
Cartier Watches
Chanel Watches
Chopard Watches
Christian Dior Watches
Chrconoswiss Watches
Corum Watches
Dewitt Watches
Ebel Watches
Fendi Watches
Frank Muller Watches
Gerald Genta Watches
Glashutte Watches
Graham Watches
Gucci Watches
Hermes Watches
Hublot Watches
Iwc Watches
Jacob & Co Watches
Jaeger Le Coultre Watches
Longines Watches
Louis Vuitton Watches
Maurice & Lacroix Watches
Mont Blanc Watches
Movado Watches
Oris Watches
Panerai Watches
Parmigiani Fleurier Watches
Patek Philippe Watches
Paul Picot Watches
Piaget Watches
Porsche Desing Watches
Prada Watches
Rado Watches
Roger Dubuis Watches
Rolex Watches
Tag Heuer Watches
Technomarine Watches
Taylormade R9 Drivers
Drivers
Irons
Putter
Wedge
Fairway Wood
Hybrids
Balls
Shoes
Accessories
Taylormade Wedges
Titleist Wedges
Callaway Fairway Woods
Mizuno Fairway Woods
Nike Fairway Woods
Ping Fairway Woods
Nike Shoes
Taylormade Fairway Woods
Callaway Hybrids
Taylormade Hybrids
Callaway Balls
Nike Balls
Taylormade Balls
Titleist Balls
Adidas Bags
Ping Bags
Titleist Bags
Callaway Bags
Taylormade Bags
Nike Bags
Adidas Shoes
Footjoy Shoes
Callaway Shoes
Golf Glove
Headcover
Sunglasses
Outwear
T-shirt
Callaway Drivers
Cleveland Drivers
Mizuno Drivers
Nike Drivers
Ping Drivers
Taylormade Drivers
Titleist Drivers
Callaway Irons
Cleveland Irons
Mizuno Irons
Nike Irons
Ping Irons
Taylormade Irons
Titleist Irons
Odyssey Putters
Ping Putters
Taylormade Putters
Titleist Putters
Yes Putters
Callaway Wedges
Cleveland Wedges
Clevelend Fairway Wood
Ping Hybrids
Lacoste
Lacoste shirts
Lacoste shoes
ugg boots
UGG
WATCH BOXES
MONT BLANC PEN Watches
ALAIN SILBERSTEIN Watches
ANONIMO Watches
A.LANGE & SOHNE Watches
AUDEMARS PIGUET Watches
BAUME & MERCIER Watches
BELL & ROSS Watches
BLANCPAIN Watches
BREGUET Watches
NBA Teams
Atlanta Hawks
Boston Celtics
Charlotte Bobcats
Chicago Bulls
Cleveland Cavaliers
Dallas Mavericks
Denver Nuggets
Detroit Pistons
Golden State Warriors
Houston Rockets
Indiana Pacers
Los Angeles Clippers
Los Angeles Lakers
Memphis Grizzlies
Miami Heat
Milwaukee Bucks
Minnesota Timberwolves
New Jersey Nets
New Orleans Hornets
New York Knicks
Orlando Magic
Philadelphia 76ers
Phoenix Suns
Portland Trail Blazers
Sacramento Kings
San Antonio Spurs
Seattle SuperSonics
Toronto Raptors
Utah Jazz
Washington Wizards
Converse
Converse shoes
Embroidery
Embroidery Designs
Advanced Embroidery Designs
FREE Machine Embroidery Designs
NBA Jerseys
MLB Jerseys
ghd
chi
ghd
chi
ghd
chi
ghd
chi
MAC Makeup
MAC Cosmetics
discount mac makeup
MAC Eye Shadow
ed hardy
ed hardy clothing
ed hardy shoes
ghd
ghd hair straighteners
chi
posted: 2011-02-24 02:27:28 |
|
|
|
cc writes...
super bowl Jersey
super bowl Jerseys
super bowl 2011 Jerseys
2011 super bowl Jerseys
super bowl XLV Jerseys
XLV super bowl Jerseys
Baltimore Ravens
Baltimore Ravens Jersey
Baltimore Ravens Jerseys
Buffalo Bills
Buffalo Bills Jersey
Buffalo Bills Jerseys
Cincinnati Bengals
Cincinnati Bengals Jersey
Cincinnati Bengals Jerseys
Cleveland Browns
Cleveland Browns Jersey
Cleveland Browns Jerseys
Denver Broncos
Denver Broncos Jersey
Denver Broncos Jerseys
Houston Texans
Houston Texans Jersey
Houston Texans Jerseys
Indianapolis Colts
Indianapolis Colts Jersey
Indianapolis Colts Jerseys
Jacksonville Jaguars
Jacksonville Jaguars Jersey
Jacksonville Jaguars Jerseys
Kansas City Chiefs
Kansas City Chiefs Jersey
Kansas City Chiefs Jerseys
Miami Dolphins
Miami Dolphins Jersey
Miami Dolphins Jerseys
New England Patriots
New England Patriots Jersey
New England Patriots Jerseys
New York Jets
New York Jets Jersey
New York Jets Jerseys
Oakland Raiders
Oakland Raiders Jersey
Oakland Raiders Jerseys
Pittsburgh Steelers
Pittsburgh Steelers Jersey
Pittsburgh Steelers Jerseys
San Diego Chargers
San Diego Chargers Jersey
San Diego Chargers Jerseys
Tennessee Titans
Tennessee Titans Jersey
Tennessee Titans Jerseys
Arizona Cardinals
Arizona Cardinals Jersey
Arizona Cardinals Jerseys
Atlanta Falcons
Atlanta Falcons Jersey
Atlanta Falcons Jerseys
Carolina Panthers
Carolina Panthers Jersey
Carolina Panthers Jerseys
Chicago Bears
Chicago Bears Jersey
Chicago Bears Jerseys
Dallas Cowboys
Dallas Cowboys Jersey
Dallas Cowboys Jerseys
Detroit Lions
Detroit Lions Jersey
Detroit Lions Jerseys
Green Bay Packers
Green Bay Packers Jersey
Green Bay Packers Jerseys
Minnesota Vikings
Minnesota Vikings Jersey
Minnesota Vikings Jerseys
New Orleans Saints
New Orleans Saints Jersey
New Orleans Saints Jerseys
New York Giants
New York Giants Jersey
New York Giants Jerseys
Philadelphia Eagles
Philadelphia Eagles Jersey
Philadelphia Eagles Jerseys
San Francisco 49ers
San Francisco 49ers Jersey
San Francisco 49ers Jerseys
Seattle Seahawks
Seattle Seahawks Jersey
Seattle Seahawks Jerseys
St.Louis Rams
St.Louis Rams Jersey
St.Louis Rams Jerseys
Tampa Bay Buccaneers
Tampa Bay Buccaneers Jersey
Tampa Bay Buccaneers Jerseys
Washington Redskins
Washington Redskins Jersey
Washington Redskins Jerseys
vibram five fingers
five finger shoes
vibram shoes
five finger
mbt shoes
wholesale mbt shoes
cheap mbt shoes
discount mbt shoes
mbt
buy mbt kaya
the north face
north face
north face jackets
north face clothing
north face backpacks
north face equipment
north face outlet
north face tents
nfl jerseys
wholesale nfl jerseys
nfl jersey
wholesale nfl jersey
super bowl
super bowl jerseys
super bowl jersey
cheap nfl jerseys
discounts nfl jerseys
nfl throwback jerseys
乐斯菲斯
The North Face
North Face
北面
户外用户
户外装备tnf
north face官网
north face 羽绒服
the north face 中国官网
the north face 冲锋衣
the north face 专卖店
the north face 羽绒服
super bowl 2011 Jerseys
2011 super bowl Jerseys
super bowl XLV Jerseys
XLV super bowl Jerseys
New Era Hat
new era hats
Cheap new era hats
whoelsae new era hats
new era cap
new era caps
wholesale era caps
DC Hat
Famous Hat
Baseball Cap
Nfl Cap
nfl jerseys
wholesale jerseys
nfl jersey
wholesale jersey
cheap nfl jerseys
cheap nfl jersey
super bowl jerseys
crocs
crocs shoes
ed hardy
wholesale ed hardy
ed hardy shoes
ed hardy discount
ed hardy clothing
ed hardy bags
ed hardy caps
ed hardy sunglasses
ed hardy watches
oil painting
china oil painting
chinese oil painting
art painting
canvas painting
photo to art oil painting
hand made oil painting
oil painting reproductions
rolex watches
cartier watches
breitling watches
tag heuer watches
gucci wathces
omega watches
cartier watches
jimmy choo
jimmy choo shoes
jimmy choo bags
jimmy choo boots
jimmy choo handbags
Safety Shoes
pu safety shoes
vivienne westwood wedding dress
vivienne westwood shop
vivienne westwood jewellery
vivienne westwood shoes
vivienne westwood biography
vivienne westwood bags
vivienne westwood wedding
vivienne westwood wallet
vivienne westwood wedding dress
vivienne westwood shop
vivienne westwood jewellery
vivienne westwood shoes
vivienne westwood biography
vivienne westwood bags
vivienne westwood wedding
vivienne westwood wallet
爱步鞋
ecco鞋
爱步休闲鞋
ecco休闲鞋
休闲鞋
商务休闲鞋
Clarks
ugg
ugg雪地靴
ugg官方网
ugg boots
ugg专柜
ugg
ugg雪地靴
ugg官方网
ugg boots
ugg专柜
nike shoes
china wholesale
nike air jordan
Nike Air Jordan
Nike Air Jordan Fusion
Nike Air Force 1
Nike Lebron James
Nike Kobe Bryant
Nike KEN GRIFF Shoes
Nike Air Max
Nike Shox
Nike Air Yeezy
Nike Sneaker King
Puma Shoes
Nike Dunk
Bape Shoes
Handbags
Jewelry
Sunglasses
Hair Straightener
Belt
Jerseys
Wallet
ヴィヴィアン
ビビアンウエストウッド
ヴィヴィアンウエストウッド
vivienne
ビビアンウエスト
vivienne westwood
Vach. Constantine Watches
Versace Watches
Zenith Watches
Chronomatic Watches
Montbrilliant Watches
Superocean Watches
BREITLING Watches
B.R.M Watches
BURBERRY Watches
BVLGARI Watches
CARTIER Watches
CHANEL Watches
CHAUMET Watches
CHOPARD Watches
CHRISTIAN DIOR Watches
CHRONOSWISS Watches
CONCORD Watches
CORUM Watches
DEWITT Watches
EBEL Watches
FENDI Watches
FRANCK MULLER Watches
GERALD GENTA Watches
GLASHUTTE Watches
GRAHAM Watches
GUCCI Watches
HARRY WINSTON Watches
HERMES Watches
HUBLOT Watches
IWC Watches
JACOB & CO. Watches
JAEGER LE COULTRE Watches
LONGINES Watches
LOUIS VUITTON Watches
MAURICE & LACROIX Watches
MONT BLANC Watches
MOVADO Watches
OMEGA Watches
ORIS Watches
PANERAI Watches
PARMIGIANI FLEURIER Watches
PATEK PHILIPPE Watches
PAUL PICOT Watches
PIAGET Watches
PORSCHE DESIGN Watches
PRADA Watches
RADO Watches
RICHARD MILLE Watches
ROMAIN JEROME Watches
ROGER DUBUIS Watches
ROLEX Watches
TAG HEUER Watches
TECHNOMARINE Watches
TUDOR Watches
U-BOAT Watches
ULYSSE NARDIN Watches
VACH. CONSTANTINE Watches
VERSACE Watches
ZENITH Watches
Ed Hardy
Ed Hardy Men Apparel
Ed Hardy Women Apparel
Ed Hardy Kid Apparel
Ed Hardy ACCESSORIES
Christan Audigier
Christan Audigier Men APPAREL
Christan Audigier Women APPAREL
other APPAREL &ACCESSORIES
other Apparel
other ACCESSORIES
Louis Vuitton Handbags
Chanel Handbags
Gucci Handbags
Balenciaga Handbags
Fendi Handbags
Yves Saint Laurent Handbags
Christian Dior Handbags
Burberry Handbags
Cartier Handbags
Celine Handbags
Chloe Handbags
Coach Handbags
Dolce and Gabbana Handbags
BALLY Handbags
Givenchy Handbags
Hermes Handbags
Jimmy Choo Handbags
Juicy Couture Handbags
Lancel Handbags
Marc Jacobs Handbags
Miu Miu Handbags
Mulberry Handbags
Prada Handbags
Thomas Wylde Handbags
Versace Handbags
Bottega Veneta Handbags
Brand Wallet
NFL Teams
Arizona Cardinals
Atlanta Falcons
Baltimore Ravens
Buffalo Bills
Carolina Panthers
Chicago Bears
Cincinnati Bengals
Cleveland Browns
Dallas Cowboys
Denver Broncos
Detroit Lions
Green Bay Packers
Houston Texans
Indianapolis Colts
Kansas City Chiefs
Minnesota Vikings
New England Patriots
New Orleans Saints
New York Giants
New York Jets
Oakland Raiders
Philadelphia Eagles
Pittsburgh Steelers
San Diego Chargers
San Francisco 49ers
Seattle Seahawks
St. Louis Rams
Super Bowl Merchandise
Super Bowl XLII Gear
Tampa Bay Buccaneers
Tennessee Titans
Washington Redskins
Miami Dolphins
MLB Teams
Arizona Diamondbacks
Atlanta Braves
Baltimore Orioles
Boston Red Sox
Chicago Cubs
Chicago White Sox
Cincinnati Reds
Cleveland Indians
Colorado Rockies
Detroit Tigers
Florida Marlins
Houston Astros
Kansas City Royals
Los Angeles Dodgers
Los Angeles Angels
Milwaukee Brewers
Minnesota Twins
New York Mets
New York Yankees
Oakland Athletics
Philadelphia Phillies
Pittsburgh Pirates
San Diego Padres
San Francisco Giants
Seattle Mariners
St. Louis Cardinals
Tampa Bay Devil Rays
Texas Rangers
Toronto Blue Jays
Washington Nationals
NHL Teams
Anaheim Ducks
Atlanta Thrashers
Boston Bruins
Buffalo Sabres
Calgary Flames
Carolina Hurricanes
Chicago Blackhawks
Colorado Avalanche
Columbus Blue Jackets
Dallas Stars
Detroit Red Wings
Edmonton Oilers
Florida Panthers
Hartford Whalers
Los Angeles Kings
Minnesota Wild
Montreal Canadiens
Nashville Predators
New Jersey Devils
New York Islanders
New York Rangers
Ottawa Senators
Philadelphia Flyers
Phoenix Coyotes
Pittsburgh Penguins
San Jose Sharks
St. Louis Blues
Tampa Bay Lightning
Toronto Maple Leafs
Vancouver Canucks
Washington Capitals
World All Stars
COLLEGE Teams
All Tmams
Rolex Watches
Watch Boxes
Alain Silberstein Watches
Anonimo Watches
A.Lange & Sohne Watches
Audemars Piguet Watches
Baume & Mercier Watches
Bell & Ross Watches
Blancpain Watches
Breguet Watches
Breitling Watches
Burberry Watches
Bvlgari Watches
Cartier Watches
Chanel Watches
Chopard Watches
Christian Dior Watches
Chrconoswiss Watches
Corum Watches
Dewitt Watches
Ebel Watches
Fendi Watches
Frank Muller Watches
Gerald Genta Watches
Glashutte Watches
Graham Watches
Gucci Watches
Hermes Watches
Hublot Watches
Iwc Watches
Jacob & Co Watches
Jaeger Le Coultre Watches
Longines Watches
Louis Vuitton Watches
Maurice & Lacroix Watches
Mont Blanc Watches
Movado Watches
Oris Watches
Panerai Watches
Parmigiani Fleurier Watches
Patek Philippe Watches
Paul Picot Watches
Piaget Watches
Porsche Desing Watches
Prada Watches
Rado Watches
Roger Dubuis Watches
Rolex Watches
Tag Heuer Watches
Technomarine Watches
Taylormade R9 Drivers
Drivers
Irons
Putter
Wedge
Fairway Wood
Hybrids
Balls
Shoes
Accessories
Taylormade Wedges
Titleist Wedges
Callaway Fairway Woods
Mizuno Fairway Woods
Nike Fairway Woods
Ping Fairway Woods
Nike Shoes
Taylormade Fairway Woods
Callaway Hybrids
Taylormade Hybrids
Callaway Balls
Nike Balls
Taylormade Balls
Titleist Balls
Adidas Bags
Ping Bags
Titleist Bags
Callaway Bags
Taylormade Bags
Nike Bags
Adidas Shoes
Footjoy Shoes
Callaway Shoes
Golf Glove
Headcover
Sunglasses
Outwear
T-shirt
Callaway Drivers
Cleveland Drivers
Mizuno Drivers
Nike Drivers
Ping Drivers
Taylormade Drivers
Titleist Drivers
Callaway Irons
Cleveland Irons
Mizuno Irons
Nike Irons
Ping Irons
Taylormade Irons
Titleist Irons
Odyssey Putters
Ping Putters
Taylormade Putters
Titleist Putters
Yes Putters
Callaway Wedges
Cleveland Wedges
Clevelend Fairway Wood
Ping Hybrids
Lacoste
Lacoste shirts
Lacoste shoes
ugg boots
UGG
WATCH BOXES
MONT BLANC PEN Watches
ALAIN SILBERSTEIN Watches
ANONIMO Watches
A.LANGE & SOHNE Watches
AUDEMARS PIGUET Watches
BAUME & MERCIER Watches
BELL & ROSS Watches
BLANCPAIN Watches
BREGUET Watches
NBA Teams
Atlanta Hawks
Boston Celtics
Charlotte Bobcats
Chicago Bulls
Cleveland Cavaliers
Dallas Mavericks
Denver Nuggets
Detroit Pistons
Golden State Warriors
Houston Rockets
Indiana Pacers
Los Angeles Clippers
Los Angeles Lakers
Memphis Grizzlies
Miami Heat
Milwaukee Bucks
Minnesota Timberwolves
New Jersey Nets
New Orleans Hornets
New York Knicks
Orlando Magic
Philadelphia 76ers
Phoenix Suns
Portland Trail Blazers
Sacramento Kings
San Antonio Spurs
Seattle SuperSonics
Toronto Raptors
Utah Jazz
Washington Wizards
Converse
Converse shoes
Embroidery
Embroidery Designs
Advanced Embroidery Designs
FREE Machine Embroidery Designs
NBA Jerseys
MLB Jerseys
ghd
chi
ghd
chi
ghd
chi
ghd
chi
MAC Makeup
MAC Cosmetics
discount mac makeup
MAC Eye Shadow
ed hardy
ed hardy clothing
ed hardy shoes
ghd
ghd hair straighteners
chi
posted: 2011-02-28 03:02:48 |
Add Comment
Subscribe to this blog by RSS.
|
|

|
|


